So You are Thinking About Night Photography

So you are thinking about night photography and not sure if your camera can do it or what the settings you might use.


Most modern DSLR’s and Mirrorless cameras can take great pictures at night and of the stars, but I would recommend doing some testing before you go out on your first night of night photography shooting. The intent is to

  1. Let you know if your camera is suitable for night photography and
  2. To give you a starting point on the settings to use to get the best shot of the night sky or other night shot.

The steps used do not only apply to taking pictures of the sky but any night photography situation you are thinking about such as taking pictures of the city at night.


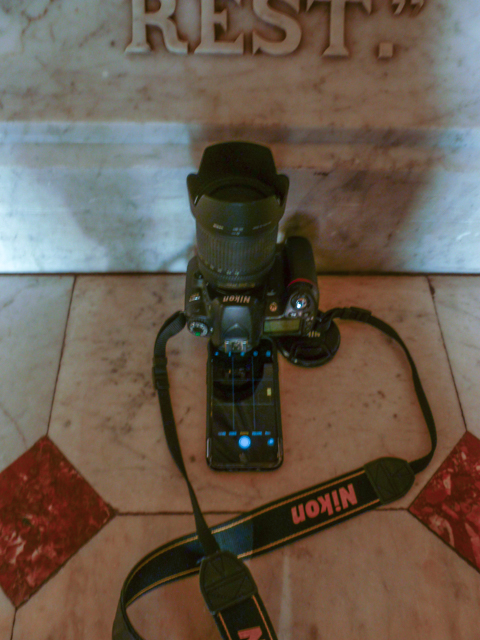
Night sky photography (AKA Astrophotography) is something that I’ve always wanted to and I needed to find out if my current camera was up to the job. On a recent night where there were no clouds in the sky I decided it was time to test my old trusty Nikon D80 to see if it was up to the job. So I headed outside with my tripod (A must if you are doing any low light photography), my Nikon D80 with the Nikkor 18-135 lens, and my wireless remote. The remote is not required, but it does make things a little faster to do. If you don’t have a remote trigger device be it wired or wireless, you can still get your night shots, but you will have to use the camera’s built-in timer function or you will get camera shake when you press down the shutter release button.


For my testing, I put my camera in manual mode, set the aperture (f-stop) as wide as my lens would let me at f3.5 with the lens at its widest setting of 18mm and set the exposure time to 30 secs, which is the longest my camera will go before switching to bulb mode. For the testing, you want the exposure time and f-stop fixed as you will be only adjusting the ISO setting for each shot. You will need to focus your camera to near infinity in order for the stars/night sky to be in focus. Do this manually by turning your focus ring all the way until it stops at infinity and turning it back just a little, or find a distant light and let your autofocus focus on that. After you have set your focus, you must turn off the autofocus feature of your lens or as soon as you go to click your shutter release your camera will just get stuck trying to focus and most likely never focus. On my Nikkor lens, I can turn off the autofocus on the lens. Your camera/lens will vary on how you turn auto focus off. It is your option whether or not to use the long exposure noise reduction option that your camera has. For my testing, I did use my camera’s long exposure noise reduction option. If you are not sure, take a series of pictures with it off, then another series with it on and compare.


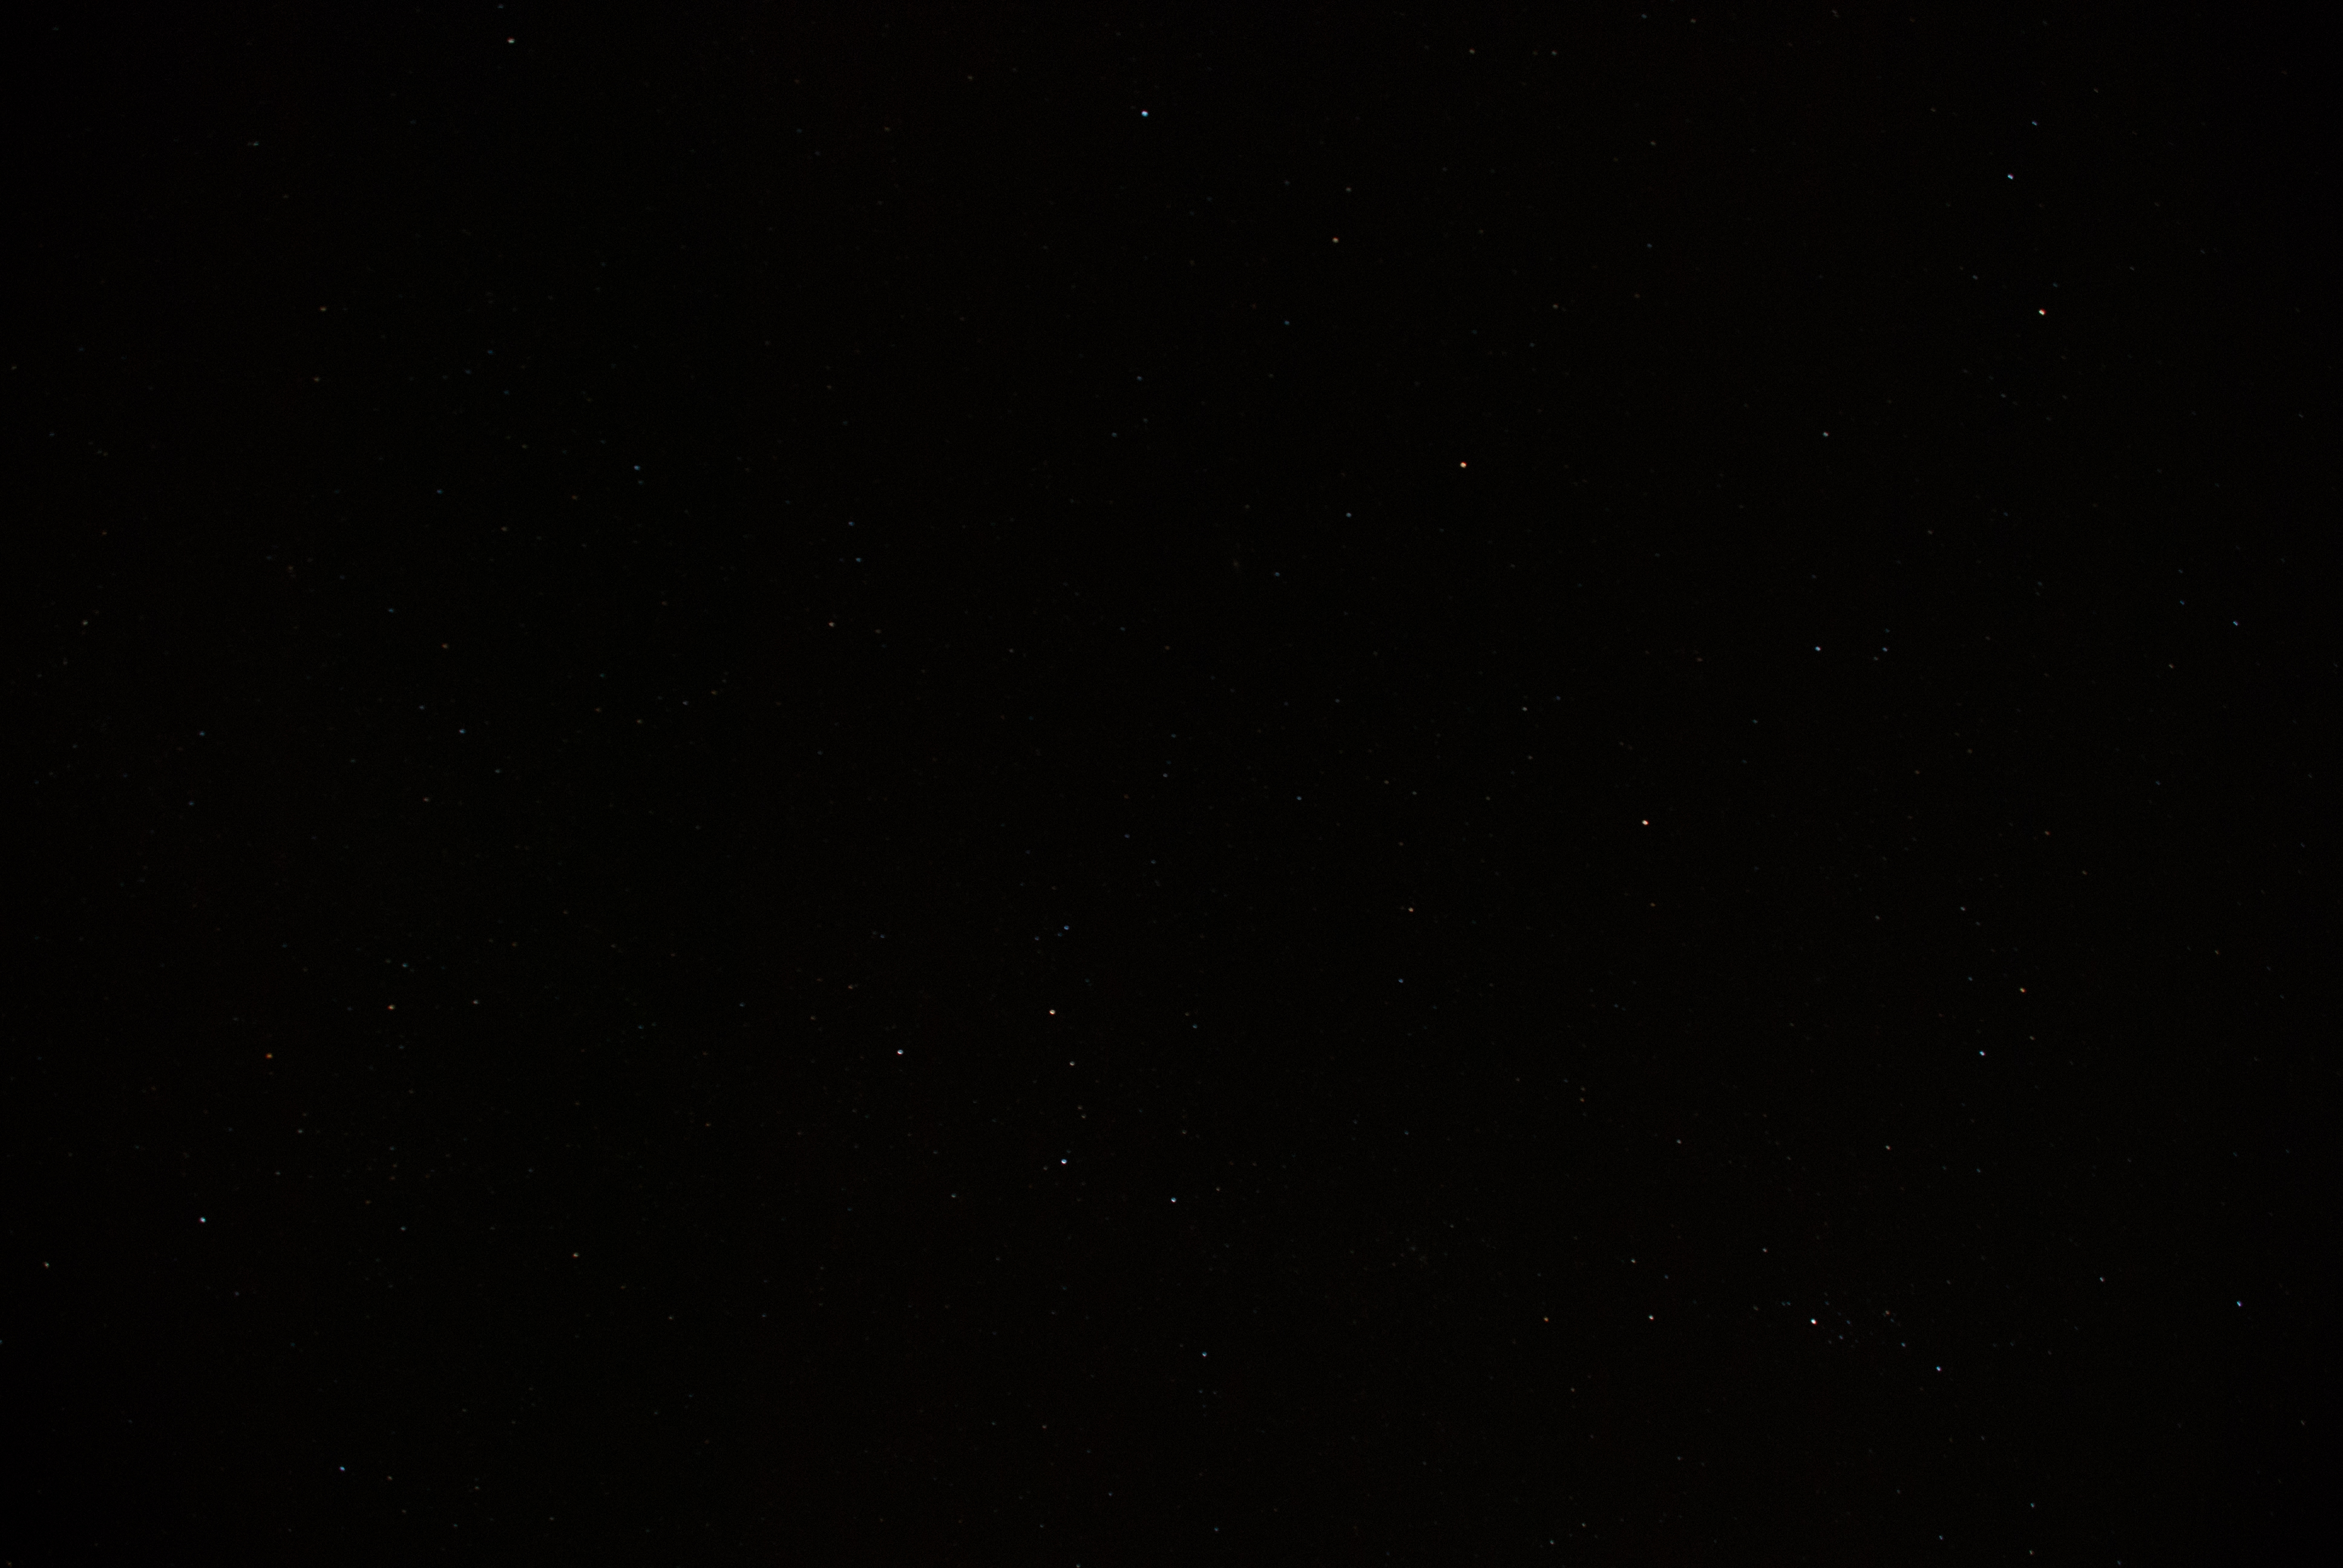
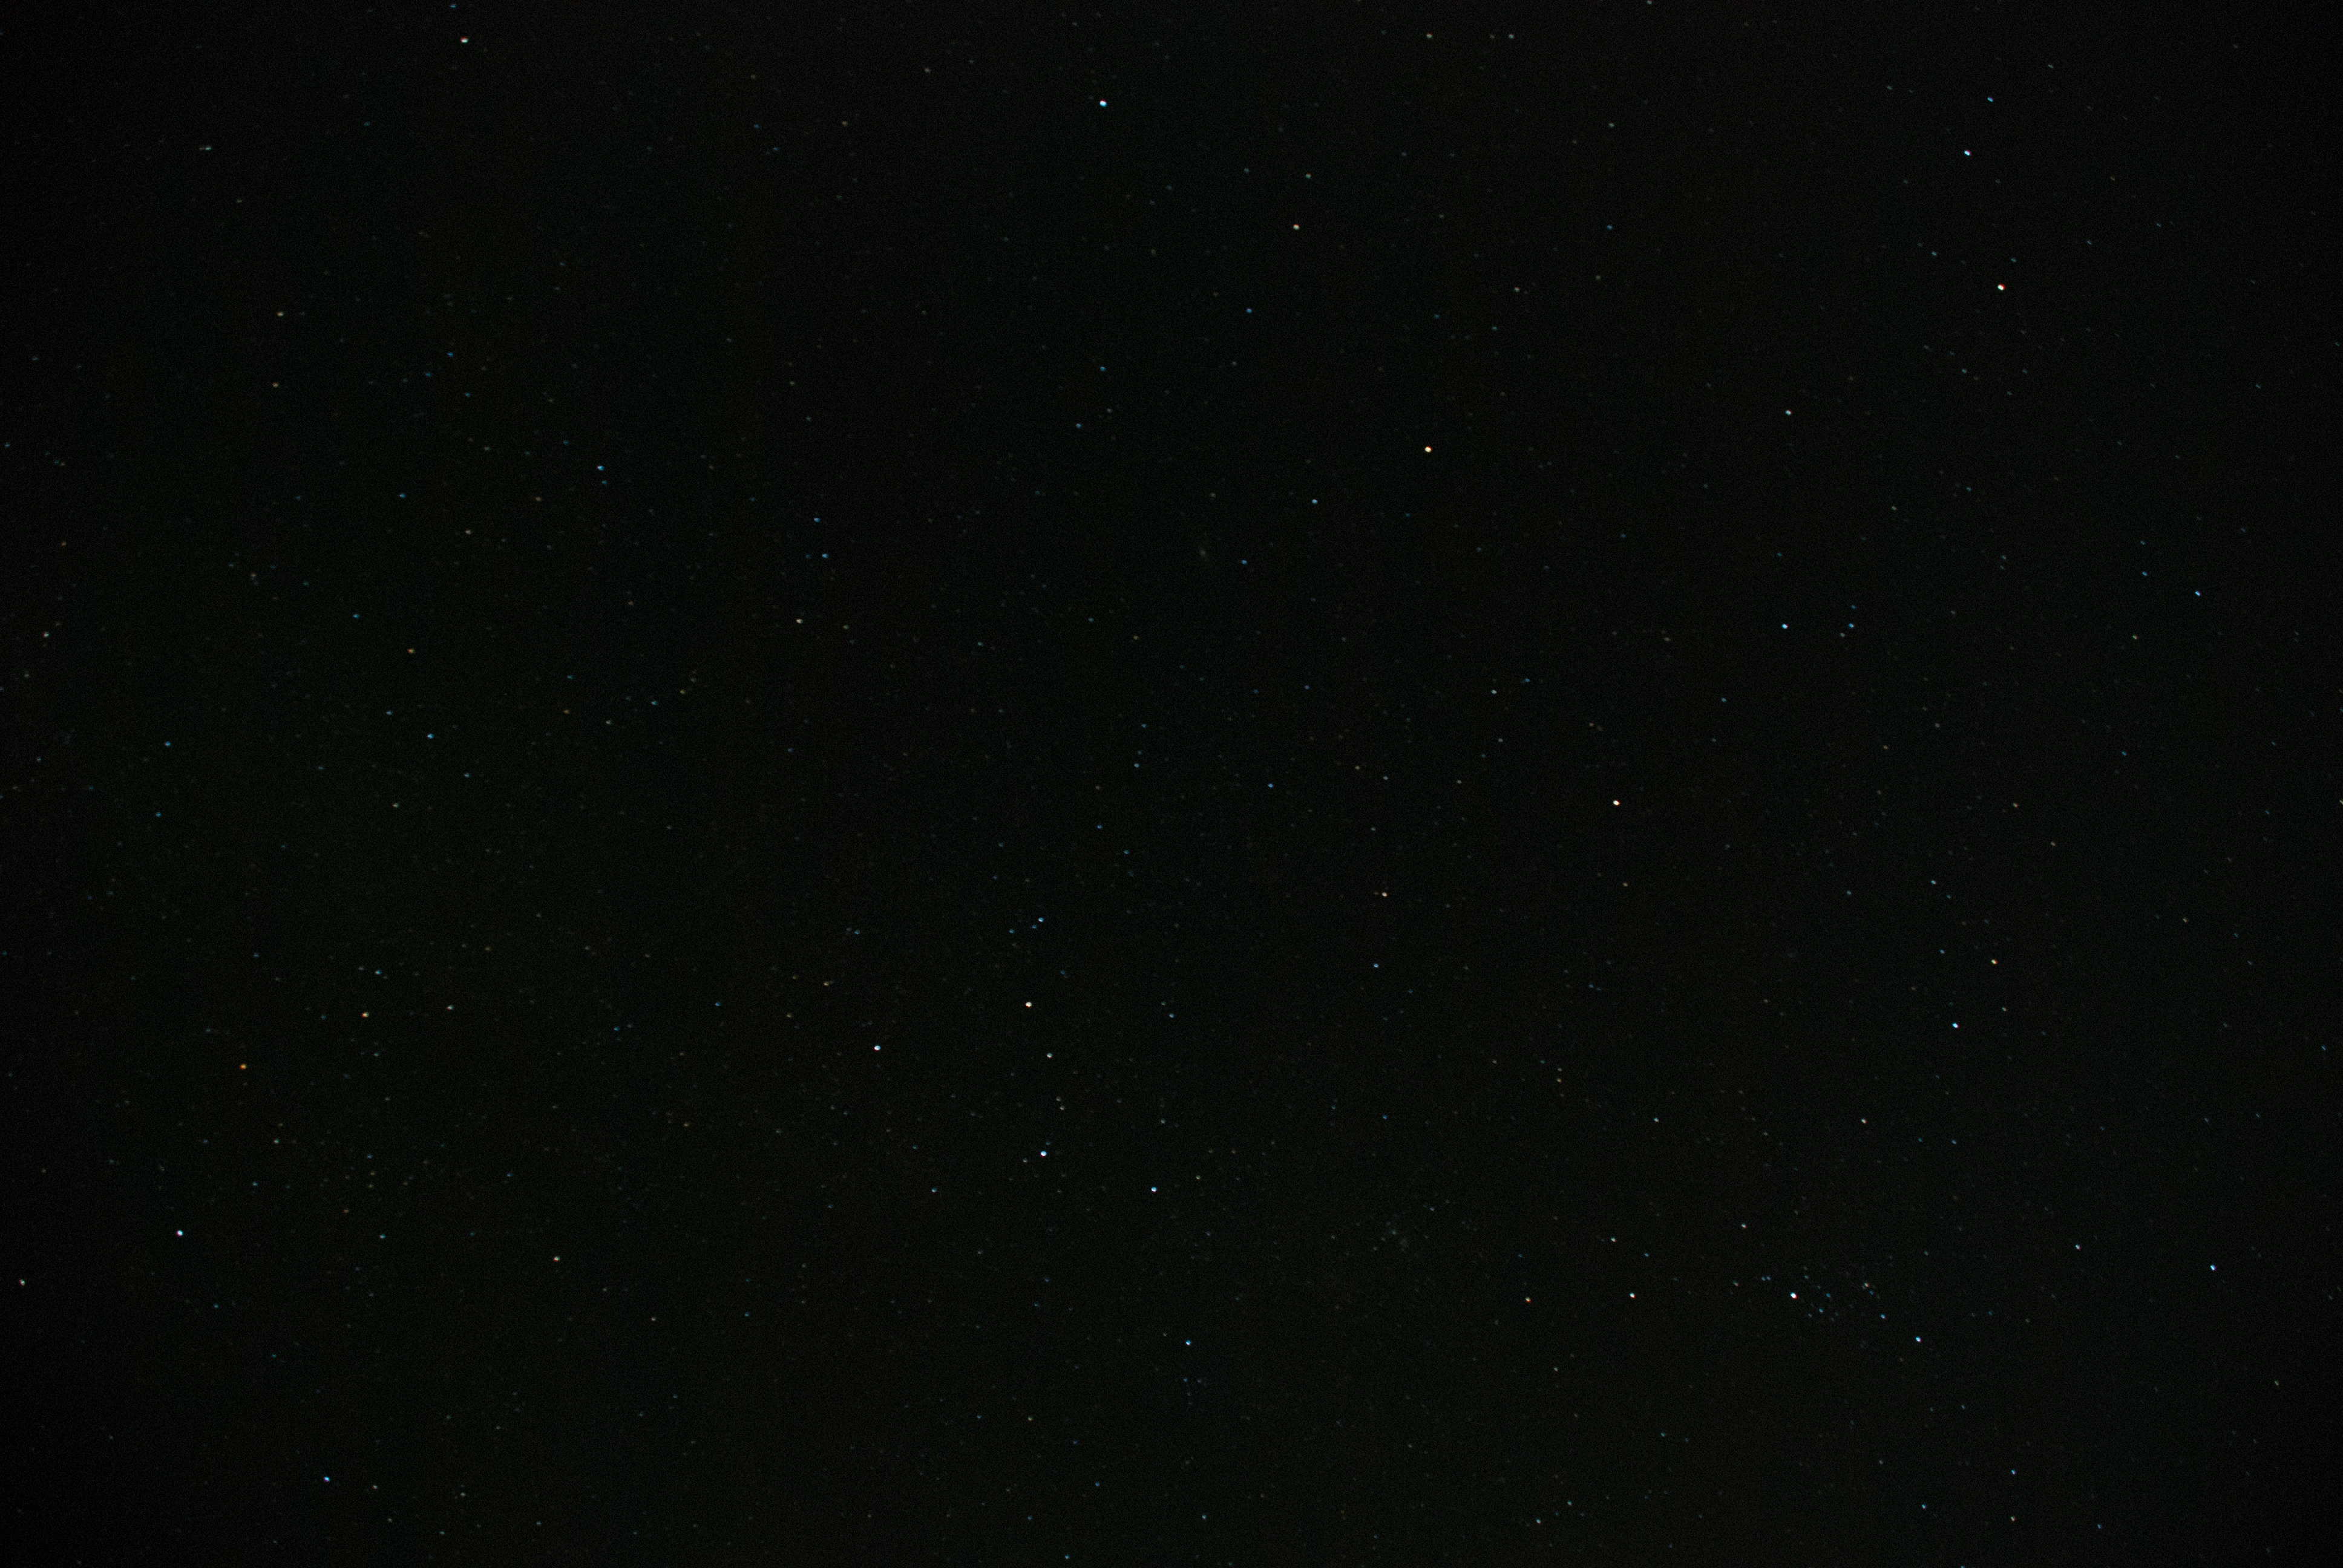
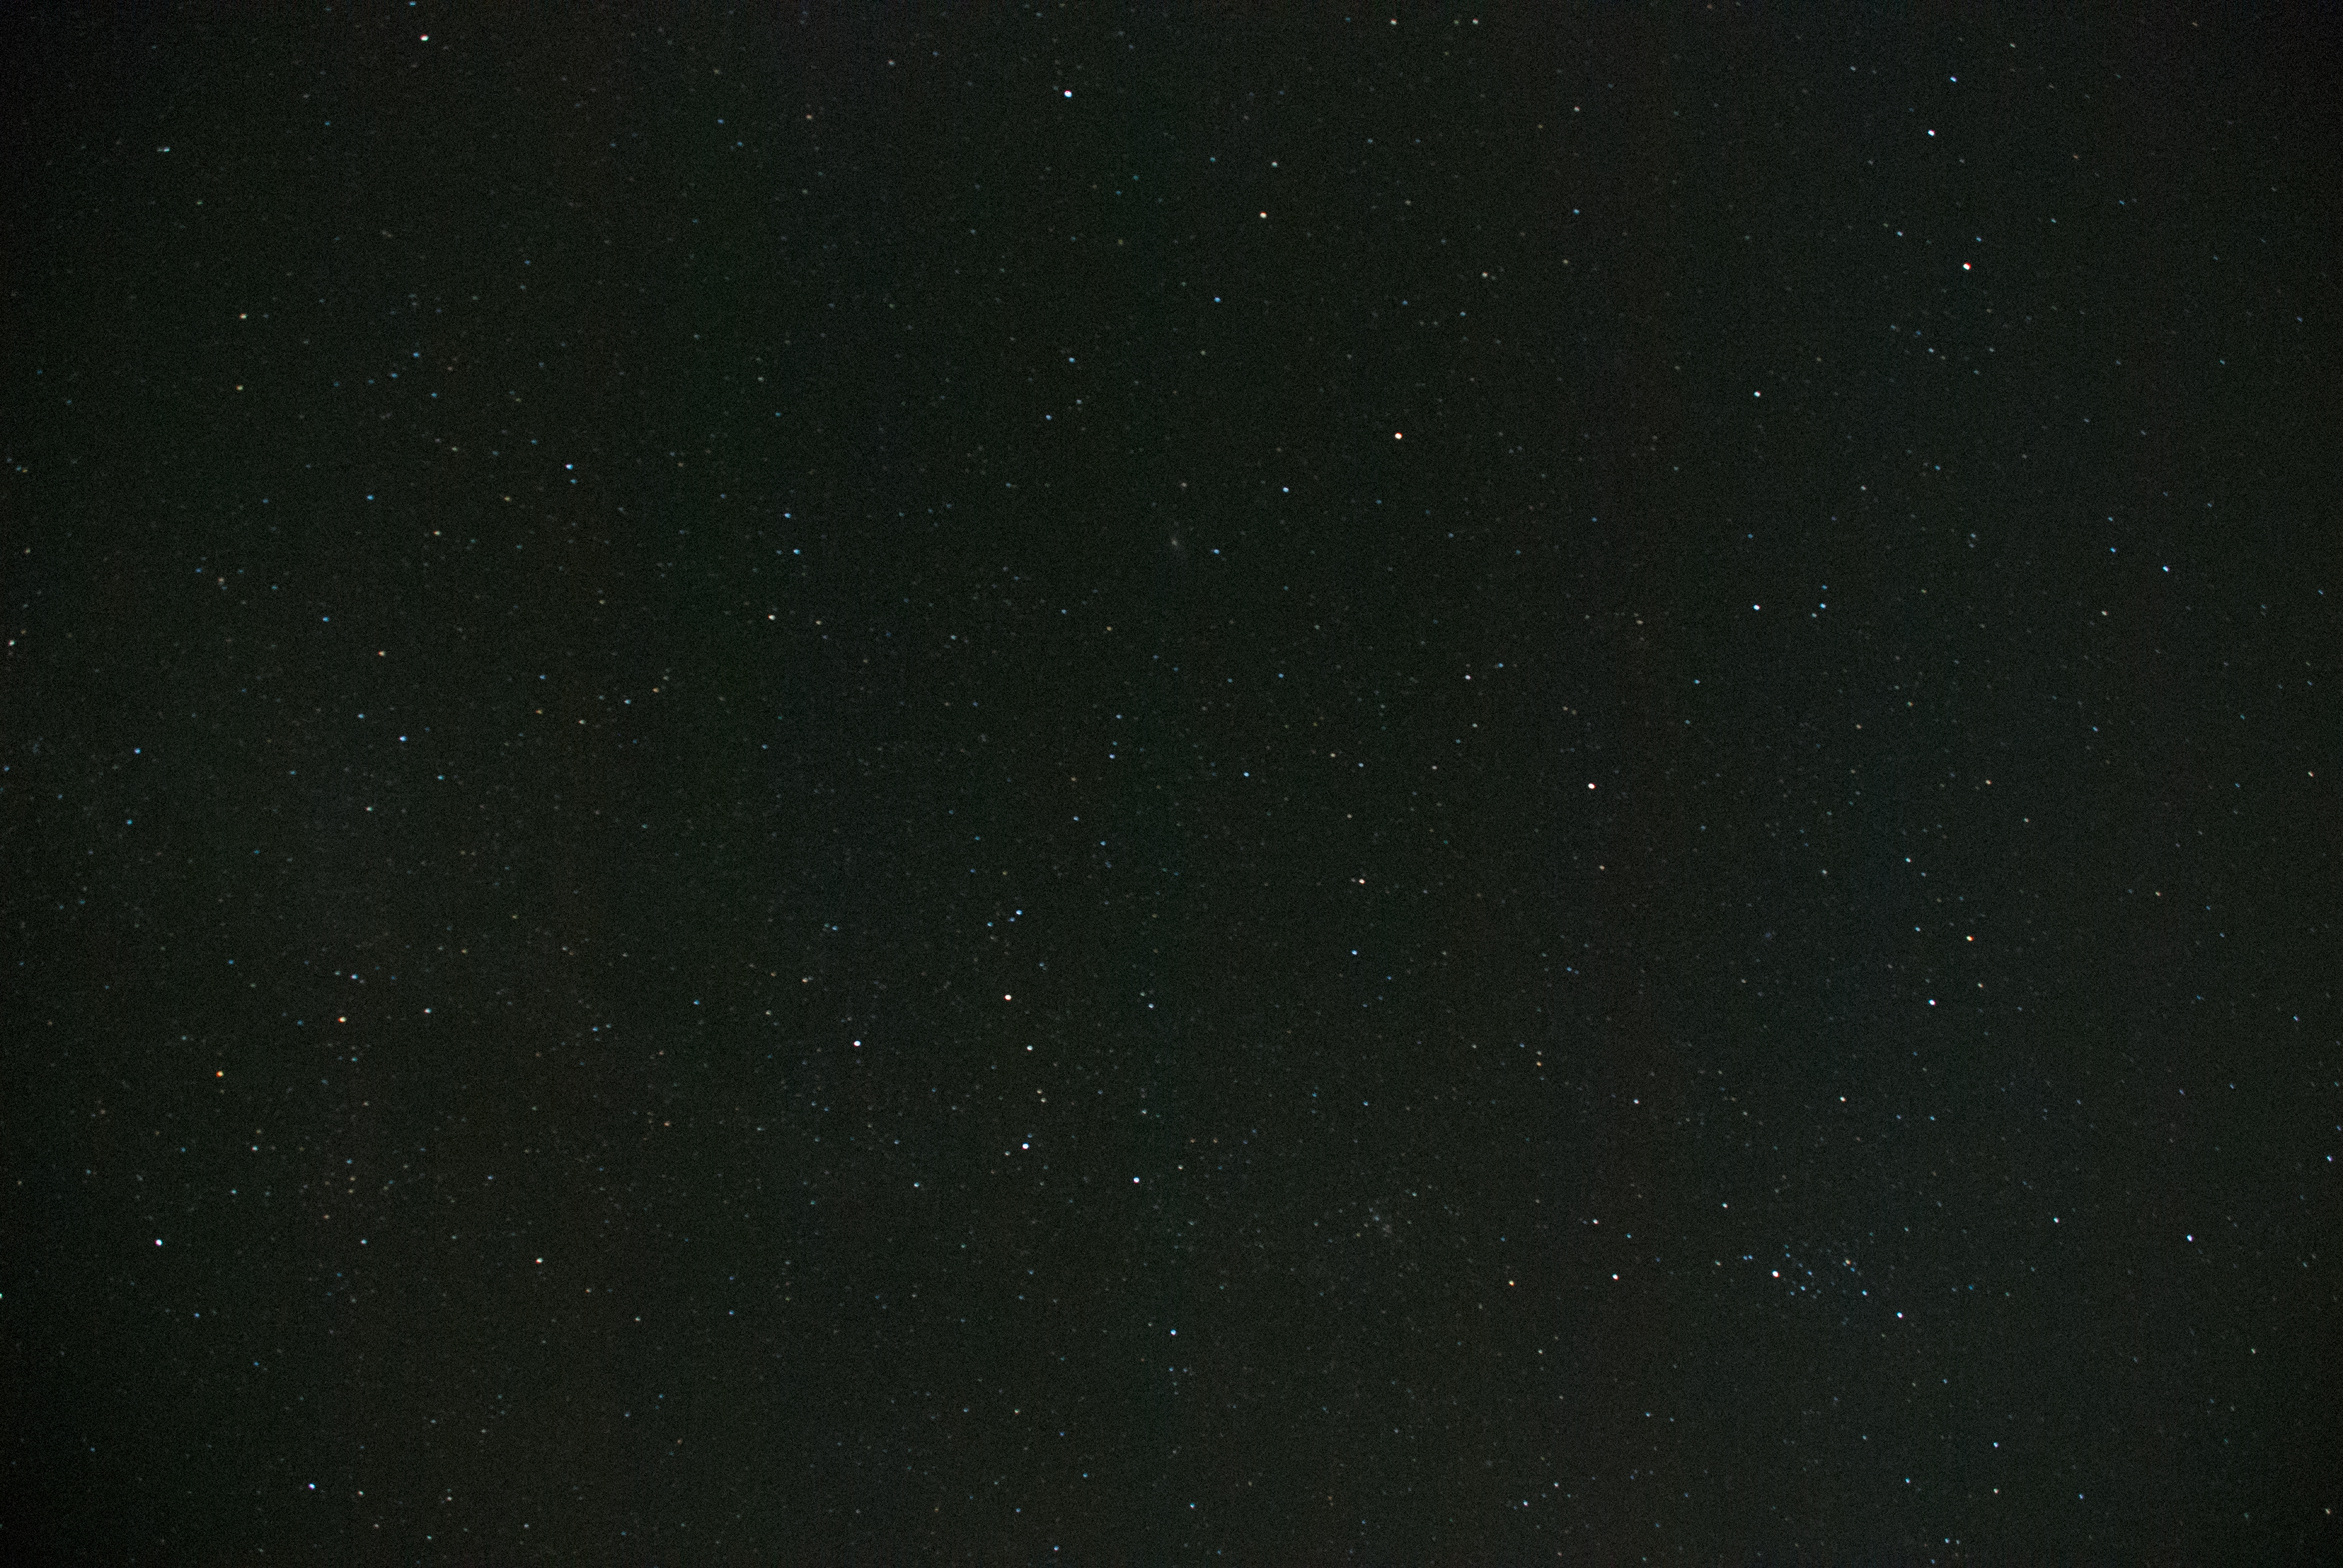
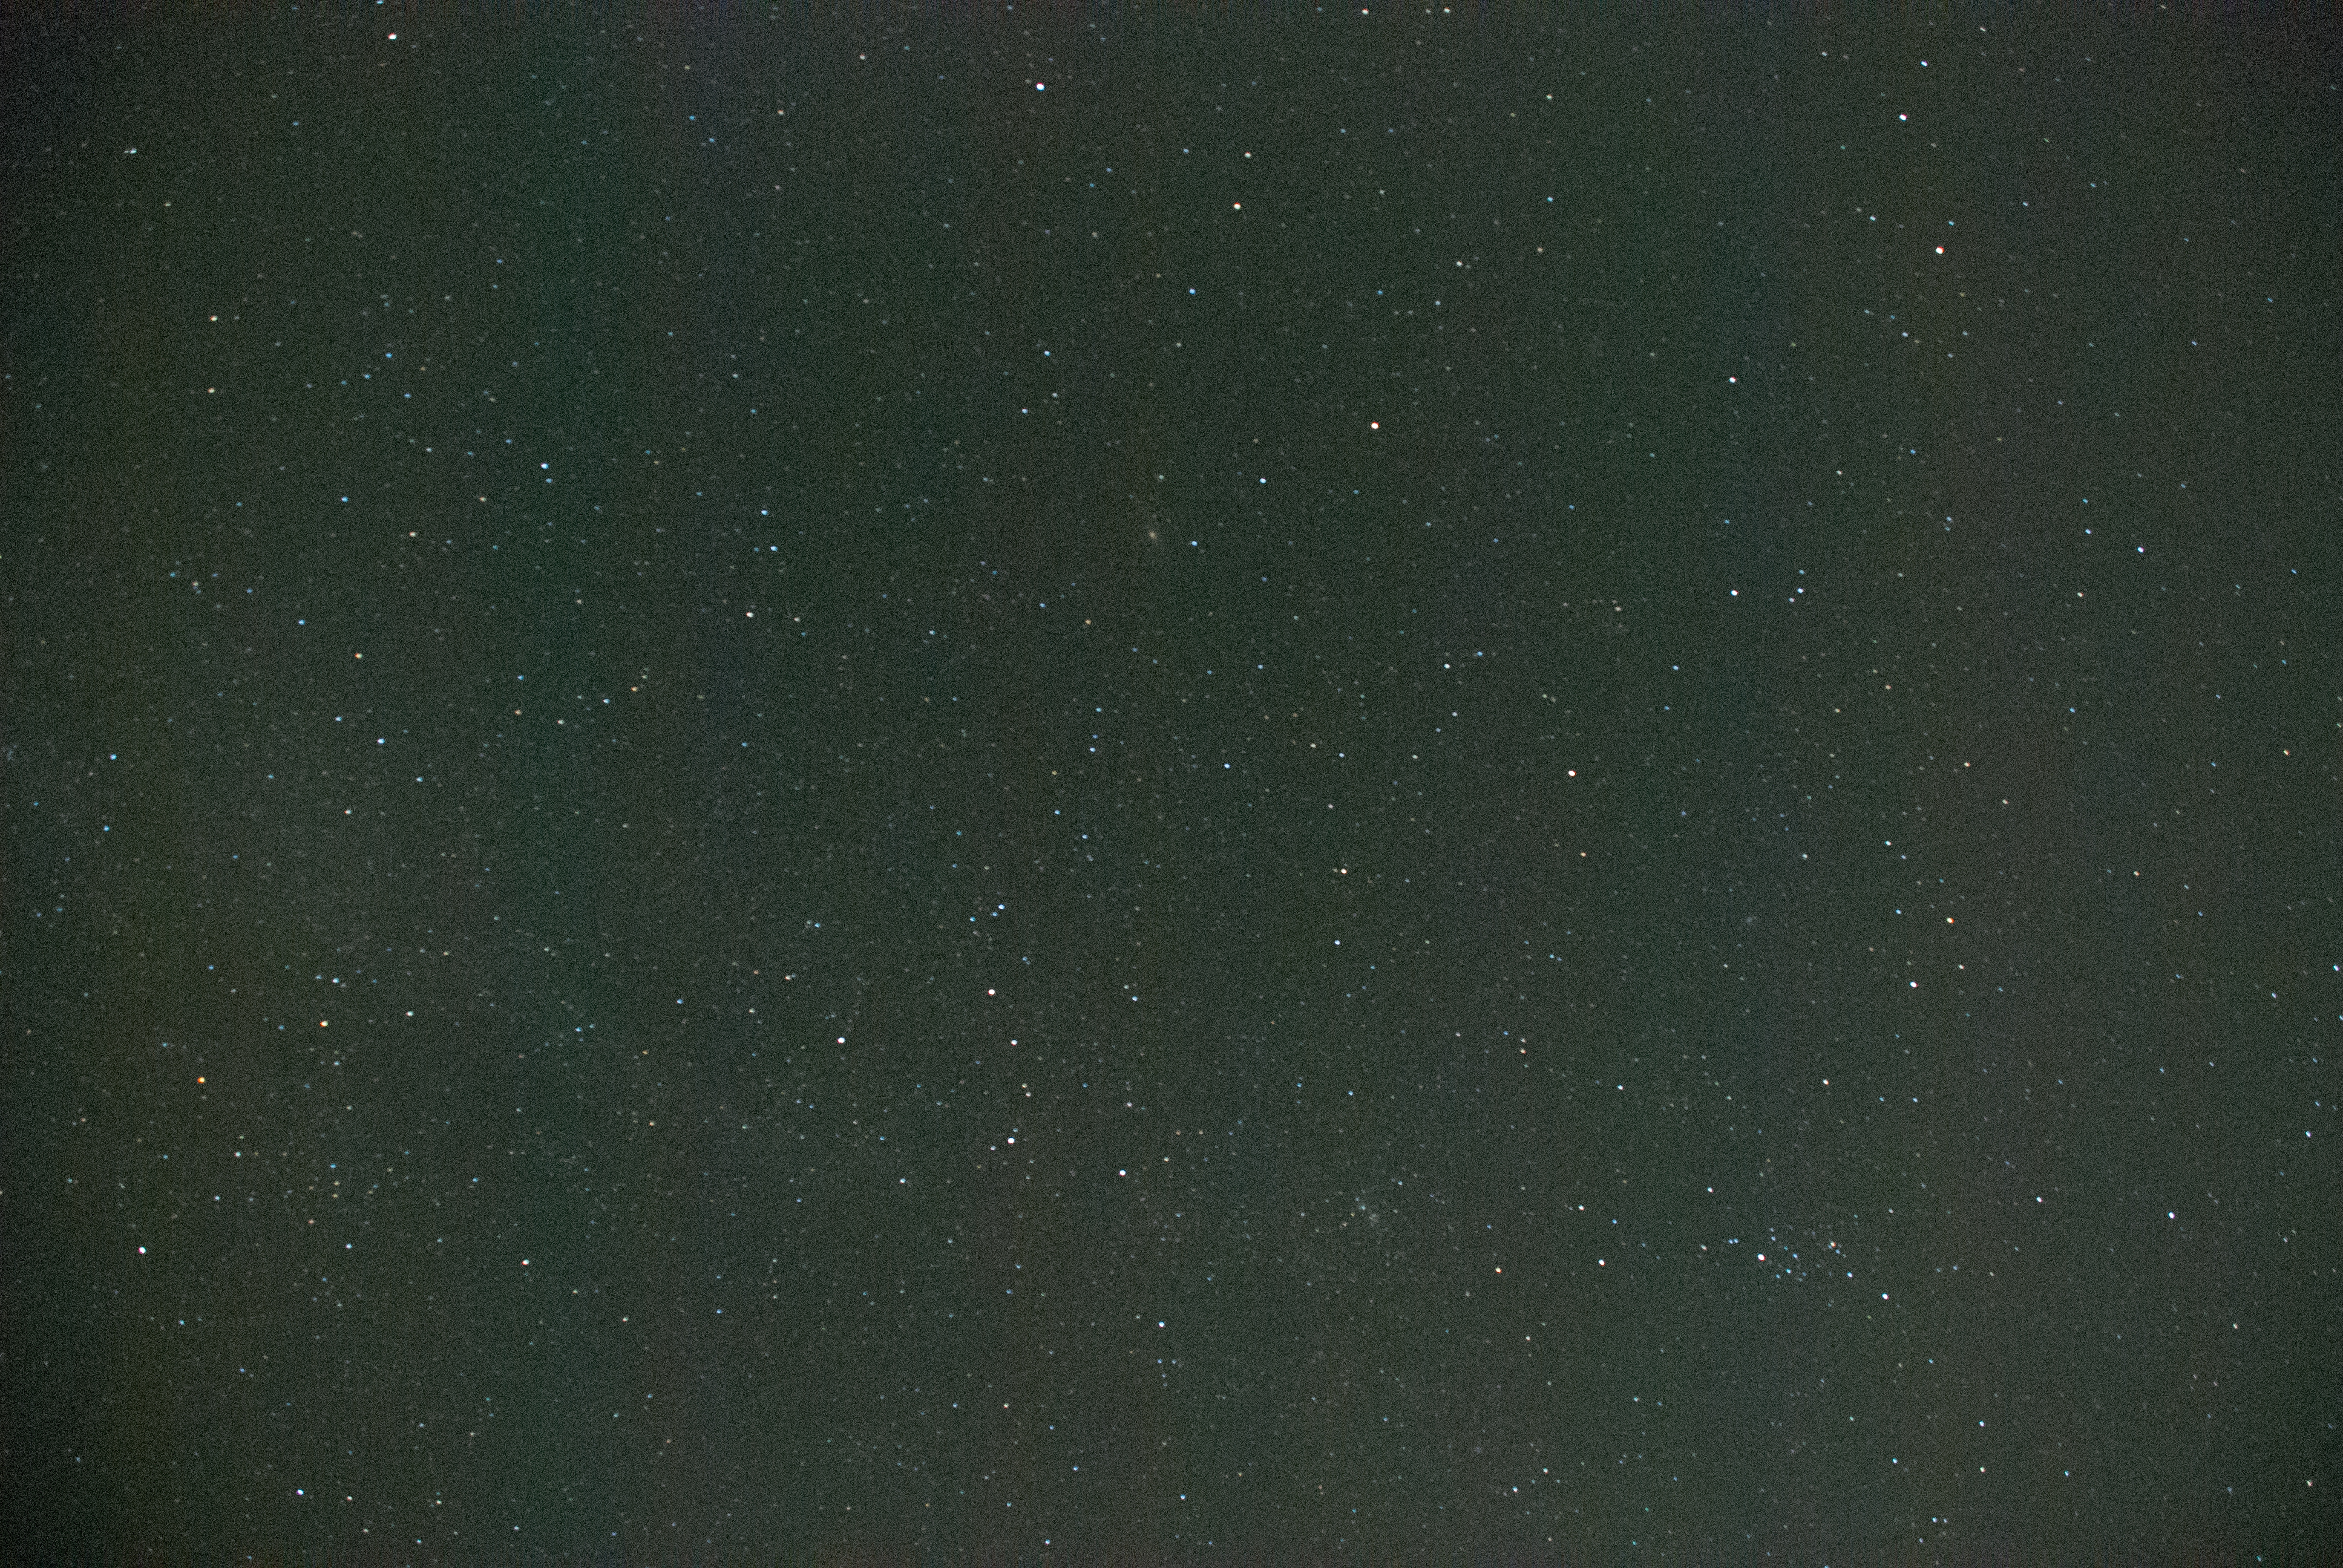
Start out at the lowest ISO your camera has, in my case that was 100 and with each picture you take,  increase the ISO by one setting stop until you get to the highest your camera can do.  For my old trusty Nikon D80 that meant ISO’s of: 100, 125, 160, 200 250 320, 400, 500, 640, 800, 1000, 1250, 1600, HI 0.3, HI 0.7, HI 1.0. When it is all said and done, you should have a range of shots that vary just by the ISO. So I ended up with 16 shots.


This 5 of the images spread across the full 16 image range of images that I got during this test.


Click on each image to see the full version

At ISO 100
At ISO 100

At ISO 250
At ISO 250

At ISO 640
At ISO 640

At ISO 1600
At ISO 1600

At ISO Hi 1.0 Equivalent to 3200


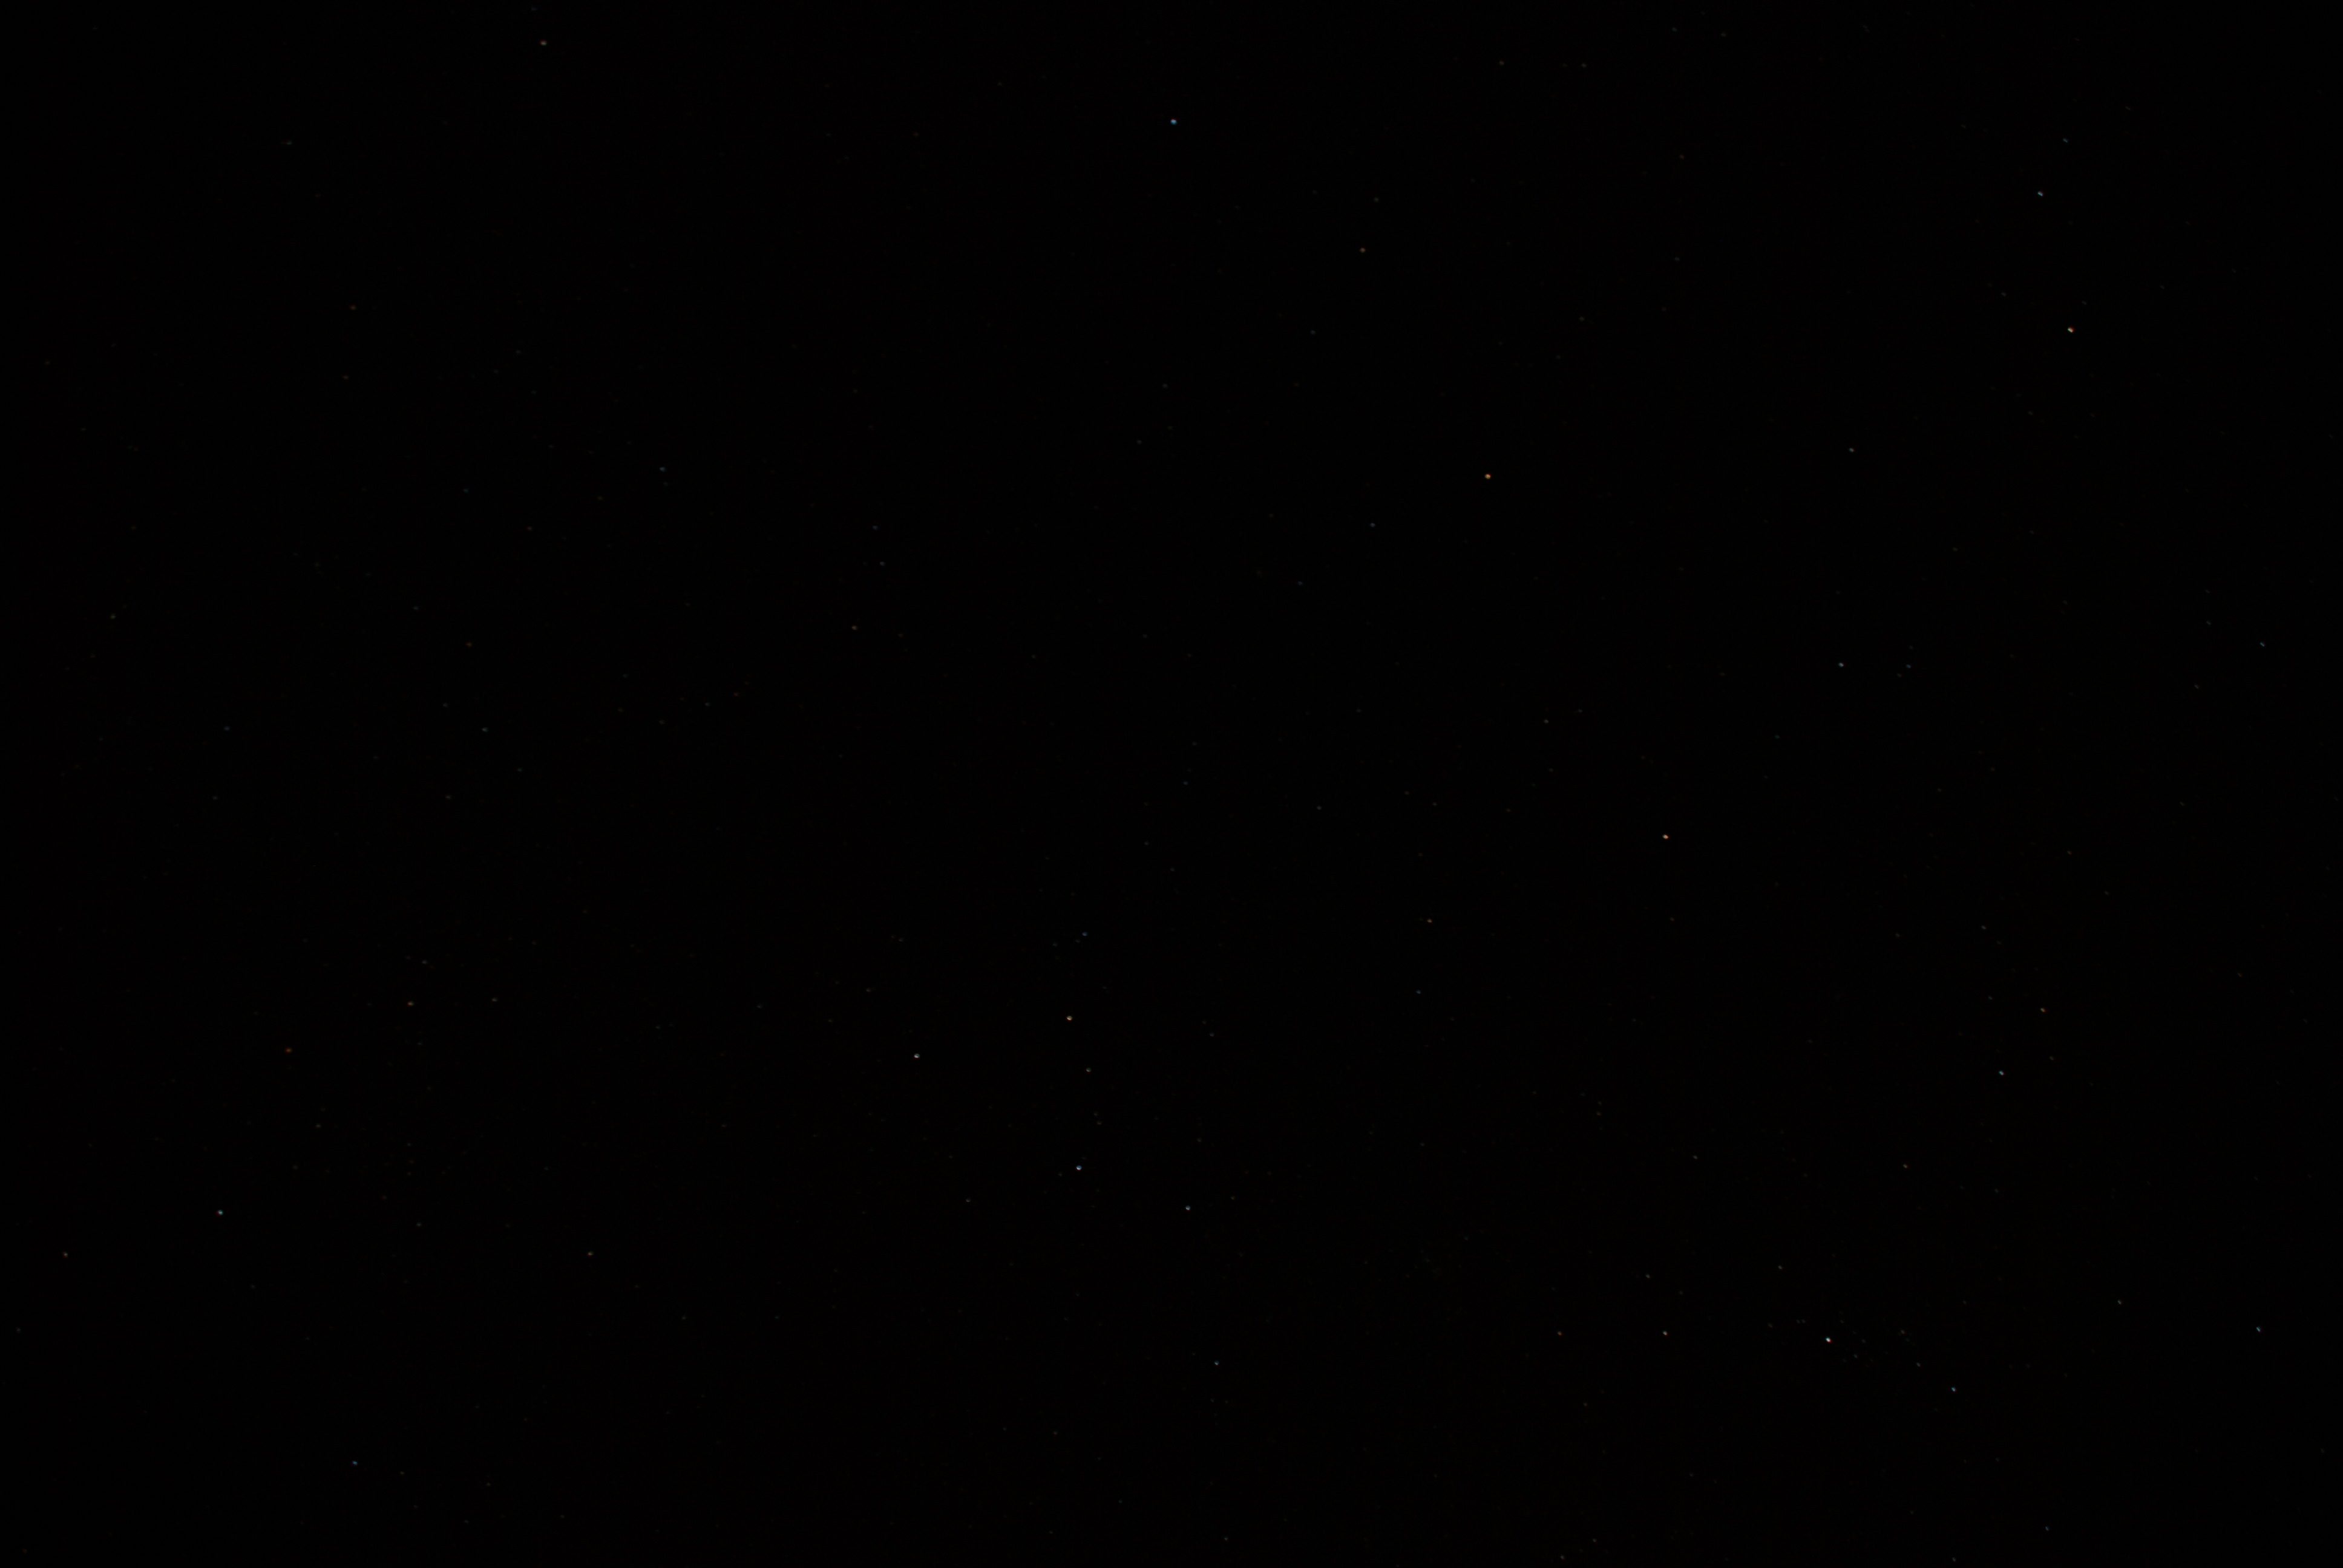
After looking at my test shots it tells me a few things

  1. Due to light pollution and the low sensitivity of my sensor I”m not able to get the Milky Way with this camera. By today’s camera standards, my Nikon D80 has a very low sensitivity as its highest native setting was 1600. Most camera’s today got to at least 25,600.
  2. To get a decent amount of stars I need to use the higher ISO’s of my camera. At least 1600 if not the digitally enhanced HI settings.
  3. Even at the higher ISO’s my camera still cannot capture enough light for the faint stars. And even with noise reduction turned on, the pictures are still too noisy.


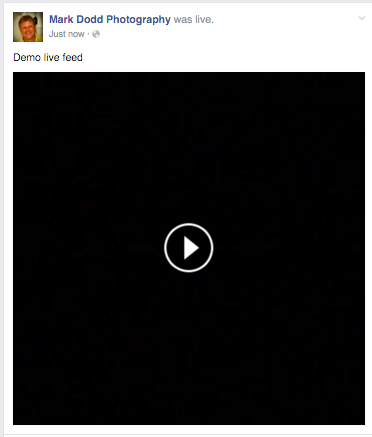
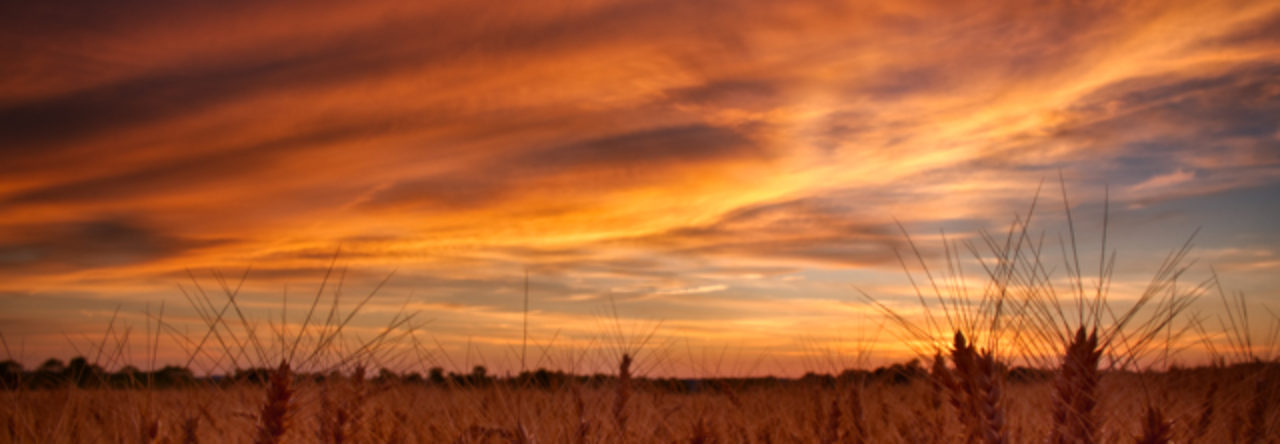
Just because I cannot capture the stars with my camera I did not give up on night photography as you may have seen in my previous posts from Light City Baltimore.


I’ve been able to get some great night shots in the city with my Nikon D80.  This is because the light it much brighter than the faint stars and my camera’s sensor is sensitive enough to get the light at this level.

Just keep in mind that you are doing this testing just as a starting point and to determine what is possible at the max aperture and timed exposure. Once you know this base, if it worked out for you, you can make adjustments when you change the exposure time and aperture. I won’t go into the formula here, but I’m sure you can find it on the internet.


For now, get out there and try some night photography shooting, I’m sure you will get some great pictures.


#nightphotography #Camera #Settings #testing #tips #night #recommendation


Educational, Government, Military, Group, Corporate discounts

Don’t forget to look for Educational, Government, Military, Group, or Corporate discounts when you’re buying software or hardware. No matter who the vendor is.


Most vendors I have come across have Educational, Government, Military, Group, or Corporate discounts available. Some do not make it easy to find on their websites while others, like Macphun, put it clearly on their front page.


The requirements to receive the discounts will vary from one vendor to another along with the method of proof of membership in the group. For example, B&H Photo does offer educational discounts, but has a stricter policy on who can receive the discount than others. Others are more flexible, and include a larger group that are eligible such as Faculty, Staff, and Students, instead of just Faculty and Students for educational institutions.


I would recommend that you make it your policy if you are a member of any educational institution, former or active Military, work for any part of the Government, or part of a larger company or association such as AAA, AARP, etc. to ask the company you are looking to buy from if they offer a discount to your group. When you ask, also make sure you find out what proof of group membership is required to receive the discount. If you do not see discounts mentioned directly on the website of the company, don’t be afraid to contact them via email or phone before you making your purchase and ask. The worst they can say is no  or you are not part of the qualifying group and you are no worse for the wear. It is better to ask before your buy and find out they do not offer any discount than to buy and find out later you could have gotten a better deal via one of these discounts.


Creating Facebook 360 photos on your iOS Device

Creating Facebook 360 photos on your iOS devices like your iPhone with either the iPhone Camera app or Google’s Street View app for iOS.

First I will say you can do this on other devices as well such as Android devices via Google Camera, but since I only have access to and iPhone this is all I can show you. I”m sure the steps are similar but the steps in the apps you use will be different.

Both the Google Street View App and the iOS Camera app were tested on an iPhone 6s running iOS 9.3.2. and using Facebook app version 58.

There is an option to embed 360 video as well, but you need a 360 camera to do this and at the moment I do not. So see the Facebook FAQ for more information on video 360.


Creating Facebook 360 Photos on iOS with the iOS Camera App.

Open the Camera app and switch to pano mode. Create your pano making sure it is not too narrow. There is no way to really know, but if you make it to narrow it will not upload in the Facebook 360 format. The wider the panorama is the more movement you will have left and right after you have uploaded it to Facebook. Once you have your panorama created you can now upload it to Facebook.


Uploading your iPhone pano to Facebook.

You can upload your pano photo to Facebook either directly from your iOS device such as and iPhone or you can upload it from your computer.


Uploading from your iOS device such as an iPhone.

Open the Facebook app, create a new post by selecting “Photo”, then select the pano from your camera roll, click done. Add text, description, and tag your friends etc if you wish, then click post. Your photo is uploaded and you are sent to the Facebook 360 post on your feed. Although the text and such is not required it is nice to have a description of what the photo is about.

Continue reading “Creating Facebook 360 photos on your iOS Device”

Getting a website created and online in no time with Bluehost

So you are thinking of creating a website and not sure where to go and how long it will take, I have a quick and easy solution for you with Bluehost, my hosting provider.

These days I think everyone is in the website hosting business and there are many providers you can choose from, but I know Bluehost can can get your website up and online in no time.

Wither you are a techie and like to do everything yourself or someone who just wants to get online and not worry about the details, Bluehost has solutions for you.

So how do you get started…

Before you even go to Bluehost, I would recommend that you do a little pre planning.

Things to think about:

  1. Your domain name. Come up with a list of domain names that you might want to use. I would come up with at least 3 and order them in preferred order. There is always a chance that the name you want is already taken so you want to have your 2nd and 3rd choices ready to go.
  2. Think about the type of site you want to have. This is anything from a blog to a just a e-commerce store. Bluehost has options for any type of site that you want and I believe WordPress can accommodate most types, but if you need a specialized type of site, they have various options for those as well.
  3. Know you budget. Like every hosting site there are a ton of options from the low-end shared hosting to dedicated servers just for you site. You can always start at the shared hosting option and move up the options list to the dedicated server as needed. Also, you can get more for your money using the introductory pricing if you get multiple years of service up front. This is what I did and it has saved me a lot over my initial sign-up period
  4. Think about your content. This mainly comes in for the Basic and Plus shared hosting options as there is a limit on server space. If you site is going to be heavy on images or videos that are stored on your site you may have to go with the Pro shared site option to start as it has unmetered storage space

Knowing these things will help you deciding which of the multitude of services that Bluehost can offer that you will need to start with.

Now that you have done your pre-planned. Lets go through the steps of getting you online and up in running.

Continue reading “Getting a website created and online in no time with Bluehost”

Review of Macphun Intensify CK and a Special Deal.

Review of Intensify CK from Macphun

I’ll get the basic information out of the way first before getting into my comments and review. First, this is a Mac OS only application. Sorry my Windows followers, but if you are looking for something that does run on Windows, I would check out On1’s Photo 10.5

The Intensify CK System and Software requirements

  • Mac OS 10.9 and above
  • iMac/MacBook Pro/ MacBook Air/Mac Pro/Mac Mini late 2009 or later
  • 4GB RAM and more
  • 512 MB Graphic RAM and more
  • Creative Kit is integrated as plugin with Lightroom 4,5,6 and CC; Photoshop Elements 10-14 (App Store version is not supported due to Apple Sandboxing); Apple Aperture 3.2 or later; Adobe Photoshop CS5, CS6 or CC 2014, СС 2015, СС.
  • Photos extensions support – for 10.11 only


Intensify CK Pricing

List price is $59.99 for the standalone application. (Look for a special limited time discount at the end of this review) You can also get it as part of the Creative Kit. There is a version of Intensify in the Mac App store, but it is a scaled down version and does not include the Plug-in support as mentioned above. To get the full features of Intensify CK you need to purchase it direct from Macphun.

Intensify CK feature set.

  • Real-Time Image Processing Engine!
  • Standalone software & Plug-in Support
  • Native 16-bit RAW Processing
  • Social integration: Facebook, Flickr, etc.
  • 68 Professional Presets
  • Advanced Structure and Micro Structure controls
  • Layers & Masking
  • Proprietary Technology for Revealing Details
  • Vignette with Custom Center
  • Proprietary Technology for Pro Contrast
  • Powerful Macro Sharpness
  • Built-in Macphun Print Lab


Now on to the review and my comments on Intensify CK

Continue reading “Review of Macphun Intensify CK and a Special Deal.”

Review of Becoming An Artist Season 1

Becoming An Artist Season 1 with Trey Ratcliff of StuckinCustoms.com

Preface

First I must say I do my best to be unbiased in all my reviews, but in this case I must disclose that I’ve been following Trey Ratcliff for years and as such I”m am a big fan so this review might be a little unintentionally biased. I’ve followed him for so long that I seen changes in his website, changes in his photography equipment, and the ever evolving changes and improvements in his photography. I’ve seen him go from a one person show to a multi artist show, to a worldwide show, and now to Facebook live. I’ve seen his business constantly expanding with new and exciting products and adventures. I also had the pleasure of meeting him in person on a photo walk he and the Stuck in Customs crew did last year in Philadelphia and Washington DC. If you want to see what that was like visit tour.treyratcliff.com

That said, let’s get to the review.

Becoming an Artist Series 1 is comprised of 15 episodes. Each episode is about 30 mins long and divided into two sections. In the first section of each episode you hear Trey tell personal stories such as a bit of his life history, how he became a photographer in his 30’s, and some of the things that inspire him in his photography and art. I believe he does this to give you a sense of where he’s coming from, how he sees the world, and what affects this has on his photography. There is some dialog just about art in general and how other art can help influence or inspire your photography. He will discuss the picture(s) he is taking at that time, why he choose to take that picture, and some tips about the picture including composition, color, light, and inspiration.

In the second section of each episode you get transported to Trey’s Studio in Queenstown New Zealand, where he will show you his editing techniques on some of the photos he took during the previous section using various tools from PhotoMatix, Lightroom,  Photoshop, and other tools like Autopano Giga for his panorama’s. He shows you basic techniques up to some very advanced techniques.

Episodes have interesting titles like

  • Episode 1 – The Accidental Creation of Me
  • Episode 6 – Writing a Failed Novel
  • Episode 10 – A Reccy to Chernobyl
  • Episode 14 – A Street Fight in Morocco

So you can see this is not your typical tutorial series.

This series was created before Aurora HDR came out, so for this season he doesn’t use his new tool, Aurora HDR Pro, which he co-developed with Macphun software.

In addition to the video series Trey has created a Facebook group “Becoming and Artist – Trey Ratcliff’s Funky Lounge” where you can post your own work and interact with fellow artists.

Continue reading “Review of Becoming An Artist Season 1”

Facebook Live – Now for everyone

You too can use Facebook Live

If you follow my Facebook page, hopefully you have viewed and subscribed to one of my live feeds on Facebook when I’m out and photographing and am able to do a live feed.

For awhile, Facebook had limited who could to do this to a small group of users via Facebook Mentions app and then released it to more users on in the Facebook app on iOS devices.

But now, Facebook Live is available to everyone on both iOS and Android devices. Currently only works on the mobile device app and not on the web browser version of Facebook.

When you go to create a post there will be a new icon at the bottom of your post. See the below picture to see what it looks like and where it is on the screen.


IMG_4218


If you do not see this icon, chances are you need to update your Facebook app on your mobile device. Once you get the latest version of Facebook installed, this icon should appear.

If you have a Facebook Page or an Event Page, you can do live video there as well.

On the Facebook Page, when you click Publish you should see the icon at the bottom of the Publish Post just like above.


Now when you click the Facebook Live icon….

Your live video screen will open and prompt you to enter a short description of what your video is about. This description will show in the Facebook feed just above the video.

If this is your personal Facebook page, you can limit who will see the live video. To do this click on the “Public” icon and select one of the friends lists you have created to have the live feed just showing to those users. For Facebook Page published posts, it is “Public” only. I haven’t tested an Event page live feed yet, but I’m assuming it is limited to users associated with the event. Note: if you have selected a friends list, the next time you open the app it that friends list is still selected. So just remember that you may need to change who you are broadcasting to the next time you open the Facebook live feature.

IMG_4254

Your all set, go ahead and click “Go Live”. You will be given a 3 second countdown and then you are live.

IMG_4249


When you are live you will see the below. A few things to know when you are live. By default the app will use your rear camera (the one facing away from you), but you can switch for the forward facing camera by clicking the icon in the top right. Click it again to go back to the rear camera. Below your live video (which is black on the image below as I had my phone on my desk so the camera wasn’t showing anything) you will see who has joined your live feed and any comments or Facebook Reactions they have posted to your live feed.

Facebook has plans to add other features to the live feed screen. On my iOS Facebook app it seems that the filter feature is available now. Try it out to see if you have it by swiping left or right on the video section of the screen. The filters that are showing up for me are; Pop, Classical, Country, Funk, Acid, and the default of No Filter. Each gives your video a different look so give it a try to see if it is working on your Facebook Live feed and to see what each does.


IMG_4250


When you are ready to end your Facebook Live feed, click the finish button. After you click finish, you will see the “Ending Live Video” screen where you have a few seconds to cancel the “Ending Live Video” if you clicked it by mistake. (One other note, if you accidentally switch to another app or your devices home screen while doing a live feed, as long as you didn’t close the Facebook app, you can go right back to it as it would have automatically been paused. Just click the pause button to go back to being live)


IMG_4251


At the end of the live feed depending upon wither this was a personal Facebook page or a Facebook Page live feed you will see screens shown below that give you details about your live feed. For the Facebook Page live feed you will get stat information about live video.  Also at the bottom there is the option to save the live feed video to your device by activating the slider. It is off by default, but in my example images I have turned it on.


IMG_4247
Personal Page
IMG_4252
Mark Dodd Photography Page


After clicking “Done” you will see your Facebook page and the live feed posting in your Facebook feed as shown below. This is also the same view folks will see in their Facebook feed when you are live. They just click the Play button to view it live when you are live or for playback when you have finished your live feed.


Screen Shot 2016-04-16 at 10.52.24 AM


Your followers can subscribe to your live feeds. I can’t say for Android devices, but when I’ve watch other users live feeds on my iOS and Mac, the subscribe button shows up at the end of the live feed that I’m watching. So at the end of your live feed remind your users to click the subscribe button so they can get notified when you do your next live feed.

Now go out there and have fun with this new feature of Facebook that is now available to everyone.

If you want to test things out before going live to your friends or the world there is a way. When you have clicked on the live feed and are on the screen to enter your description and the group you are broadcasting to, click “Public” and select “Only Me”. When you select “Only Me” the Facebook Live post will only show up in your Facebook feed. Once you have completed testing you might want to go to your Facebook Page and delete the testing live video post.

#facebooklive #livefeed #livevideo #facebook #broadcast #nowforeveryone


Things you do to get the shot

The things that you do to get that shot.

A few days ago I posted the following picture on my Facebook page (https://www.facebook.com/markdoddphotography/) BTW, if you like my photography, be sure to like this page.

20160307-DSC_3363_AuroraHDR_HDR

Although I did like it, something was not quite right. I had taken it on my tripod at the lowest height setting I could use. After someone commented on my Facebook page that they thought the hands were too close to the edge of the photo I realized that was what was bugging me about the photo.

Since I do not have a super wide-angle lens what was I going to do. My widest lens is a 18mm-135mm and that is the lens I used for this photo and was already at the widest setting of 18mm. I thought about it for a few days and decided I’d go back and just set the camera on the floor.

So yesterday I went back, set the camera on the floor and got ready to take a few photos. I’ve done this kinda thing before with sheer guesswork and multiple attempts. Take the photo, pick up the camera, check the image and repeat until I got what I was looking for. This takes forever and there is no sure way to know if I got the shot until I picked up my camera and took a look at what I just shot. Not to mention that you had to remember where the camera was when you picked it up so you knew where to place it when making an adjustment.

My camera does not have a flip screen or wi-fi, so I had no way to view the image live. Also it is inside and my camera doesn’t have a high enough ISO to let me hand hold it and get a noiseless photo without using a flash, which would destroy the look. What else was I going to do.

Then I started thinking. I have a cell phone, it has a forward facing camera so you will see on the screen what it is pointing to. Can I use this to see what I would see through the viewfinder. Turns out the answer is yes. I placed the camera on the floor, slide my cell phone under the viewfinder so the lens is lined up with the viewfinder, and low and behold, I could see on the screen what the viewfinder was showing.

Here is the picture of the setup on the floor at the base of the statue.

20160318-P1020408

I did have to use my lens cap to prop up the right side of my camera to make it level. So if you are going to do something like this, have a few small items that are the same thickness as your cell phone just in case you need to prop one side of you camera up like I did. I lucked out in that my lens cap was the same thickness as my cell phone

Here is of one of the photos I took with this setup. I think it turned out rather well with much more space between the hands and the edge of the frame and showing much more of the dome itself.

The Statue of Jesus in the Billings Building of Johns Hopkins Hospital

I do have a Black and White version that is colorized like the first photo on my store page so be sure to check that one out as well.

#tips #gettheshot #Hopkins #Baltimore


Free Essential HDR Course by Macphun using Aurora HDR

Macphun announced a Free Essential HDR Course today that is using Aurora HDR in the course.

So if you have thought about using Aurora HDR or just looking into improving your HDR experience go ahead and sign up. Hey, it’s free!!

But First…..

If you don’t already have Aurora HDR, click the image below for the Stuck in Customs store where you can either buy Aurora HDR if you already know you want it, or at the bottom of the page you can download a trial version that you can use while you are taking this course.

Now that you have the software let’s get you to the course

Click here to see the course details and to Sign up for the “Become a better HDR photographer in 10 weeks” course.

I’ve signed up myself as never hurts to learn how to improve your craft and software skills. And it’s free, can’t beat that.

#AuroraHDR #Macphun #Freecourse #Software #Training #StuckinCustoms #Trail


Subscription software, not a fan

Software by subscription…

I will start this by saying I will try to not mention products by name as I don’t want to single out any particular company as they are not the only ones doing this.

I recently had to decide wither or not to license some software I use for my photo editing by subscription license or try to get the standalone application license. I had been given access to the subscription license for one year but that year is about up. Now it is time to pay the full price of the subscription or get the standalone application or I lose my ability to use the software.

So I started to compare pricing. At first glance the subscription service didn’t look that bad. But then I started to think about things a bit. Ok so for the monthly subscription I can get the software I’m using plus several other features/software included in the “packaged” deal. Sounds pretty good right. Then I looked at the “packaged” deal and realized I’ll never use any of the other apps/services except the one program. So started looking to buy a license for just that application. The fun began as for this vendor it is not so easy to find the pricing for the standalone application. The site keep on redirecting me to the subscription service page anytime I clicked on links for pricing information. I eventually found the application pricing only to find out the discount that I qualified for in the past years is no longer an option and can now only get it at full retail pricing. I think this is the result of their push for the subscription model pricing. I fell they are trying to make the standalone app look less appealing and they were intentionally trying to steer me towards the subscription licensing versus getting the standalone app.

OK monthly fee versus one time purchase, which do I choose.  Next I though how long do I think I’m going to use this app. Well I’ve used it for a year now and have become dependent upon it so switching to something else would be a pain, so I will stick with this application and thus will be using it for sometime. Since I’m one of those folks that doesn’t always upgrade to the latest version of software as I don’t think I need the new features or it doesn’t work on my computer given that I have an older model computer, I am happy to just stick with and older version most of the time.

So decision time. With the monthly plan I would pay just as much as the standalone app price after about 14 months, then after that it would be costing me more. Given that I don’t know if a new version of this app will come out within the next year and that I may not upgrade to anyway, I didn’t see any benefit of the subscription service. I determined it would cost me more over time and that if I cancelled the subscription service I would not longer have access to the application.  That is one of the Big drawbacks to subscription based software I think. One reason I like the standalone application purchase better. For my example if I cancelled after 14 months, even though I would have paid the same as the standalone purchase, I would no longer be able to use the application if I had not purchased the standalone version

If it was just one application vendor I used software for that did this subscription service model I might be ok with it, but it seems more and more software vendors are going to this model.  Individually the prices are low, but when you have to buy a subscription each for application you use, that low monthly fee becomes a large monthly for all the applications.

I”m just hoping that these companies will not go to solely subscription based licensing as I think it will make the software be out of a lot of folks price range if they think about the total cost over time or it is going go get folks into more debt as it is so easy to just put that on a credit card and forget about it. I have a feeling that this particular vendor will be going that way as with every new upgrade of their suite of applications more and more of their applications have become available by subscription license only.

For business I think the subscription licensing makes sense as most will have up to date computers and would need to stay up to date on the applications. The subscription method would keep them up to date and would save them money over time versus the individual upgrades each time. But for the people who occasionally purchases a product it will end up costing them a lot over time. So I’m just not a fan of subscription based licensing.


Union Station Ceiling of Gold


Union Station Ceiling of Gold

The view straight up of the ceiling in Union Station in Washington DC. I ended up putting my camera on a planter edge and thus the plant in the picture as tripods are not allowed in Union Station and there was not enough light to get a good picture if I hand-held my camera.

So consider that my tip of the day. Don’t be afraid to creative to get the picture. This planter was in the right spot for me to lay my camera down on to get the shot. Since my camera doesn’t have a flip screen nor built-in wifi it was sheer guesswork on getting things lined up so it took a few shots until I got it right. With newer cameras especially the one’s with wifi that will let you see the image on your phone this would have been much easier.

#Software #Subsciption #WashingtonDC #UnionStation #Train #Station #Amtrak