Some starting with Mylio Tips

Disclaimer: I may affiliate with a product mentioned on this page. As a result, I may receive some compensation from the vendor. This affiliation does not influence any of my commentary on any product that I may write about, nor does clicking on the affiliate links cost you anything, in fact, you may save some money.

Now that I’ve had Mylio for a week and have worked on importing my images into Mylio I thought I would give some tips based on my experiences. But as always, refer to the Mylio Manual or contact their tech support (Which has been great by the way) if you have any issues.

Importing

If you created a new folder for your Mylio Library

This is not my case so what I say here is just from my trial and error when I was testing it out.

Basically, do one import at a time. Such as one memory card at a time, or one folder of images at a time. There is a lot that Mylio is doing in the background, it is not just making a listing in your catalog, but Mylio also does some other work on your files so it is ready for the Face Recognition, De Duplicating, creating previews, creating thumbnails and putting your images on the Map to name a few that I know of

You should be ok having multiple vaults and multiple devices to start

If you choose an existing folder as your Mylio Library Folder

This is the scenario that I fall into and can give you some advise base upon my experience

After you set up Mylio you should have 2 devices, 1 being your computer and the other being your Vault where your Mylio Library is located. Be that your internal drive or external drive (PS recommend external)

You might be tempted to add your other devices right away such as your phone or another computer. HOLD OFF on doing this.

Depending upon how large your existing library of files is, the initial import into Mylio will take some time. Be prepared for that. As mentioned above, it is not just a matter of putting a listing for an image in your Mylio catalog, but many other things are done as your images are imported.

The larger your library the longer it will take. Mine for example was ~ 182000 images that take around 3 TB of space on my external drive and it took a weekend on my 2019 iMac to finish the initial import properly.

By not adding other devices to your Mylio setup until this is finished, it will speed up the process as Mylio doesn’t have to deal with the other devices during this initial import. That was part of my problem, I couldn’t help myself and I added a second vault right away along with some other devices. And as a result, my initial import took much longer as it copied information to the second vault and to my other devices along with my primary computer and vault when it was adding images to my Mylio Library catalog.

So to the point, after the setup of your computer and 1st vault, let things go until your Mylio Library is all in synced and happy, then add another device, let that sync up, then add another vault if you wish, and let that sync up, etc. Each time you add something, let that sync up completely before adding another. Non Vault devices should be pretty quick, but adding another Vault does take some time.

Once you have slowly added all your devices that you want in your Mylio environment and things sync up across all of them for this initial setup, anytime you add more images it will be much faster to sync to your vault(s) and your other devices as they are connected.

For those Mac OS folks who had been using Apple iPhotos

I have been a long-time Mac OS user and as such have some old iPhoto libraries that still have images that I wanted to import.

I discovered that Mylio didn’t recognize them when I when to add them via the option to add Mac OS, iPhoto, and Aperture option. I believe this to be the fact that these are very old libraries and in a format that Mylio does not recognize. (I have not yet confirmed this with Mylio). But I did find a workaround to make these libraries show up. It will require double the space that your iPhoto Library takes as it will make a copy.

I would open the old library, it would open the current version of Photos and start converting. When it was done and I quit photos I would see two libraries with the same name. One was the new Photos format library and an iPhoto merged library. I would go back to Mylio and choose to add the iPhoto library and low and behold, the iPhoto Merged library would show as being available. I believe that this is due to the format of the iPhoto Library being migrated to the latest iPhoto format before it was converted to a Photos library.

Doesn’t really matter to me what is happening behind the scenes, I just know with this method I can now import this very old iPhoto library into my Mylio Library

If you are a long time Mac User and have images prior to Mac OS X

I am a long time Mac User and I discovered one issue for my images that I had taken before Mac OS X (yes back in the Mac OS 9 days). Those images did not have an extension as part of the file name.

Although Mac OS X does recognize them as images, Mylio was not as it seems Mylio relies on the file extension. So I had the situation where I had images in a vault directory, but they were not showing in my Mylio catalog. This applies to any Linked folder as well.

So the work around it to give your files an extension for the type of image they are. You can do that using the Mac OS Terminal.

  • Locate your images that do not have extensions. If you have a folder that has some with an extension and some without, create a new folder in that same folder and move all the images that do not into that folder.
  • Open the Terminal Application. Found in applications -> utilities
  • type cd and add a space.
  • Drag the folder icon onto the terminal window. This will add the folder file path in the terminal window. Press return. You can also type it as well, but this is a much easier method especially for long file paths.
  • You should now be in the folder that has the images to have an extension added. Yow can confirm this by typing pwd to show the folder path. And doing an ls -l command to show the files
  • Next, you will use the following command to add a JPEG extension to your file names. Just copy and paste the below command. Pressing return after pasting to execute.
    • for i in *; do mv “$i” “$i.jpeg”; done
  • If you have tiff images, the command is similar, just a different extension in the command as shown below. Remember to press return after pasting in the terminal window to execute the command.
    • for i in *; do mv “$i” “$i.tiff”; done

If you make a mistake and accidentally add the tiff extension to Jpeg file types or vice versa, it is easily fixed.

  • Changing the extension from .tiff to .jpeg us the following command in the terminal while in the folder
    • for file in *.tiff; do mv “$file” “${file%tiff}jpeg”; done
  • Changing the extension from .jpeg to .tiff us the following command in the terminal while in the folder
    • for file in *.jpeg; do mv “$file” “${file%jpeg}tiff”; done

Of course, if you have a different extension, the above command work, you just need to change the .tiff or .jpeg to the extensions you need.

Once the extension has been added, Mylio will automatically add the images from these linked folders to your Mylio Catalog.


If you found this post and have not yet tried Mylio, click the button below to get started. You can also click it to get the subscription to add more devices or more than 5000 images that are available in the trial/free version.

By using this special link you will receive the affiliate discount offer that is only available to affilate members

The Sky replacement craze

Although the ability to replace skies has been doable for years, up until recently it required some serious Photo editing skills in either Photoshop or other editor of yours choice.

Now it has come to the masses via various programs such as Luminar AI and On1 Photo Raw.

I’m not saying it is a bad thing that the new programs make it easier so that everyone can do it, but I do think sometimes people do it just because they can. The Sun Rays phase was another good example of doing it just because it was there. I saw multiple photos where the adding of Sun Rays did nothing to add to the overall view of their photo. In some cases, it was actually rather distracting.

Now I personally do not replace skies in my images, yet, but I so see when there is a case for it. But that is it, I would only do the replacement if it is absolutely necessary to create the vision of the image that you want.

I can see one scenario when you might want to replace the sky is if you are on a travel trip or somewhere you know you will not be back for a while or you won’t be back to at all and the sky is very boring such as a cloudless sky. Then I would consider it since it is a case you would not be able to return to get a better sky.

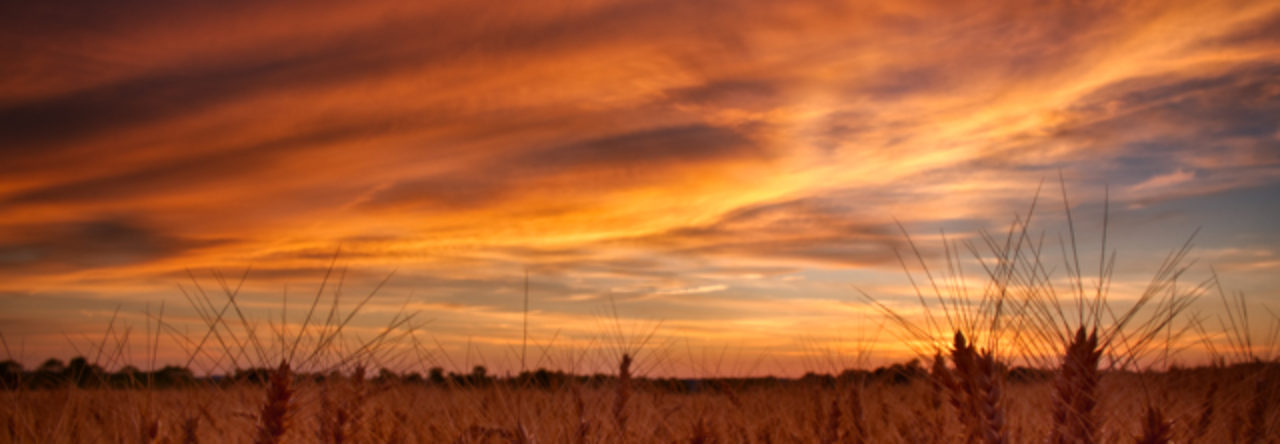
But if you do need to replace the sky, pay attention to what is in the image and the over all view and the light of the image.

I have seen several shots in photography groups I belong to on the web where the tone of the clouds added does not match the rest of the scene. Such as the clouds are the warm color of a sunset, but the foreground is a cool color. Another bad placement is when you see the light coming from one direction on the ground and another in the clouds. (pay attention to shadows and bright spots). If you replace your sky you want to pick a sky that matches the rest of the scene in tone and in the direction of the light.

So before you jump on the sky replacement bandwagon, take a serious look at your image. Does it really need to have the sky replace? Asked yourself, will my image be enhanced by a new sky. Once you have decided that make sure to check that the tone and light direction of the sky you have chosen as a replacement match the rest of your image. Some software like Luminar AI can assist you with matching the tone of your replacement sky to the tone of your image along with helping with water reflections.

In short, don’t use a new sky replacement feature just because it is there, think about how the feature will enhance your photograph. That pretty much goes for all the other options that you have, just because it is there doesn’t mean you have to use it on every single photo.

Since this is just an opinion piece, I do welcome your thoughts, just leave a comment below Do you agree with my thoughts?. I only ask you to be courteous in your statements but all options are welcome.

OK, back to your regular scheduled programming as they use to say.

Recommended Book for Photographing D.C.

Book Recommendation Snap D.C. by Angela B. Pan

I would recommend reading it through as it is a quick and easy read. Once you have read it in its entirety I’m sure you will start planning your D.C. photography trips and use this book as a reference guide for your trip and future trips to D.C.

Angela goes over the locations she recommends in the National Mall area, but also includes some lessor know locations near the National Mall that are great photo opportunities. Even has a few that are just outside of the D.C. area.

She includes transportation information, the best time to shoot at the location, some of her photography from that location, and imparts some local knowledge of the area.

If you are planning a photography trip to Washington D.C. and want to know the best times to go to a location, how to get there, and how to get a different photo that everyone else in D.C. then this book is for you.


Currently sold only through Amazon. You can get your Kindle or Paperback


Get your copy of SnapDC


Image of the Day

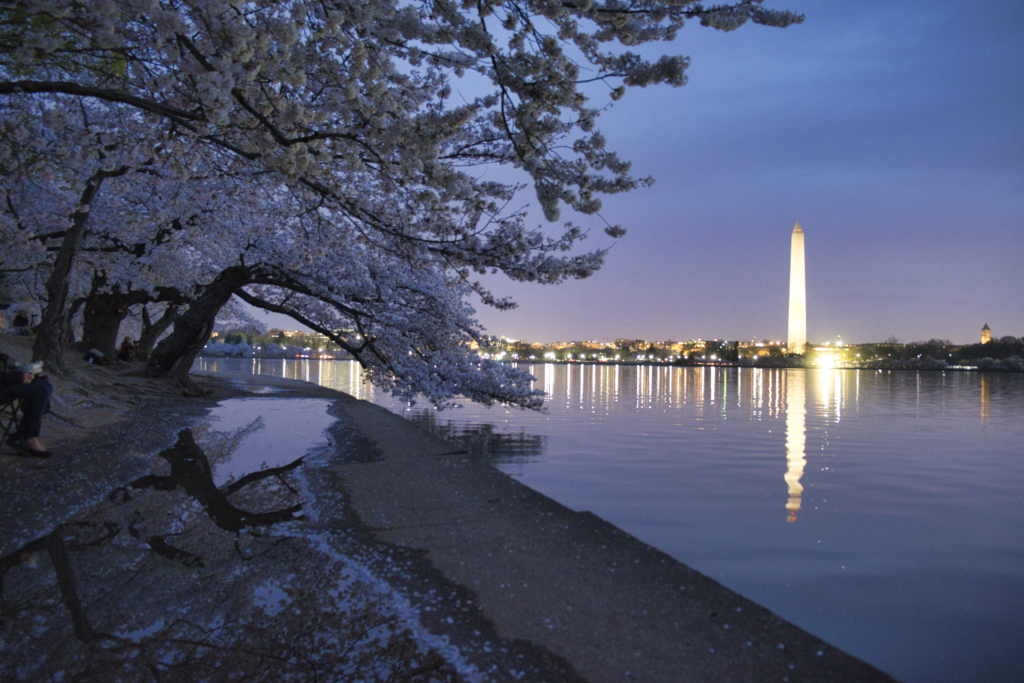
Here is an image that I took of the Cherry Trees using one of the tip locations she mentions in the book.


#SnapDC #amazon #affiliate #book #washingtonDC


Some hopefully helpful advice on the 2017 Solar Eclipse.

I’m planning on driving to a location for the total solar eclipse this year and thought I would post what sites I plan to use and those I found helpful to me in planning.

First, I’d say, if you are a procrastinator like me you will need to get your accommodations.   Depending upon the area you are going to, more than likely all the accommodations in the direct center path area are already full.  Look for areas that are on the outer edge of the total eclipse shadow zone. You might still be able to find something there, but expect to pay top dollar at this point.  That is the situation I’m in, but I still plan to drive about an hour to get to the center of the shadow of the total eclipse.


Recommended Websites

To find locations that are within the shadow of the total eclipse, the best site I’ve found so far is.

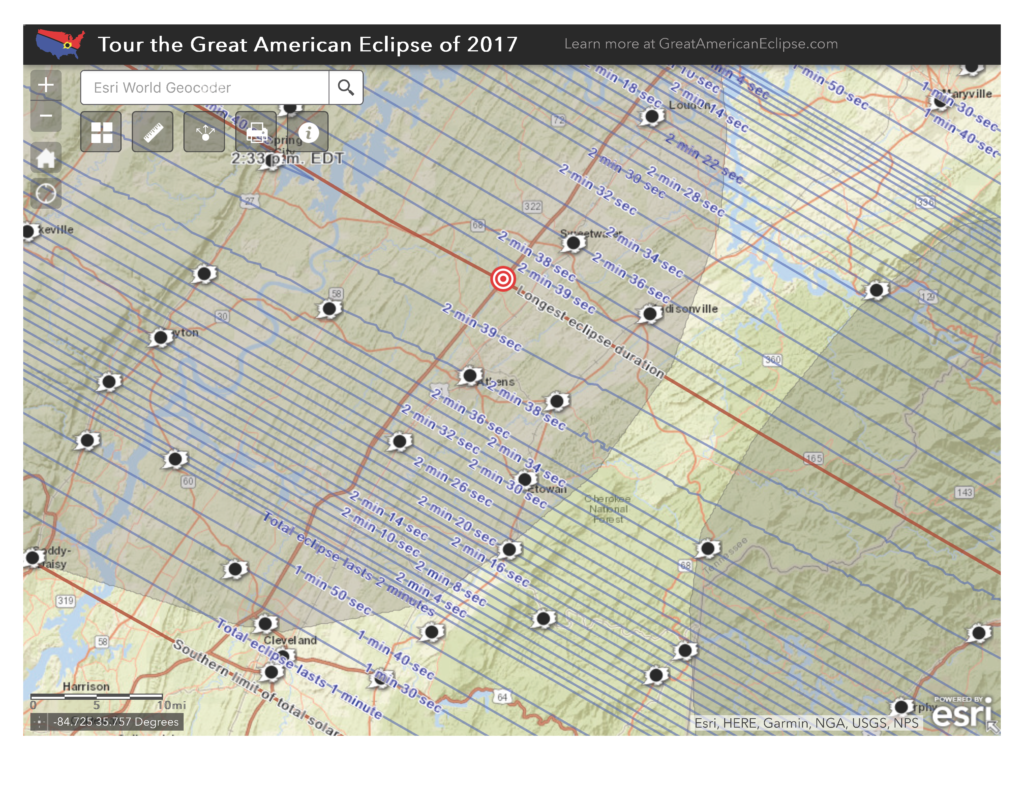
Interactive Map from the greatamericaneclipse.com

By using this map, not only can you find a location within the total eclipse shadow, but you can see the length of time the total eclipse will be visible for that area. If like me, my accommodations are on the outer edge, you can see where you would need to drive to get more time within the shadow. For my case, where I’m staying it would only be in the shadow for a little over a minute.  Where I plan to drive to it will be 2min 38sec.

This is what the interactive map looks like for the area I’m going to.

The biggest thing that I found helpful was the blue time lines. Due to terrain and partly due to the moon’s surface, the time lines to vary a little bit. Notice the 2min 38-second line gets a little squiggly as it goes over the mountains.


For an overview on the eclipse check out the NASA site at

eclipse2017.nasa.gov

Here you can get the all important Saftey tips, the Science behind the eclipse, and find out about some events planned. And more.


For the photographers out there, so far, the best site I’ve found for tips on how to photograph the eclipse is at

www.mreclipse.com

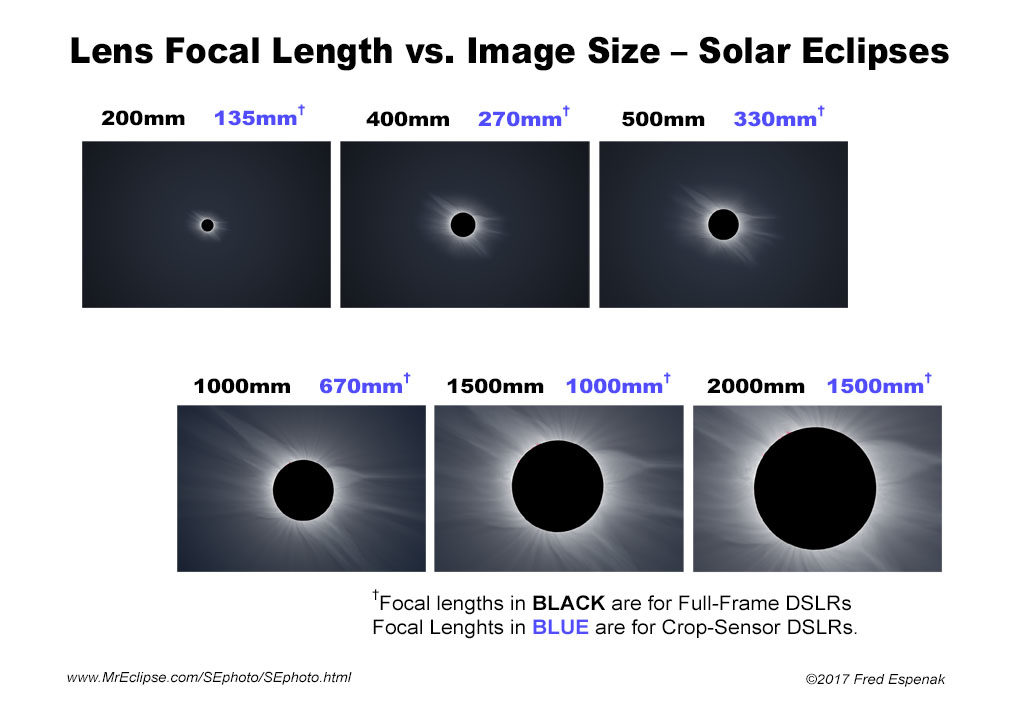
Two particular images I’ve found useful are

  1. The size guide showing what the sun would look like using a particular focal length lens shown here.https://www.mreclipse.com/SEphoto/image/SE-DSLR-Scale1pp.jpg
  2. The Exposure Guide:


both of these images can be found in full artcile context at

www.mreclipse.com/SEphoto/SEphoto.html


The equipment:


No matter what camera you have, you MUST get a special SOLAR rated filter. Dark ND filters will NOT protect your camera. A lot of the solar filters are sold out, but it is still possible to get some at your favorite photography website like Adorama.com.

You will also need eye protection. Again, your favorite photography site like Adorama.com should have them. I happened to get my from another site and they are the paper version with the special Solar Rated shield.  You may look geeky, but you MUST protect your eyes. And I can’t stress enough, any other solution that does not meet the requirements of ISO 12312-2 for direct solar viewing should NOT be used.  There are many products out there and you need to verify that they meet this standard in order for you to look directly at the Sun during this eclipse.

Please verify this for yourself, but it seems if you are in the area of direct shadow from the full eclipse when the moon fully covers the sun, this is the short period of time that you can view the sun with the naked eye. You must wait a few seconds (say 15 to be safe) after the moon covers the sun to make sure you are in full darkness. And you must make note of how long the full eclipse will be for your location as you will need to put your eye protection back on before the sun peeks out the other side. (again maybe 15 secs before it is predicted to reappear to be safe)


What to do before the big day

Now that you have your location planned out, your Solar Filter and Eye protection, it is time to practice.

If you don’t want to start right out with practicing on the sun, practice taking pictures of the moon. Try out the various size lenses you have if you have that type of camera to get an idea of how big the sun will be in the image for that size lens.

After practicing on the moon, go ahead and practice on the sun with your filter attached and your eyewear on. Remember for the cameras with direct view finders such as DSLR’s, even with the filter on do not look through the viewfinder. The filter on your camera is designed to protect your camera and does not have the protection needed for your eyes.

Practice, practice, practice.

You want to get all the bugs worked out of your workflow or plan especially if you are going to change lenses during the event. You don’t want to get to the big day and miss the shot because you were fumbling with your camera during the short total eclipse period.

The one thing you can’t test for that I know of is the full eclipse. That is where the above exposure sheet will come in handy. But make sure to review, highlight, or do what ever you need to do to make note of what settings you will need during that time.

Not everyone is going to be in the total eclipse area, but a big majority of the United States will get to see at least a partial eclipse. This is the first total eclipse over the United States in some time so you don’t want to miss it.  You don’t have to stand out the entire time, but at least try to get out during the peak for your area.


Only slight plus on things is that if you totally mess up this time, take it as a learning experience for the next time a total solar eclipse comes to the United States in 2024.


And don’t forget while you’re taking pictures to stop and just take a moment and enjoy the experience. And have fun.


As soon as I get my own practice shots done, I’ll post them here so you may get an idea of what practice shots can look like.


So You are Thinking About Night Photography

So you are thinking about night photography and not sure if your camera can do it or what the settings you might use.


Most modern DSLR’s and Mirrorless cameras can take great pictures at night and of the stars, but I would recommend doing some testing before you go out on your first night of night photography shooting. The intent is to

  1. Let you know if your camera is suitable for night photography and
  2. To give you a starting point on the settings to use to get the best shot of the night sky or other night shot.

The steps used do not only apply to taking pictures of the sky but any night photography situation you are thinking about such as taking pictures of the city at night.


Night sky photography (AKA Astrophotography) is something that I’ve always wanted to and I needed to find out if my current camera was up to the job. On a recent night where there were no clouds in the sky I decided it was time to test my old trusty Nikon D80 to see if it was up to the job. So I headed outside with my tripod (A must if you are doing any low light photography), my Nikon D80 with the Nikkor 18-135 lens, and my wireless remote. The remote is not required, but it does make things a little faster to do. If you don’t have a remote trigger device be it wired or wireless, you can still get your night shots, but you will have to use the camera’s built-in timer function or you will get camera shake when you press down the shutter release button.


For my testing, I put my camera in manual mode, set the aperture (f-stop) as wide as my lens would let me at f3.5 with the lens at its widest setting of 18mm and set the exposure time to 30 secs, which is the longest my camera will go before switching to bulb mode. For the testing, you want the exposure time and f-stop fixed as you will be only adjusting the ISO setting for each shot. You will need to focus your camera to near infinity in order for the stars/night sky to be in focus. Do this manually by turning your focus ring all the way until it stops at infinity and turning it back just a little, or find a distant light and let your autofocus focus on that. After you have set your focus, you must turn off the autofocus feature of your lens or as soon as you go to click your shutter release your camera will just get stuck trying to focus and most likely never focus. On my Nikkor lens, I can turn off the autofocus on the lens. Your camera/lens will vary on how you turn auto focus off. It is your option whether or not to use the long exposure noise reduction option that your camera has. For my testing, I did use my camera’s long exposure noise reduction option. If you are not sure, take a series of pictures with it off, then another series with it on and compare.


Start out at the lowest ISO your camera has, in my case that was 100 and with each picture you take,  increase the ISO by one setting stop until you get to the highest your camera can do.  For my old trusty Nikon D80 that meant ISO’s of: 100, 125, 160, 200 250 320, 400, 500, 640, 800, 1000, 1250, 1600, HI 0.3, HI 0.7, HI 1.0. When it is all said and done, you should have a range of shots that vary just by the ISO. So I ended up with 16 shots.


This 5 of the images spread across the full 16 image range of images that I got during this test.


Click on each image to see the full version

At ISO 100
At ISO 100

At ISO 250
At ISO 250

At ISO 640
At ISO 640

At ISO 1600
At ISO 1600

At ISO Hi 1.0 Equivalent to 3200


After looking at my test shots it tells me a few things

  1. Due to light pollution and the low sensitivity of my sensor I”m not able to get the Milky Way with this camera. By today’s camera standards, my Nikon D80 has a very low sensitivity as its highest native setting was 1600. Most camera’s today got to at least 25,600.
  2. To get a decent amount of stars I need to use the higher ISO’s of my camera. At least 1600 if not the digitally enhanced HI settings.
  3. Even at the higher ISO’s my camera still cannot capture enough light for the faint stars. And even with noise reduction turned on, the pictures are still too noisy.


Just because I cannot capture the stars with my camera I did not give up on night photography as you may have seen in my previous posts from Light City Baltimore.


I’ve been able to get some great night shots in the city with my Nikon D80.  This is because the light it much brighter than the faint stars and my camera’s sensor is sensitive enough to get the light at this level.

Just keep in mind that you are doing this testing just as a starting point and to determine what is possible at the max aperture and timed exposure. Once you know this base, if it worked out for you, you can make adjustments when you change the exposure time and aperture. I won’t go into the formula here, but I’m sure you can find it on the internet.


For now, get out there and try some night photography shooting, I’m sure you will get some great pictures.


#nightphotography #Camera #Settings #testing #tips #night #recommendation


Educational, Government, Military, Group, Corporate discounts

Don’t forget to look for Educational, Government, Military, Group, or Corporate discounts when you’re buying software or hardware. No matter who the vendor is.


Most vendors I have come across have Educational, Government, Military, Group, or Corporate discounts available. Some do not make it easy to find on their websites while others, like Macphun, put it clearly on their front page.


The requirements to receive the discounts will vary from one vendor to another along with the method of proof of membership in the group. For example, B&H Photo does offer educational discounts, but has a stricter policy on who can receive the discount than others. Others are more flexible, and include a larger group that are eligible such as Faculty, Staff, and Students, instead of just Faculty and Students for educational institutions.


I would recommend that you make it your policy if you are a member of any educational institution, former or active Military, work for any part of the Government, or part of a larger company or association such as AAA, AARP, etc. to ask the company you are looking to buy from if they offer a discount to your group. When you ask, also make sure you find out what proof of group membership is required to receive the discount. If you do not see discounts mentioned directly on the website of the company, don’t be afraid to contact them via email or phone before you making your purchase and ask. The worst they can say is no  or you are not part of the qualifying group and you are no worse for the wear. It is better to ask before your buy and find out they do not offer any discount than to buy and find out later you could have gotten a better deal via one of these discounts.


Facebook Live – Now for everyone

You too can use Facebook Live

If you follow my Facebook page, hopefully you have viewed and subscribed to one of my live feeds on Facebook when I’m out and photographing and am able to do a live feed.

For awhile, Facebook had limited who could to do this to a small group of users via Facebook Mentions app and then released it to more users on in the Facebook app on iOS devices.

But now, Facebook Live is available to everyone on both iOS and Android devices. Currently only works on the mobile device app and not on the web browser version of Facebook.

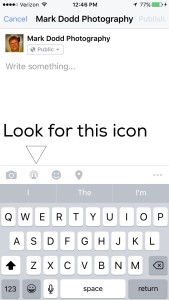
When you go to create a post there will be a new icon at the bottom of your post. See the below picture to see what it looks like and where it is on the screen.


IMG_4218


If you do not see this icon, chances are you need to update your Facebook app on your mobile device. Once you get the latest version of Facebook installed, this icon should appear.

If you have a Facebook Page or an Event Page, you can do live video there as well.

On the Facebook Page, when you click Publish you should see the icon at the bottom of the Publish Post just like above.


Now when you click the Facebook Live icon….

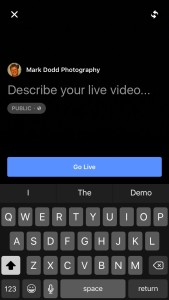
Your live video screen will open and prompt you to enter a short description of what your video is about. This description will show in the Facebook feed just above the video.

If this is your personal Facebook page, you can limit who will see the live video. To do this click on the “Public” icon and select one of the friends lists you have created to have the live feed just showing to those users. For Facebook Page published posts, it is “Public” only. I haven’t tested an Event page live feed yet, but I’m assuming it is limited to users associated with the event. Note: if you have selected a friends list, the next time you open the app it that friends list is still selected. So just remember that you may need to change who you are broadcasting to the next time you open the Facebook live feature.

IMG_4254

Your all set, go ahead and click “Go Live”. You will be given a 3 second countdown and then you are live.

IMG_4249


When you are live you will see the below. A few things to know when you are live. By default the app will use your rear camera (the one facing away from you), but you can switch for the forward facing camera by clicking the icon in the top right. Click it again to go back to the rear camera. Below your live video (which is black on the image below as I had my phone on my desk so the camera wasn’t showing anything) you will see who has joined your live feed and any comments or Facebook Reactions they have posted to your live feed.

Facebook has plans to add other features to the live feed screen. On my iOS Facebook app it seems that the filter feature is available now. Try it out to see if you have it by swiping left or right on the video section of the screen. The filters that are showing up for me are; Pop, Classical, Country, Funk, Acid, and the default of No Filter. Each gives your video a different look so give it a try to see if it is working on your Facebook Live feed and to see what each does.


IMG_4250


When you are ready to end your Facebook Live feed, click the finish button. After you click finish, you will see the “Ending Live Video” screen where you have a few seconds to cancel the “Ending Live Video” if you clicked it by mistake. (One other note, if you accidentally switch to another app or your devices home screen while doing a live feed, as long as you didn’t close the Facebook app, you can go right back to it as it would have automatically been paused. Just click the pause button to go back to being live)


IMG_4251


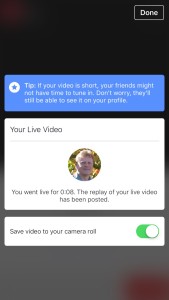
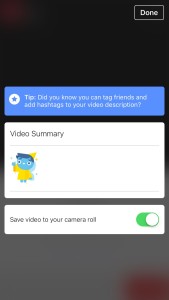
At the end of the live feed depending upon wither this was a personal Facebook page or a Facebook Page live feed you will see screens shown below that give you details about your live feed. For the Facebook Page live feed you will get stat information about live video.  Also at the bottom there is the option to save the live feed video to your device by activating the slider. It is off by default, but in my example images I have turned it on.


IMG_4247
Personal Page

IMG_4252
Mark Dodd Photography Page


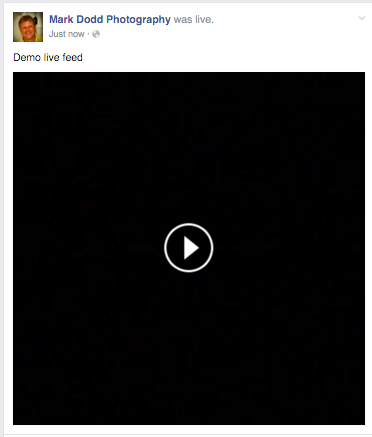
After clicking “Done” you will see your Facebook page and the live feed posting in your Facebook feed as shown below. This is also the same view folks will see in their Facebook feed when you are live. They just click the Play button to view it live when you are live or for playback when you have finished your live feed.


Screen Shot 2016-04-16 at 10.52.24 AM


Your followers can subscribe to your live feeds. I can’t say for Android devices, but when I’ve watch other users live feeds on my iOS and Mac, the subscribe button shows up at the end of the live feed that I’m watching. So at the end of your live feed remind your users to click the subscribe button so they can get notified when you do your next live feed.

Now go out there and have fun with this new feature of Facebook that is now available to everyone.

If you want to test things out before going live to your friends or the world there is a way. When you have clicked on the live feed and are on the screen to enter your description and the group you are broadcasting to, click “Public” and select “Only Me”. When you select “Only Me” the Facebook Live post will only show up in your Facebook feed. Once you have completed testing you might want to go to your Facebook Page and delete the testing live video post.

#facebooklive #livefeed #livevideo #facebook #broadcast #nowforeveryone


Things you do to get the shot

The things that you do to get that shot.

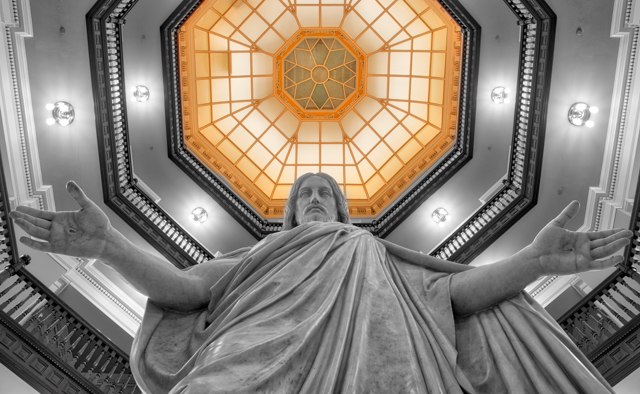
A few days ago I posted the following picture on my Facebook page (https://www.facebook.com/markdoddphotography/) BTW, if you like my photography, be sure to like this page.

20160307-DSC_3363_AuroraHDR_HDR

Although I did like it, something was not quite right. I had taken it on my tripod at the lowest height setting I could use. After someone commented on my Facebook page that they thought the hands were too close to the edge of the photo I realized that was what was bugging me about the photo.

Since I do not have a super wide-angle lens what was I going to do. My widest lens is a 18mm-135mm and that is the lens I used for this photo and was already at the widest setting of 18mm. I thought about it for a few days and decided I’d go back and just set the camera on the floor.

So yesterday I went back, set the camera on the floor and got ready to take a few photos. I’ve done this kinda thing before with sheer guesswork and multiple attempts. Take the photo, pick up the camera, check the image and repeat until I got what I was looking for. This takes forever and there is no sure way to know if I got the shot until I picked up my camera and took a look at what I just shot. Not to mention that you had to remember where the camera was when you picked it up so you knew where to place it when making an adjustment.

My camera does not have a flip screen or wi-fi, so I had no way to view the image live. Also it is inside and my camera doesn’t have a high enough ISO to let me hand hold it and get a noiseless photo without using a flash, which would destroy the look. What else was I going to do.

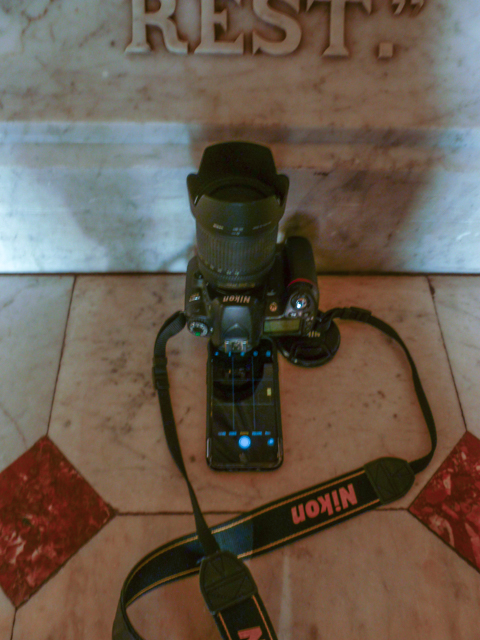
Then I started thinking. I have a cell phone, it has a forward facing camera so you will see on the screen what it is pointing to. Can I use this to see what I would see through the viewfinder. Turns out the answer is yes. I placed the camera on the floor, slide my cell phone under the viewfinder so the lens is lined up with the viewfinder, and low and behold, I could see on the screen what the viewfinder was showing.

Here is the picture of the setup on the floor at the base of the statue.

20160318-P1020408

I did have to use my lens cap to prop up the right side of my camera to make it level. So if you are going to do something like this, have a few small items that are the same thickness as your cell phone just in case you need to prop one side of you camera up like I did. I lucked out in that my lens cap was the same thickness as my cell phone

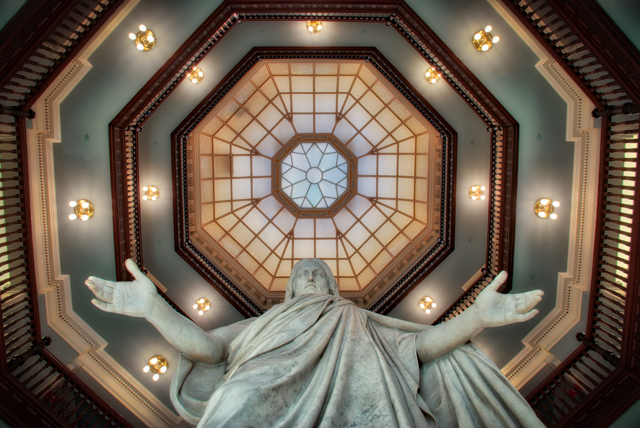
Here is of one of the photos I took with this setup. I think it turned out rather well with much more space between the hands and the edge of the frame and showing much more of the dome itself.

The Statue of Jesus in the Billings Building of Johns Hopkins Hospital

I do have a Black and White version that is colorized like the first photo on my store page so be sure to check that one out as well.

#tips #gettheshot #Hopkins #Baltimore


Subscription software, not a fan

Software by subscription…

I will start this by saying I will try to not mention products by name as I don’t want to single out any particular company as they are not the only ones doing this.

I recently had to decide wither or not to license some software I use for my photo editing by subscription license or try to get the standalone application license. I had been given access to the subscription license for one year but that year is about up. Now it is time to pay the full price of the subscription or get the standalone application or I lose my ability to use the software.

So I started to compare pricing. At first glance the subscription service didn’t look that bad. But then I started to think about things a bit. Ok so for the monthly subscription I can get the software I’m using plus several other features/software included in the “packaged” deal. Sounds pretty good right. Then I looked at the “packaged” deal and realized I’ll never use any of the other apps/services except the one program. So started looking to buy a license for just that application. The fun began as for this vendor it is not so easy to find the pricing for the standalone application. The site keep on redirecting me to the subscription service page anytime I clicked on links for pricing information. I eventually found the application pricing only to find out the discount that I qualified for in the past years is no longer an option and can now only get it at full retail pricing. I think this is the result of their push for the subscription model pricing. I fell they are trying to make the standalone app look less appealing and they were intentionally trying to steer me towards the subscription licensing versus getting the standalone app.

OK monthly fee versus one time purchase, which do I choose.  Next I though how long do I think I’m going to use this app. Well I’ve used it for a year now and have become dependent upon it so switching to something else would be a pain, so I will stick with this application and thus will be using it for sometime. Since I’m one of those folks that doesn’t always upgrade to the latest version of software as I don’t think I need the new features or it doesn’t work on my computer given that I have an older model computer, I am happy to just stick with and older version most of the time.

So decision time. With the monthly plan I would pay just as much as the standalone app price after about 14 months, then after that it would be costing me more. Given that I don’t know if a new version of this app will come out within the next year and that I may not upgrade to anyway, I didn’t see any benefit of the subscription service. I determined it would cost me more over time and that if I cancelled the subscription service I would not longer have access to the application.  That is one of the Big drawbacks to subscription based software I think. One reason I like the standalone application purchase better. For my example if I cancelled after 14 months, even though I would have paid the same as the standalone purchase, I would no longer be able to use the application if I had not purchased the standalone version

If it was just one application vendor I used software for that did this subscription service model I might be ok with it, but it seems more and more software vendors are going to this model.  Individually the prices are low, but when you have to buy a subscription each for application you use, that low monthly fee becomes a large monthly for all the applications.

I”m just hoping that these companies will not go to solely subscription based licensing as I think it will make the software be out of a lot of folks price range if they think about the total cost over time or it is going go get folks into more debt as it is so easy to just put that on a credit card and forget about it. I have a feeling that this particular vendor will be going that way as with every new upgrade of their suite of applications more and more of their applications have become available by subscription license only.

For business I think the subscription licensing makes sense as most will have up to date computers and would need to stay up to date on the applications. The subscription method would keep them up to date and would save them money over time versus the individual upgrades each time. But for the people who occasionally purchases a product it will end up costing them a lot over time. So I’m just not a fan of subscription based licensing.


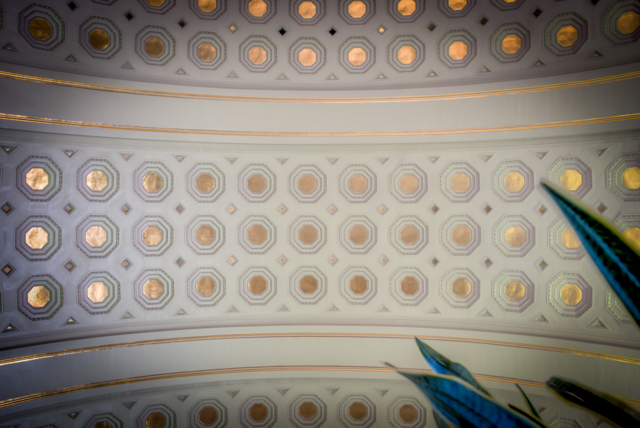
Union Station Ceiling of Gold


Union Station Ceiling of Gold

The view straight up of the ceiling in Union Station in Washington DC. I ended up putting my camera on a planter edge and thus the plant in the picture as tripods are not allowed in Union Station and there was not enough light to get a good picture if I hand-held my camera.

So consider that my tip of the day. Don’t be afraid to creative to get the picture. This planter was in the right spot for me to lay my camera down on to get the shot. Since my camera doesn’t have a flip screen nor built-in wifi it was sheer guesswork on getting things lined up so it took a few shots until I got it right. With newer cameras especially the one’s with wifi that will let you see the image on your phone this would have been much easier.

#Software #Subsciption #WashingtonDC #UnionStation #Train #Station #Amtrak


Made it through the storm

We survived and made it through the storm.

The weekend storm is now the largest single snowfall event on record for the Baltimore area. The only time we have had it worse was the back to back snow storms in 2010. What made it worse was that it was one right after the other, but still not the amount of snow we received this time.. Like many around us, I spent yesterday digging out for 6+ hours just to get my 100 feet of driveway clear and unbury the cars. We got lucky in that a neighbor’s son who had a plow on his truck cleared our spur of the road and another neighbor had already cleared the main private road out to the county road.

Thank goodness I bought a snow blower a few years back or I think I would still be out there and very sore instead of just a little sore and stiff. I’m still recovering from all the exercise today though with sore muscle that haven’t seen that much use in a while. Despite all the work it takes to clear it, it was a beautiful sight to see everything covered in snow there for a while.

The beauty of the snow

20160124-DSC_3252

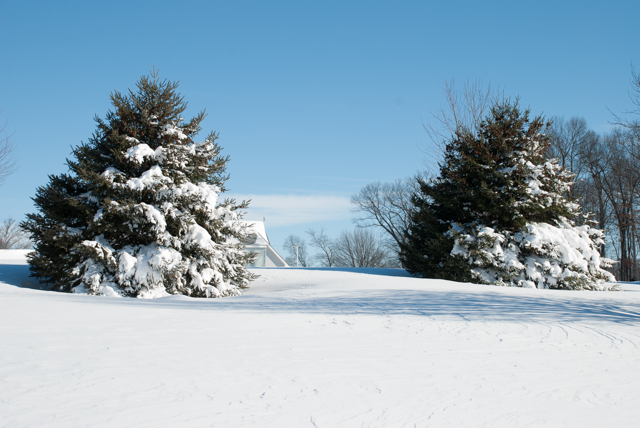
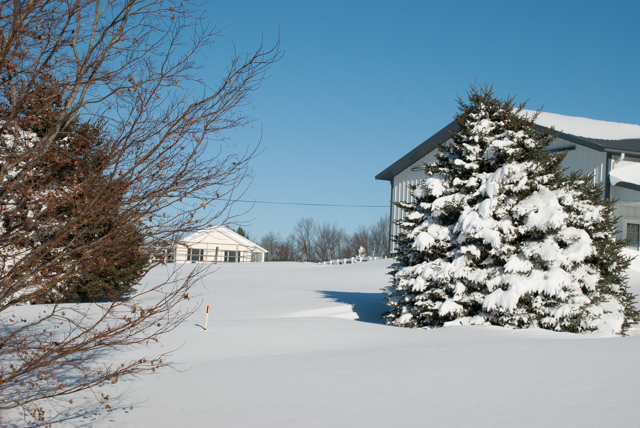
The scene outside out house before we got to clearing the road. Yes our road is buried in there between the stake and the pine trees. Now that things are cleared and all the snow is piled up it doesn’t look so pretty.

I was hoping to get another series of photos with the snow on the trees, but by the time we got things cleared out enough the snow had fallen off the trees. It was just way to deep for me to walk in before so I wasn’t able to get the entire tree line as I’ve done in the past like I had hoped to. Also, the snow was only on the south side of the trees this time. During the storm the high winds from the north kept the snow from sticking to the north side of the trees.

A tip when taking pictures of snow

I learned over time from various web sources that when you are photographing snow you should slightly overexpose your photo. The thinking behind it make sense to me in that all the snow glare is making your sensor think it is much brighter than it actually is and thus it is setting your f-stop higher that you want it to be, an Aperture of f11 instead of f8 for example. Since the f-stop is higher it is letting is less light and as a result you will get dull looking snow instead of the crisp white snow that you see. For the above picture I over exposed my photo by 1 f-stop. It is straight out of the camera untouched.

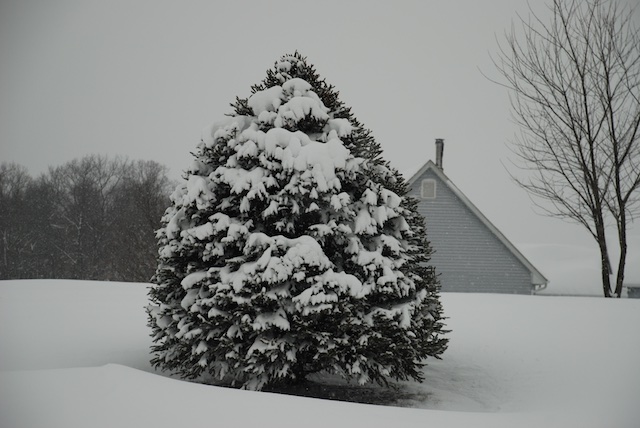
Here is a photo I took back during the 2010 storm before I figured out this tip. And you can see how dull it looks. Granted it was cloudy in this picture but it was still very bright outside at the time.

DSC_0173 - 2010-02-06 at 14-48-03

#Storm #Snow #Snowmagedon #WinterStormJonas