Ace Rental Auckland Airport, New Zealand Review

First I have to say this one is a little overdue as I thought I had already posted this, but had not. So forgive the lateness.

After extensive online searching for the best price on a rental vehicle on my trip to New Zealand last May, I settled on renting from Ace Rental, Airport branch.

We booked very early in that I booked the People mover (Van for those in the US) back in Oct when our trip wasn’t until the following May and got the best rate out of all the rental agencies I could find for Auckland.

Booking online we easy and convenient. The only confusion I had been when I got the confirmation it showed as “Tourism Enterprises Ltd trading as “Ace Rental Cars””.

When we arrived in Auckland we called the Airport branch from their courtesy phone at the airport and they arrived in their shuttle van with a trailer for our luggage within 10 mins.

At the branch, the staff were friendly and got us squared away with the paperwork rather quickly. We did opt for the full insurance which I think made the paperwork go much quicker.

Now here is where I had the only problems.

After getting the paperwork done, they walked us out to check out the vehicle and walked up to a car, this was not what we had reserved as we had reserved a People mover (Van for those in the US)

I showed them my booking receipt and they apologized and we walked back in while they got the People mover ready.  We went out and checked out the vehicle, put our luggage in and drove off.  This vehicle had a problem right from the start in that at about 50K it had a horrible engine noise and no acceleration and then the check engine light came on.  We immediately took it back and after waiting another 10-15 minutes they got us another People mover for us and we drove off into the city without issues this time.

We were very happy with this vehicle and had no issues with it while on our trip. At the time of our booking, they offered AA (AAA for those in the US) roadside assistance, if you needed it, but we did not, so I cannot speak to that. But most Auto Associations have very good service.

I would recommend getting the full insurance, as many roads outside of the city have loose stone and can easily chip the windshield, which did happened in our case. That and you do not have to deal with the large hold on you card (what they call Excess and Bond)

When we returned the People mover it only took a few minutes to check the vehicle in and the shuttle to take us to the departure terminal was already there, so we when right off to the terminal.

Despite the minor problems, I would still recommend this company due to the value for the service.  The next closest competitor was at least $300 more and that was a similar service to Ace.  If you went with the name brand agencies I would have spent over $1000 more.

Also, these are late-model vehicles with higher mileage than you would find at a name brand agency, but that is how they keep their costs down. Since they are late-model vehicles, the might get lower gas mileage/kilometers that a newer vehicle, but I in our case the gas consumption was about the same as a newer model and thus didn’t justify paying the higher rental fee. The vehicles all seemed well cleaned and in good shape as I checked out several of the cars while we were waiting for People mover to become ready.

I would take a copy of your rental confirmation with you and do one thing that I didn’t, call or email the branch you are renting from the day before just to confirm your reservation. This way they should have the right vehicle ready for you when you arrive.

A People Mover rented from the Auckland Airport Ace Rental
Entrance to Ace Rental on Manu Tapu Drive
Entrance to Ace Rental on Manu Tapu Drive, just a few Kilometers from the Airport.

An alternative to Hotels/Motels when you travel

As I’ve posted before, I recently took a trip to New Zealand. Although this is where I’m from originally and still have several relatives that are living there, on this trip, I had to find lodgings in places where I no longer have relatives that I could stay with.

I wanted other options to standard Hotel/Motel, so I started my internet search. I ended up using a site called Holiday Houses New Zealand (https://www.holidayhouses.co.nz/). Through this site I was able to find either an entire home or a home with a guest apartment. Staying in these lodgings gave you the feeling that you were living in a house instead of just a room somewhere. It even ended up being less expensive than staying at a local Hotel/Motel.

There seems someone is renting out their house or apartment for almost any place you want to go to in New Zealand. Some areas have more offerings that others, so check the area you are looking to visit and book early.

On this trip, I ended up in 3 such homes.

In Rotorua we stayed at a home with a separate apartment on the first floor for the guests called Matipo Haven. This house was relatively new and had all the amenities you could ask for in your stay. The home is owned by a retired couple who were very inviting and helpful to us while we were staying with them. It is just outside Rotorua on the south side, but is convent to all the local tourist attractions.

Early morning before as we were getting ready to head out for our activities that day


In Te Aroha we stayed at an old farm-house that had been renovated called Aroha View. They even had a hot tub, which we were not able to take advantage of due to our late arrival. This place is in the Central Waikato region halfway between Hamilton and the Coromandel Peninsula. It is not to far from Hobbiton (about 45mins) if that is one of your places on your list to visit.

We arrived pretty late the night we stayed, so we did not have a chance to meet the owners of this house. Despite that, they made sure we were able to get in and were very helpful over the phone even with our spotty cell coverage at the time.

Aroha View
Getting ready to head out in the morning as the fog was lifting at Aroha View


In Dargaville we stayed at a home with a guest apartment attached called Leslie Lodge. The house is located just out-of-town on the north side of town on Rt 12. It is just 5 min to the center of Dargaville and is convent to many of the areas attractions and beaches. The owners are a wonderful retired couple who know the area well.

The quest apartment is the section that the deck steps lead up to
The guest apartment is the section that the deck steps lead up to


All the places I stayed at on this trip offered everything we needed from tea/coffee, towels, and sheets, blankets, clothes washer, and more.  Not all places do, so make sure to read the description before you book. Not only did we get a “home” environment to stay in, the owners who lived on premises were able to give us many “local” insights and tips for the areas we visited. In our case, we got some great recommendations on where to eat and some free locations to visit that were just as good as the paid tourist sites. One of the other advantages of this type of lodging is that you can cook your own food if you wish as they do offer kitchen ware for cooking and eating. On this trip we just ate breakfast there and decided to take in the local food for lunch and dinner.

If you are looking for a different experience on your travels in New Zealand I would check out the Holiday Homes website (https://www.holidayhouses.co.nz/) to find your home while away from home. If not traveling to New Zealand, I would see if there is a similar service offered for the area you are traveling to as I think it is well worth it.


My Travel Photo Time Stamp Fiasco

This is a little story about my recent trip to New Zealand and my wish to have all my photos correctly time stamped to the local time zone and how that went terribly wrong and how I went about fixing the issue. A little background to start. My home timezone is New York EDT (GMT-5). On this trip I had 3 camera’s with me, My trusty iPhone, My Nikon D80, and My Panasonic point and shoot. My photo software is Apple’s Aperture, but I’m sure this applies to most other photo editing software where you have the option to modify your photo’s timezone information.

Mistake number 1:

I didn’t think to check the date and time settings on my camera’s before I left.

I have to admit it is one of those things you set once and forget about it. Since I really haven’t gone anywhere with all three camera’s at once, I didn’t notice that each had a slightly different time.

Mistake number 2:

Not checking the date and time settings on my cameras when I was in a new time zone.

After arriving in San Francisco I didn’t change the timezone on any of my cameras, so they were still set to EDT for date and time. Since my cameras were not set for the local time zone the date/time on my photos were off by 3 hours. My iPhone was the exception and as mentioned in my other post iPhone Photos and Times Zones my iPhone did record the correct date and time, but not the time zone. This caused problems later when importing.

Mistake number 3:

Changing the timezone of the photos when I imported into Aperture

After getting to New Zealand and settling in for a day it was time to start importing photos into Aperture so I could free up my memory cards. It was at this time I realized I had not changed the date/time/timezone settings on any of my camera’s. I noticed the option to change the timezone when I imported the pictures, so I said to myself, ok this is an easy fix and choose that option when I imported the photos I took in San Francisco. For the most part this was ok until I saw I had selected a few photo’s that I took in Baltimore before I left and a few of the photos I had taken in New Zealand  as they were on the same memory card as the San Francisco photos.

Mistake number 4:

Changing the timezone settings on the camera mid trip.

At this time I had the brilliant idea of, ok, lets avoid changing the timezone when importing by changing the timezone on all my cameras. I promptly went into the settings on each camera and changed the timezone to GMT+12 for New Zealand. Thinking all is good, I continued on my merry way taking pictures and importing. During my next import I didn’t choose the option to change the timezone on importing and I thought all the pictures had the GMT+12 time zone. I didn’t realize that I had a few memory cards with pictures on them that I had taken before I changed the timezone settings. So now I had a series of photos that were part EDT and part GMT+12.  When sorted by filename in Aperture, they showed up in the correct order, but when sorted by Date/Time, things were all out of whack. I don’t think I had changed my computer’s date and time settings yet either and that put another wrinkle in the import process when it came to my iPhone photos which had the right date and time, but were getting the wrong timezone. See my other post iPhone Photos and Times Zones

Mistake number 5:

Not checking that each camera had the same date and time.

I was lucky that they had the same date, but after importing and checking the camera’s settings after the fact I noticed that my Panasonic camera’s time was 20 mins off of what my Nikon was set to. And my iPhone, which had the correct time, was a few minutes ahead of my Nikon. This made an interesting sort when sorted by date and time in Aperture.  I would find photos all out of sequence when I had taken several shots at the same location with each camera.

So how did I go about fixing the issue.

When I got home to Baltimore I started looking at my library and was all in a panic after seeing all the photos out-of-order. If they had all been taken on one camera I think I would have just said, oh well, and left the mixed dates and times alone and just sorted by filename, but alas I had used 3 cameras all of which had their own naming convention.

I started searching the web for solutions and came across the fact that Aperture has a Batch Change option. I’ve used this option before for making batch changes to other metadata, but I hadn’t noticed there was the option to change the Time Zone as well.

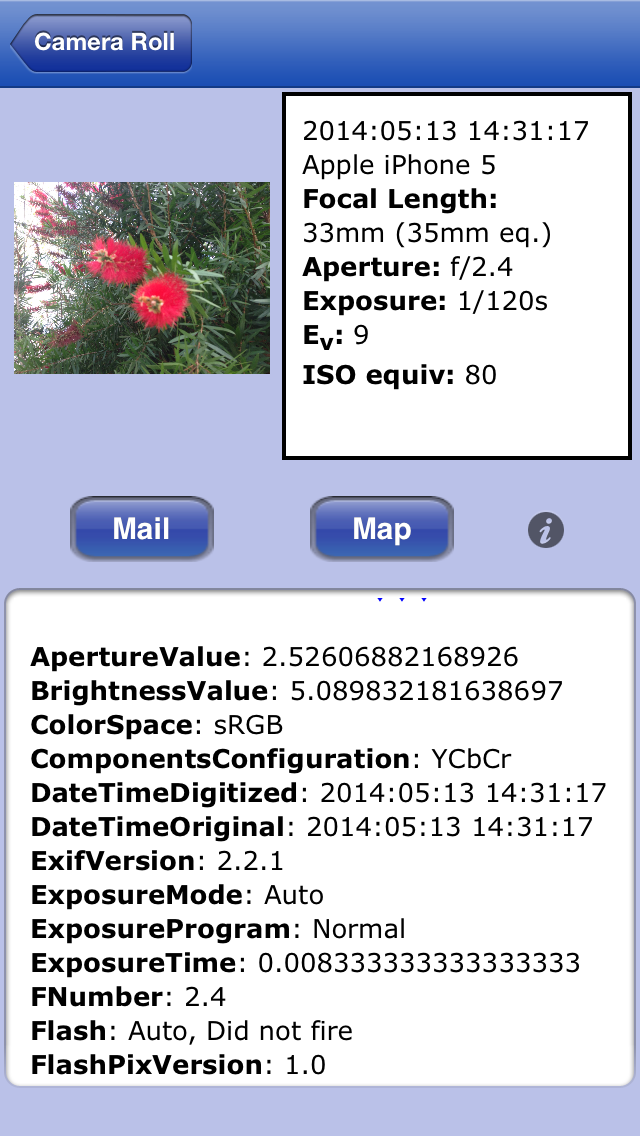
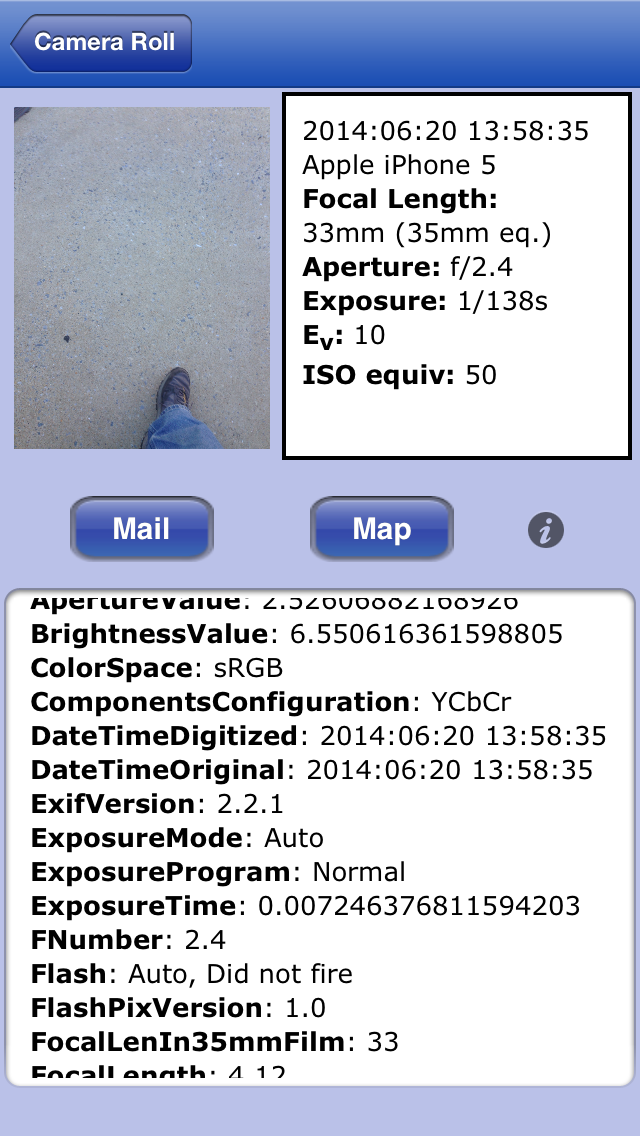
I started the process by correcting the timezone information for my iPhone photos as after realizing that the date and time were correct, but the time zone was not, I was able to use these as a reference for changing the dates of the other files. That and along with my travel log of where I was and when. I did this by selecting the pictures I took in San Francisco using my iPhone and choosing the batch change options. In the batch change options, select Adjust Time Zone and then choose the intended time zone for both the Camera’s timezone and the Actual time zone. This will set the time zone to the intended time zone without adjusting the date and time. So, if the time is 2014:06:20 13:58:35 EDT and the correct time zone is PDT, I would select PDT for the Camera’s timezone and the Actual time zone to give the corrected entry at 2014:06:20 13:58:35 PDT

I repeated the process for the iPhone photos taken in New Zealand except I used GMT +12.

The iPhone was the easy part. Next on to one of my other cameras pictures which were all over the place. I would sort the photos by date and look for an iPhoto photo that was in the same location as one of the other camera photos that needed correction. I could then figure out what the time/date offset was and make the adjustments needed. I eventually figured out that if I set the camera time to GMT and then selected GMT – or + for what the offset would be for the time zone of where the photo was taken, it was easy to get the date and time right.  Then I just had to correct the timezone to be the GMT+12 for New Zealand or PDT for San Francisco. I would again, set the the Camera’s timezone and the Actual time zone to be the same for the time zone I needed. Either PDT or GMT+12

It has taken me about 3 weeks of on and off work at night to get things straight, but I’ve been able to fix most of my issues.  The only issue I’m not going to discuss fixing is the time differences between cameras as except for a few images, most were still grouped together after correcting the time zone issue.  If I did, Aperture does have the option to let you can manually set the date and time so I would just adjust the minutes in this case.

The take away.

If you have multiple camera’s, make sure all are set to the same timezone wither it be your home timezone or the foreign timezone. And maybe more importantly, check the date and time down to the sec on each camera if you can do that. If you don’t feel like messing with your camera’s time zone settings, just make sure that the date and time is the same and correct on each camera.

If you don’t feel like messing with your camera date and time settings, make sure you have it set right for you home timezone and just leave it. You can take care of changing the time zones in your photo software.

do not recommend changing the timezone information when you import the pictures into your computer, especially if you have multiple cameras on your trip. Your software should let you can change the timezone of the picture after importing and this is what I recommend as it is much easier to keep track of what needs to be changed.. I know Aperture does as shown above

iPhone Photos and Time Zones

I recently took a trip where I crossed several times zones and the international date line and here is what I observed how my iPhone 5 recorded dates and times with respect to the different places and time zones.

My trip involved 3 locations with 3 different times zones and one location being across the international date line. I assumed that with time zone support on that my iPhone would record not only the current date, but the time zone of where the photo was taken.  I found out differently after I uploaded them to my computer during my trip. I discovered this due to My Travel Photo Time Stamp Fiasco

I became curious when I noted that all of my iPhone photos had the EDT time zone indicated when I imported them into Aperture.

First, I’ve determined that the iPhone with iOS 7 only records the current date and time and not the time zone information. I confirmed this by using a free Exif application on my iPhone. The picture to the left is an example of a picture I took while in the GMT +12 time zone. Note that it does not show a time zone, but only a DateTime stamp. When I imported this photo into my Aperture library it showed with the date and time zone information of

2014:05:13 14:31:17 EDT

So where did the time zone information come from?


photo for Time Zone TestI did a little experimenting by using my existing photos and creating a few after setting the time zone on my phone. This is a sample photo that I took at 16:58 EDT where I had changed the time zone to PDT. It recorded the time at 13:58 which was the correct time for the PDT time zone, but again there is no sign of the time zone.  When I imported the photo into my Aperture library, Aperture shows the time as

2014:06:20 13:58:35 EDT

So why does it show as EDT time zone in Aperture even though it recorded it as the correct time for the PDT time zone?


Since the iPhone is not recording a time zone with the picture and Aperture displays time zone information on picture, Aperture adds the EDT time zone when a picture is imported. So why did it pick the EDT time zone?  Aperture uses the computer’s time zone information when adding the time zone to the photo and in this case, the time zone of this computer is EDT.

You can test this by importing a photo from your iPhone, then go and change the time zone of your computer and import the same photo again. The photo will show up with two different time zones but the same date and time stamp.

So how do you correct the time zone information in Aperture? Aperture has a batch change option under the meta data menu. Here is the important part. Since it recorded the correct date and time for the photo, (there is an exception to this, see below) you do not want to change the date and time, just the time zone.  You only want to change the time zone to the correct time zone.  In the batch change options, select Adjust Time Zone and then choose the intended time zone for both the Camera’s time zone and the Actual time zone. This will set the time zone to the intended time zone without adjusting the date and time. So in my example, if the time is 2014:06:20 13:58:35 EDT and the correct time zone should be PDT, I would select PDT for the Camera’s time zone and the Actual time zone to give the corrected entry at 2014:06:20 13:58:35 PDT

The exception to the rule is when your camera has airplane mode turned while taking a picture. Since this disables several functions including cellular connections where your phone would have learned its new time zone, you phone keeps the date, time, and time zone it had when you enabled airplane mode .  This occurred to me when I had imported a few photos where I took a few obligatory selfies on the airplane,  a few shots out of the plane’s window, and 2 pictures I took after I landed before I turned off the airplane mode.

In my case I was going from San Francisco (time zone PDT) to New Zealand (GMT+12) and crossing the International Date line. Upon arriving in New Zealand I took a few pictures of the inside of the airport before I remembered to turn off airplane mode. The date and time showed up as 2014:05:12 10:11:38 and when I imported into Aperture it added the time zone of EDT.

In this instance I had to correct with the Batch Change and actually change the time zone from Camera’s time Zone of PDT to Actual Time Zone of GMT+12. I knew I had to choose PDT as that is the time zone of San Francisco, where I had just come from and I knew based upon the date and time that was still using PDT for the time zone. Especially since it said 5/12 as I knew I would lose that day while crossing the International Date line as I arrived in New Zealand on the 13th.

So to summarize.

  • The iPhone does NOT include the time zone in the date and time stamp of any photo taken with your iPhone, but does use the local data and time (unless your phone is in Airplane mode)
  • When importing your photos, Aperture adds your current computer’s time zone to the picture’s date and time stamp
  • Except for pictures taken with Airplane mode on, you would use Batch Change and change the time zone by selecting the time zone for where you took the picture for both the Camera and Actual time zone’s

Plans were a bust

Well I had all the intentions in the world of making at least one post a day to this blog while on was on my trip in New Zealand. Well that turned out to be a total bust. Didn’t even get to one post let alone one a day.

The plans fell apart almost immediately after arriving in New Zealand.  I ended up spending the first 2 days spending time with relatives and figured time spent with them was much more important that writing a post here, especially since I have not seen some of them in, ahem, 20+ years.

During the rest of my trip I just didn’t seem to have the time, between driving from place to place, visiting the sights at each place, needing time to sleep, and sometimes, no internet or at least very slow internet.

The other part of my big plan was to have a picture a day posted along with a description of the area I was in or the activities and sites I had seen that day.  This became a bust as well as I was not always able to upload my photos from my memory card to computer everyday and when I did I had the brilliant idea of correcting the timestamps as I imported. This turned out to be a very bad idea. I plan on making another post related to this on what my problem was, how I fixed it after a few weeks, and what I would recommend on how to avoid the whole timestamp mix up in the first place. So keep an eye out for that.

So now that I’m back in home and have fixed my photo timestamp issues to the best of my ability, I plan on creating some of those posts that I had planned to.  Not sure if I’m going to back date them or not just yet.  My thoughts at the moment are that I will as I would like them to fall into the correct timeline for when the post should have been posted, but then again, is it better to just post on the day I actually create the post and mention the date the photo or content refers to?  Have some time to think about that until I actually create the posts, but if anyone out there has some thoughts, feel free to post a comment as I’m interested in knowing your thoughts. So let me know, Backdate or Not.