Click on the link to get all the details on what is included and information about the series.
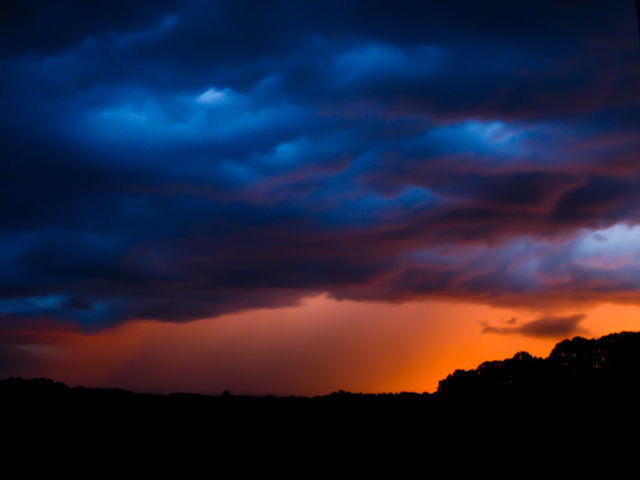
The Color before the Storm
I haven’t had much of a chance to go out and take pictures recently and I have yet to process those that I have taken. This one I did get to take quickly near my home.
There was a storm rolling in with very dark and gloomy clouds right around sunset. I didn’t think we would get any sunset, but then I looked out and saw this. Ran to get the camera and get a quick snapshot before it disappeared.
Sometimes things don’t always go as planned, but that doesn’t mean the pictures you end up with are not worth keeping.
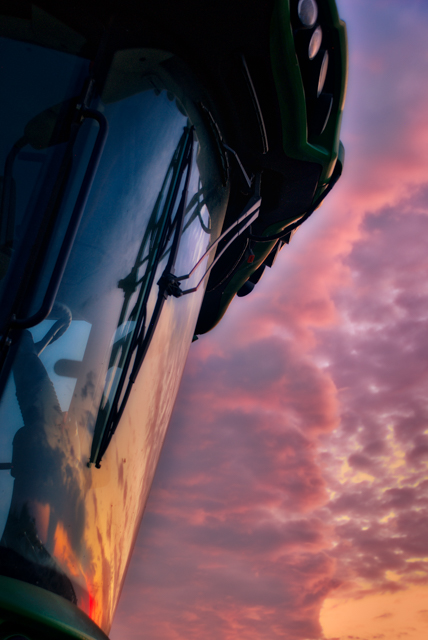
Recently I went out on two different days with hope to take some breathtaking sunset photography.
On the first trip, I just wanted to get the sunset on a recently cut farmers field. This turned out to be a dud as far as my plans went. First, the sunset did not look like it was going to be that great so I didn’t head out to the location. About 10 mins after I had planned on leaving, the sun broke through the clouds and the start of a spectacular sunset was on its way.
I got into the car and rush to the location I was thinking about. Even though it was only a few miles from where I was, by the time I got there and got my camera equipment setup, the best part of the sunset had gone. I was bummed, but I was still determined to get some photos while I was there so it would not be a wasted trip.
I looked around and saw that the farmer’s combine was parked nearby and that the cab’s window was facing in the direction of what was left of the sunset. I immediately ran over and set up my tripod and started taking pictures. I usually try to do HDR photo’s which require taking a series of shots at different exposures which get combined later on my computer with Aurora HDR Pro to produce the final picture.
Here is one of the pictures I ended up capturing. It was not the red sky and the farm field that I had planned on, but I made the best of what was available to me.
Sunset Reflection in the cab of a combine after a long day on the job.
This shot was a result of the HDR process by combining the 3 shots shot at -2,0,+2 exposures and using Aurora HDR Pro to process the combined shots into the final you see above.
Now on to another trip where my HDR Process failed me
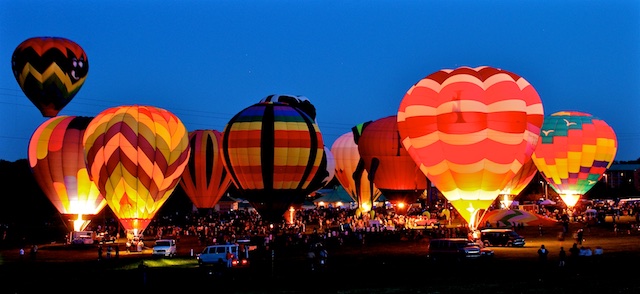
A recent purchase of a 30.000″ x 13.750″ print of Balloon Glow by a buyer from Baltimore, MD reminded me that the Maryland Preakness Hot Air Balloon Festival is just around the corner.
First, I want to thank them for their purchase and I’m always grateful to anyone for purchasing my work.
The above picture is the one they selected. A wide shot of the Balloon Glow that they hold on 2 nights of the festival.
If you have never been to the Preakness Hot Air Balloon Festival I would recommend going. It is a fun event and is family-friendly. You can get Balloon rides and walk inside one of the balloons. If you can only go one day, I would go on one of the days that they do the Balloon Glow, pictured above. It is rather amazing to see all the Balloons lit up. Be aware that when they are all firing their flames to illuminate their balloon it is rather loud
Here is a small selection of photographs I’ve taken at this festival in earlier years.
Went down for the last night of the Light City Festival at the Inner Harbor yesterday to redo some shots that I was not happy with and to get a few art pieces that I had missed somehow.
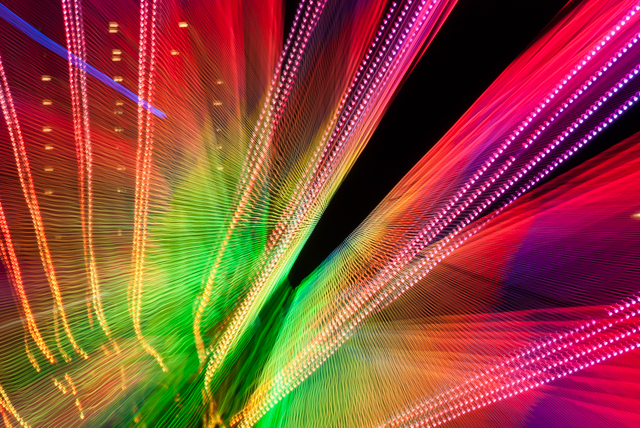
Although I did like the picture I got of the “Voyage” (the floating lights), I felt getting a few more shots when it was darker of just the lights would be better. I also went back to the Peacock to get some more shots when it was darker and was hoping with less people. Alas, it was as popular as before, but I think I got a few good shots in between all the folks walking up to the work who were there to admire it as well. I will say the “Voyage” and the “Peacock” were my two favorite pieces of the show. The Laser Lotus may have been another one, but the two days I was in the area it didn’t seem to be working.
I had gone back down to also get the “The Pool” as I had somehow missed that exhibit entirely last time even though I would have had to walk right passed them to get to the metro on my way home the other night. I guess I was just too tired to notice at that point.
Here are a few unedited shots I got of each. I took a ton of photos of each as I knew it was the last chance to get them. It is going to make it tough to narrow it down to the best of each.
The Peacock
The Peacock a 20 foot tall animatronics bird with illuminated wings up to 40 feet
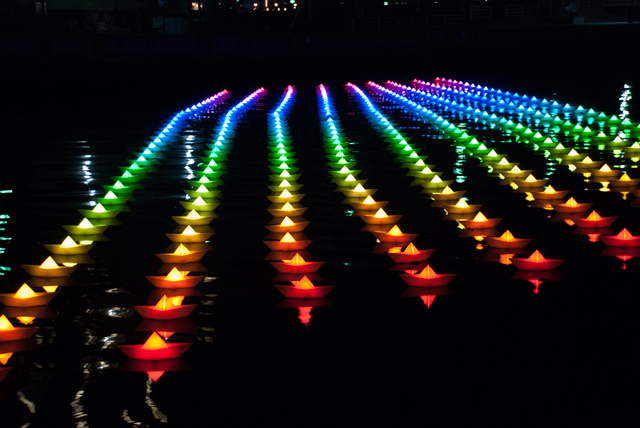
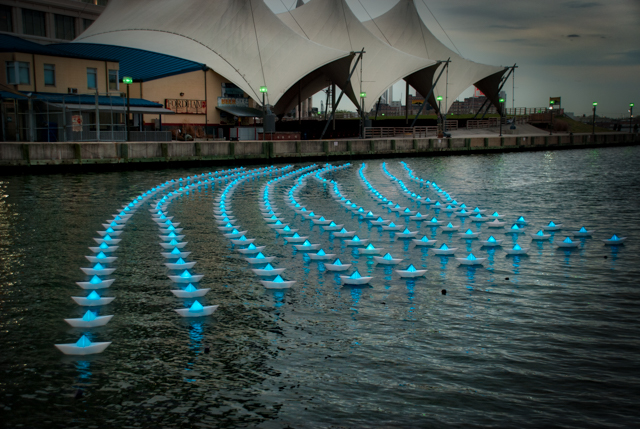
The Voyage
Voyage presented by Brown Advisory: Aether & Hemera (United Kingdom) 300 “paper boats” with rainbow-colored lights that were manipulated by festival-goers.
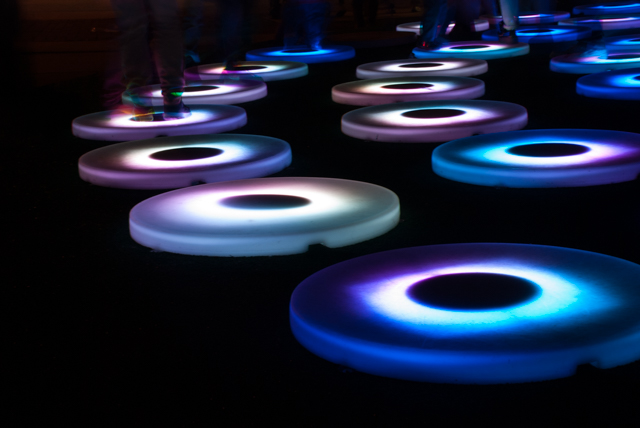
The Pool
Colorful concentric circles that changed colors as folks stepped on them
Spent another night at the Inner Harbor for the Light City Festival last night.
This time I started over at Inner Harbor East and walked back towards the Inner Harbor. This was the side that had more of the individual artists displays. Out of the two halves that I saw this is definitely the more interesting side.
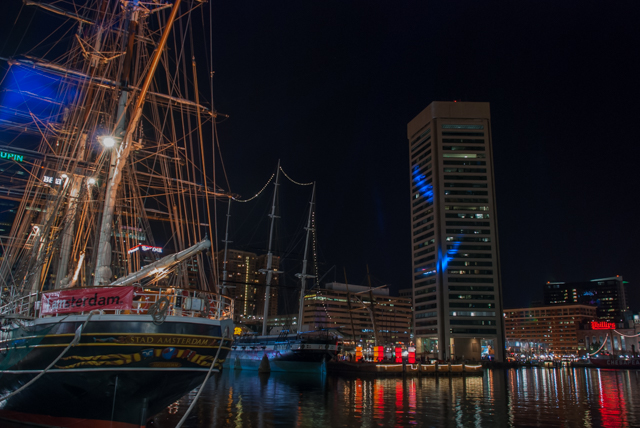
I did miss getting the tall ship Stad Amsterdam as it had left the Inner Harbor and was a bit disappointed about that. That just stresses the point of, if you see something you want to take a picture of take it as it might not be there tomorrow. As in my case, I got the stern of the ship and meant to get it from the bow last night, but it had left.
The show goes on until Sunday night (4/3/16) and it is worth the visit. If you are limited on time I would start on the East side and make your way back towards the Inner Harbor.
The Big Cube
The Beacon: The Barnycz Group (Baltimore, MD) A landmark multi-story cube built from hundreds of LED panels. The Beacon will engage, inform, and entertain festival-goers with Light City images.
The Floating Lights
Voyage presented by Brown Advisory: Aether & Hemera (United Kingdom) 300 “paper boats” with rainbow-colored lights that are manipulated by festival-goers.
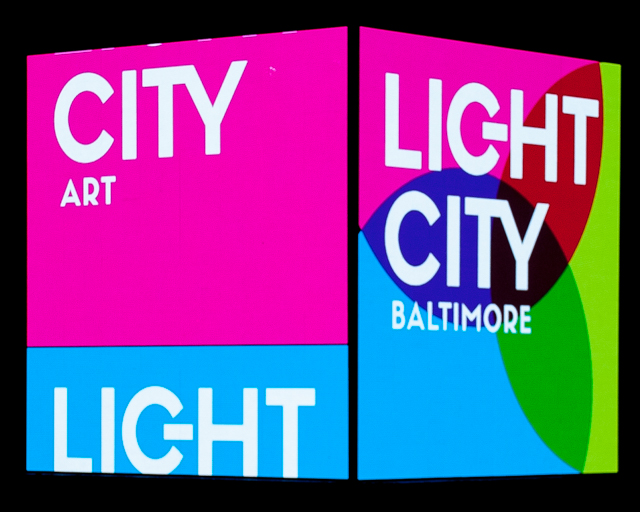
Spent the good part of Tuesday night in downtown Baltimore at the Light City Baltimore event. This is just one day of many I plan on being down there for this event. Most of the displays are around the Inner Harbor in Baltimore, but some are also spread around the city. See the Light City Baltimore website at lightcity.org/ for details of what is where.
This first night I started out on Federal Hill to get the wide view of downtown and then slowly made my way up towards the Light St Pavilion. This is not even 1/2 way around the event. I took my time and in many situations, as I had to be very patient to get the shot I wanted. I will say I didn’t see as many photographers as I expected, but then again I haven’t seen all the displays yet and some of the more interesting displays are in areas I will go to on Thursday.
I’ve got many pictures to go through and process, but here is just a sampling of first the two I’ve processed quickly for you.
The Ferris Wheel
The Ferris when by Rash Field and the Maryland Science Center. My first attempt at doing this kind of photo. I think it turned out pretty well.
I had a pretty productive day shooting the Cherry Blossoms around the Tidal Basin in Washington DC. Spend pretty much the entire morning down there and walked the entire basin.
It is taking a bit longer to edit the photos as after coming home I discovered I must have dirt on my sensor or somewhere in the camera. So it is taking me a bit longer to edit them as I have to clean the dirt spots of each picture. Although there is software out there that can remove the spots it is always best to make sure your camera is clean before your trip. In my case I did check out the sensor and cleaned the lens before this trip, but either the dust is very small on the sensor or I had dirt on my ND filter. I’m going to re clean everything and see if I can figure it out and do some test shots to see if I got it clean.
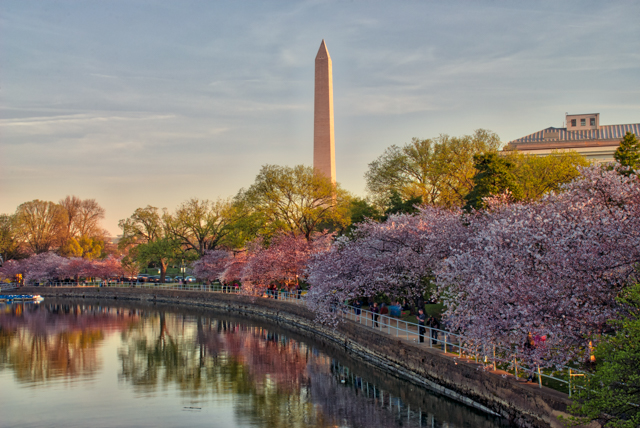
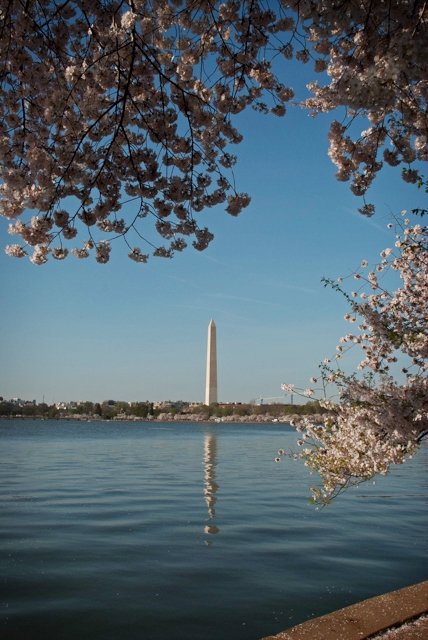
Washington Monument and the Cherry Trees
The Cherry Trees along the Tidal Pool with the Washington Monument in the background.
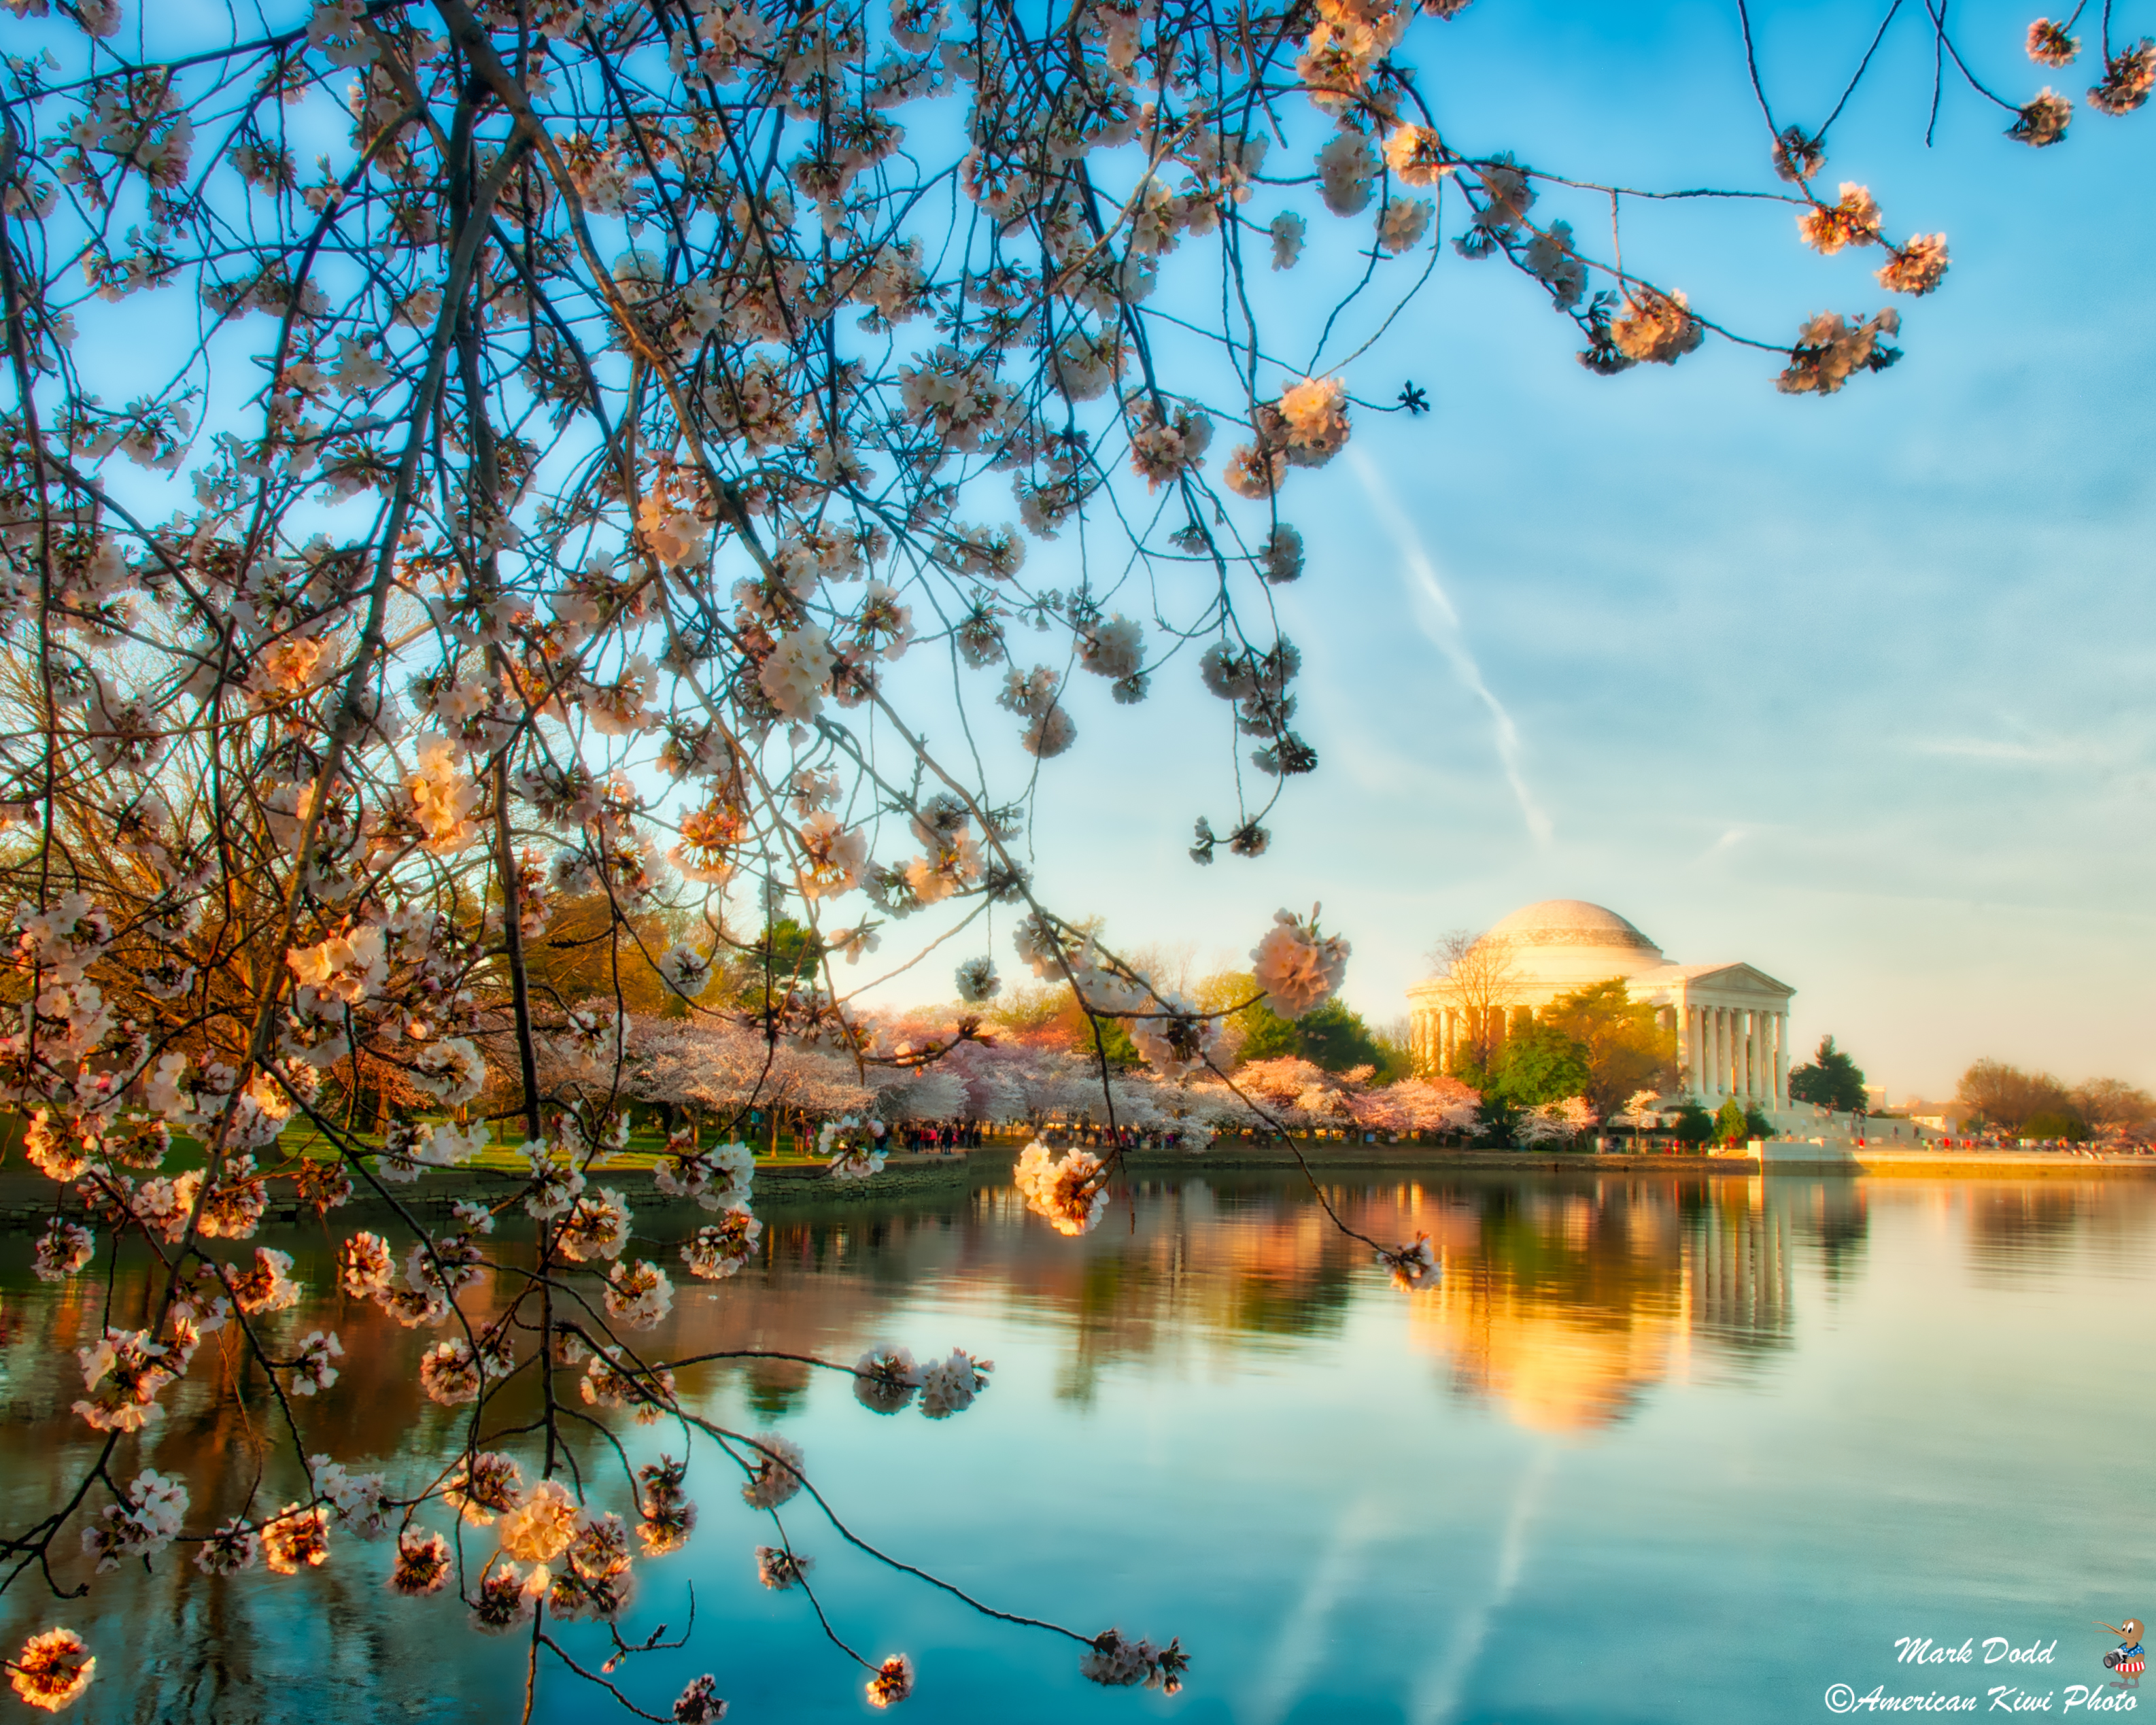
One of the first shots I got during the day and turned out as one of the better shots I got during the day. It is from the bridge on the way to the Jefferson Memorial.
Making the trip down to Washington DC to take pictures of the Cherry Trees that are now in full bloom along the Tidal Basin.
This year I’m attempting to arrive before Sunrise, but we will see how that goes. For those who know me, getting up at 4am to make the trip is the middle of the night for me. So this might be a bit rough in the morning and will have a nice supply of coffee to keep me away.
If you want to see what I get this year, check back here or visit my Facebook page at https://www.facebook.com/markdoddphotography/ Be sure to like the Facebook page so you can get notified of the posted pictures and any live videos that I do.
If you are planning on going here are a few tips.
Arrive around sunrise if you can to avoid the crowds. But even this early there will be people there.
Take public transportation. Parking is already tight on a normal day, but even more so during this time, so public transportation is the best way to get there.
If taking Metro, the Smithsonian is about the closest stop to the Tidal Basin.
Weekdays are best, but the weekend is crazy packed with folks enjoying the trees.
Washington Monument through the Cherry Trees
This is one of the photos I took on my trip last year. It was a weekday trip, but I didn’t get down there until the afternoon. Even though it was a weekday, people were everywhere enjoying the view.
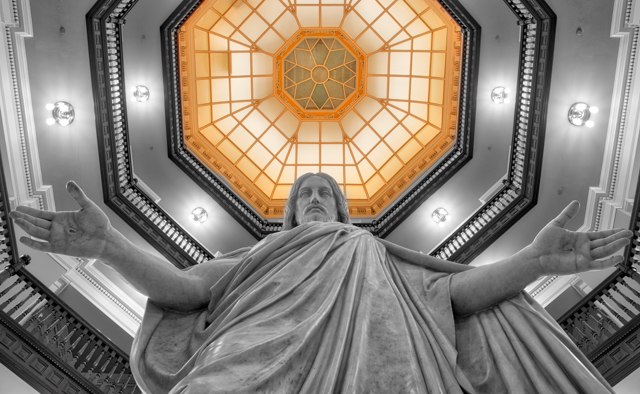
Although I did like it, something was not quite right. I had taken it on my tripod at the lowest height setting I could use. After someone commented on my Facebook page that they thought the hands were too close to the edge of the photo I realized that was what was bugging me about the photo.
Since I do not have a super wide-angle lens what was I going to do. My widest lens is a 18mm-135mm and that is the lens I used for this photo and was already at the widest setting of 18mm. I thought about it for a few days and decided I’d go back and just set the camera on the floor.
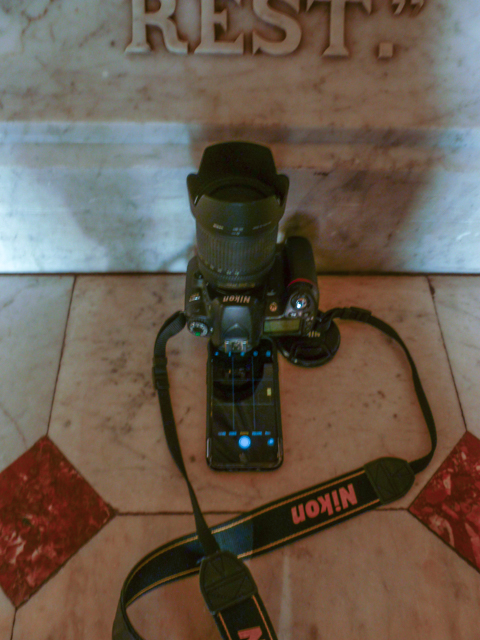
So yesterday I went back, set the camera on the floor and got ready to take a few photos. I’ve done this kinda thing before with sheer guesswork and multiple attempts. Take the photo, pick up the camera, check the image and repeat until I got what I was looking for. This takes forever and there is no sure way to know if I got the shot until I picked up my camera and took a look at what I just shot. Not to mention that you had to remember where the camera was when you picked it up so you knew where to place it when making an adjustment.
My camera does not have a flip screen or wi-fi, so I had no way to view the image live. Also it is inside and my camera doesn’t have a high enough ISO to let me hand hold it and get a noiseless photo without using a flash, which would destroy the look. What else was I going to do.
Then I started thinking. I have a cell phone, it has a forward facing camera so you will see on the screen what it is pointing to. Can I use this to see what I would see through the viewfinder. Turns out the answer is yes. I placed the camera on the floor, slide my cell phone under the viewfinder so the lens is lined up with the viewfinder, and low and behold, I could see on the screen what the viewfinder was showing.
Here is the picture of the setup on the floor at the base of the statue.
I did have to use my lens cap to prop up the right side of my camera to make it level. So if you are going to do something like this, have a few small items that are the same thickness as your cell phone just in case you need to prop one side of you camera up like I did. I lucked out in that my lens cap was the same thickness as my cell phone
Here is of one of the photos I took with this setup. I think it turned out rather well with much more space between the hands and the edge of the frame and showing much more of the dome itself.
The Statue of Jesus in the Billings Building of Johns Hopkins Hospital
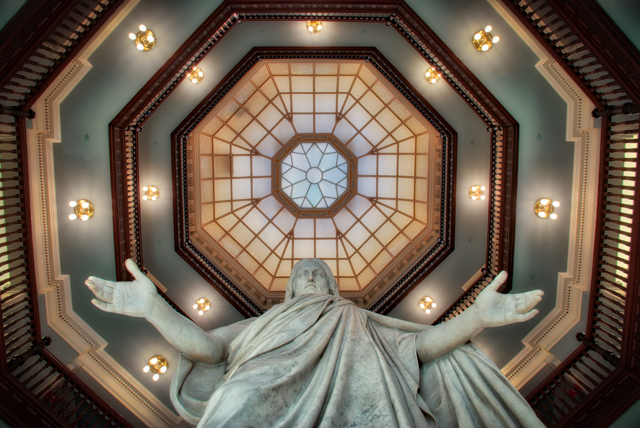
I do have a Black and White version that is colorized like the first photo on my store page so be sure to check that one out as well.
My primary photo editor is now Aurora HDR that was developed by Trey Ratcliff of Stuck in Customs in collaboration with Macphun. If you do HDR photography I would say this is the best program to use for that.
Macphun makes a whole series of photography apps in addition to Aurora HDR. When I’ve taken a single photo instead of the multiple brackets that you need for HDR photography I sometimes use the Macphun apps of Intensify and Noiseless CK to do select edits, but they do have an entire suite that you may like.
Check out the complete line of Macphun software. Click on their logo below to visit their site.
And don’t forget you can get 10% off any of their products using my coupon code
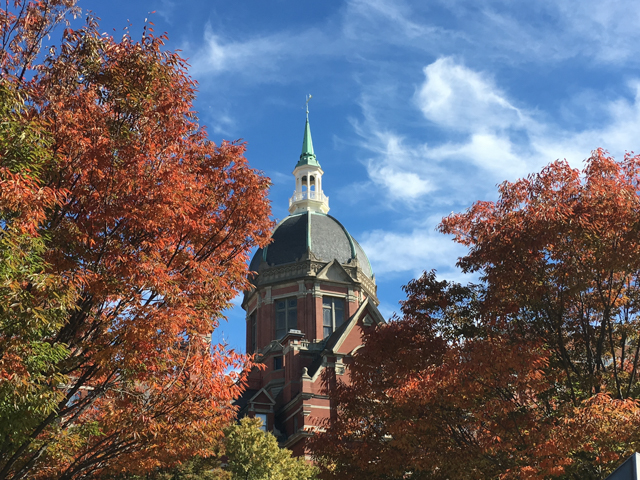
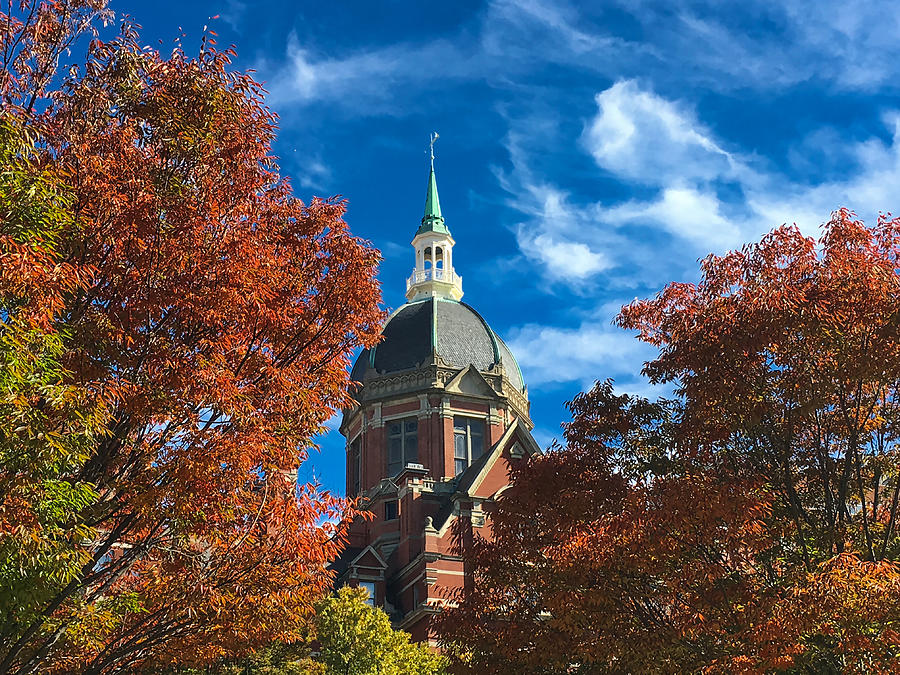
A recent photo edited with Aurora HDR
This is my photo of the Johns Hopkins Hospital Billings Building also know as the Dome.
I know it needed a little punch added to it so I brought it into Aurora HDR, the Macphun/StuckinCustoms application. Click the slider to compare the 2 photos of the original iPhone image and the edited image from Aurora HDR. It didn’t need much adjustment, but you see the possibilities especially in the sky.