
For a long time now I’ve been trying to find the right program to catalog all my photography ever since my first photo editor with a Catalog (Apple’s Aperture) was no more.
I have finally found the affordable solution that I have been looking for.
Before I get into the program itself, I just wanted to give a few things that I was looking for in a cataloging program.
- It must be able to hold all of my photography and videos. All the various file formats that I have from Nikon, Fujifilm, and since I’m an Apple person, the Apple file formats like HEIC.
- It must be quick to load when viewing the catalog. I don’t want to open the application and have to wait minutes for the catalog to process and open to view
- It must be Mac OS compatible since that is what my computer platform of choice is.
- It must do keywords, Albums, and view and edit metadata of the image as I do my best to keyword and organize my images.
- Rate, label, and flag images as needed
- My images can be accessed by any of the photo editors that I use
- It must create a backup of my catalog. You always need a backup
- A way to view my photos on a Map. I’m a visual person, so I want a way to look at where my photos where visually
- Has to be affordable
I’ve tried other platforms to solve my problem from various photo editing vendors that have a catalog as part of their application, but none fully solved my problem. They all suffered from varying degrees of slowness as I opened the programs it opened my library of nearly 300,000 images. A few programs were not bad on opening and were bearable, but then when I would close the program, there was a long delay while it processed the catalog.
The only programs that said they would do what I was looking for were designed for large business use and cost thousands of $

And then I was introduced to Mylio Photos
Mylio has filled all my requests and more.
In my view, Mylio is first a cataloging application, but it does also have editing capabilities. So not only can you use it to catalog your photography, but you can also use it to edit your as well photos (more on that later)
I will say that I will primarily focus on the Cataloging portion of the program since that is my primary interest in this application. I’ll cover the editing and other non-cataloging features in detail in a future post.
Since this will be a long post, let me put a link to their website now so you can refer to it later for more details. Psst, there is a free level too…. See info on that and how you can get a special 25% discount on Mylio Photos at the bottom of this post. (You must use the special link at the bottom of this post to get the 25% and this is a limited-time promotion)
For those who are visual, check out my Youtube video as I’ll cover most of the same content in this post in that video.
Features of the cataloging function of Mylio Photos
Features that I was looking for in a cataloging application for my photography
- File Formats – Check. Covers my Raw format camera and my Apple formats (This program reads most if not all image formats along with document formats) Click HERE to see the supported formats
- Keywords, Album, and metadata – Check. Note that Metadata editing is limited to the most commonly used fields. And you can show more EXIF data about the image. You can also add and edit an IPTC card that has your information and copyright information. There is a toggle to turn on viewing this for an image
- Rate, label, and flag – Check.
- Quick to load – Check.
- Available for Mac OS – Check. (the program is cross-platform and device. Covers the most common devices) Click HERE to see the platforms supported and system requirements
- My images can be accessed by any of the photo editors that I use – Check
- Backup catalog- Check. Backs up the catalog and images.
- Has a Map view – Check.
- Is affordable – Check
Features that I call bonus features as they go above and beyond what I was originally looking for.
- Can sync images from my phone. Before I was exporting the images from my phone or Photos on my Mac to import into my catalog. It works for both iOS and Android
- The ability to see your entire library on all devices. With my other solutions, I could see only what I shared. It was never the entire library and it wasn’t across all my devices at the same time. There has been many a time I wanted to show someone an image, but it wasn’t one of the images I was syncing or had in my iCloud Library.
- Can create multiple backups of my catalog and full-resolution copies of the images in that catalog via Vaults to multiple locations.
- Can import from Facebook, Flickr, and Google Photos directly into your catalog
- Import from Hard Drives or other storage media
- and of course import from Camera and SD cards.
- Your source files do not have to all be in one location. Although I am merging mine into one large external drive, you don’t have to, you can have your images wherever and on whatever media the Mylio can see and add those images to my catalog. You will have all the functionality of Mylio even with offline media as long as your vaults are available.
- You can add documents to your catalog. So Mylio not only covers your photos it can be used for documents as well. Although I do not plan to use this feature
- OCR. Mylio will index all text in the document and in your photos so you can search for any text shown.
There are many many features in this latest Release of Mylio Photos and I’m new to the program so I’m sure I’m not listing them all.
The overview of Mylio Photo
This is your cataloging application. Use this to catalog your images and then use your favorite Editor or Mylio to edit your photos. Let the apps do what they do best.
Supports almost all modern devices as Mylio devices so you can view, edit and access all your images on all your devices and have those changes quickly show up on your other devices.
Built-in backup of all your images via Vaults. The more Vaults the better the backup
You can edit, search, keyword, and organize how you like, this program is very flexible and you can organize more than just photos.
There is a lot to this program, so I’m going to have follow-up posts to cover smaller chunks at a time. But here are a few highlights.
One important fact, this is NOT a Cloud service. All your photos live on your devices. You do have the option to add a cloud service as a Vault, but it is not required.
And for those who have a slower internet connection, all the syncing is peer to peer, meaning if all your devices are on your home network, the syncing between your devices occurs just on your home network. No uploading via the internet and back down to your devices.
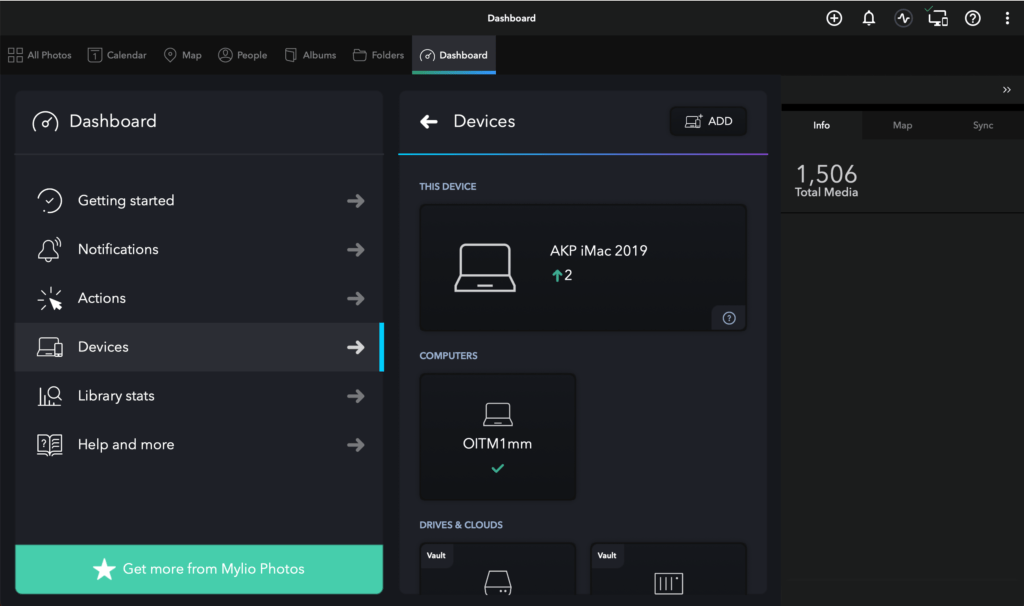
The Mylio Dashboard.
The Dashboard is the entry view to give you an overview of your Mylio environment to see how everything is doing.
Calendar view
At first, you may say, calendar view, ok nothing too special there. But unlike other programs that can show you events based upon searched dates, this one shows it to you on a calendar. Not only does it do that, but if you connect it to your computer’s calendar, it can look up events on your calendar and match it up with the dates of your phots and show that event on your calendar.

Example Tile showing and Event 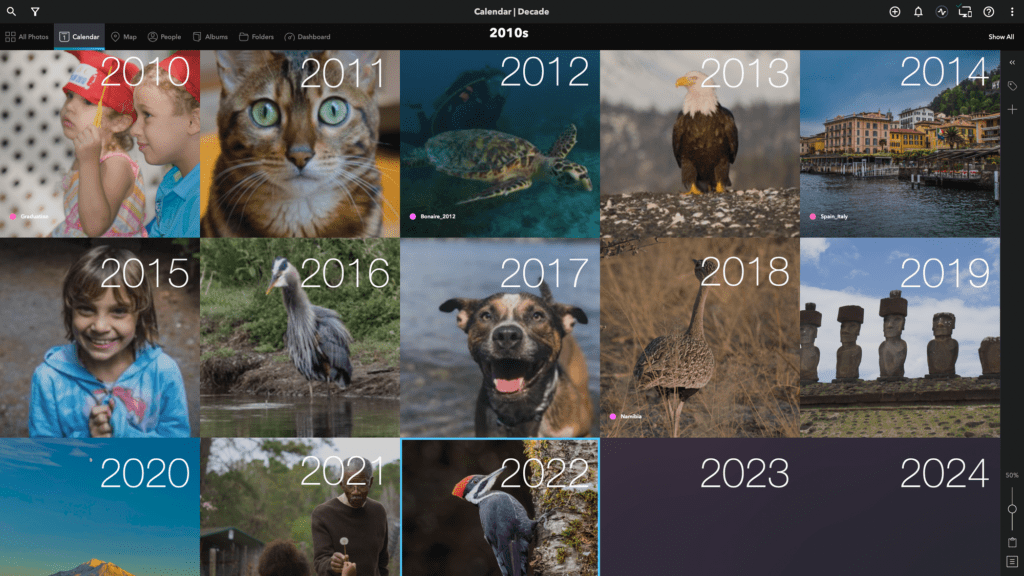
Calendar viewed by years
In the example above from Washington DC, I was viewing the calendar view in the year view, and in the year 2016, I went to the Cherry Blossom Festival. My calendar entry for that was labeled “Cherry Blossom Peek in DC”. So Mylio saw the dates of my connected calendar and added the event automatically. Now if I click on that event in the calendar view, it takes me to all the photos that I took at the Cherry Blossom Festival that year.
Other ways to view your images
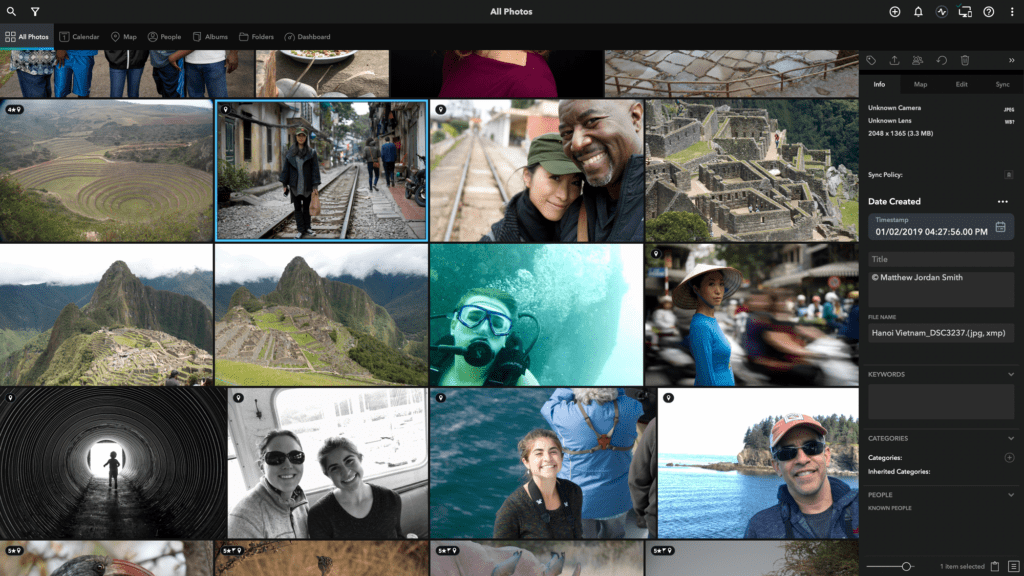
All Photos View 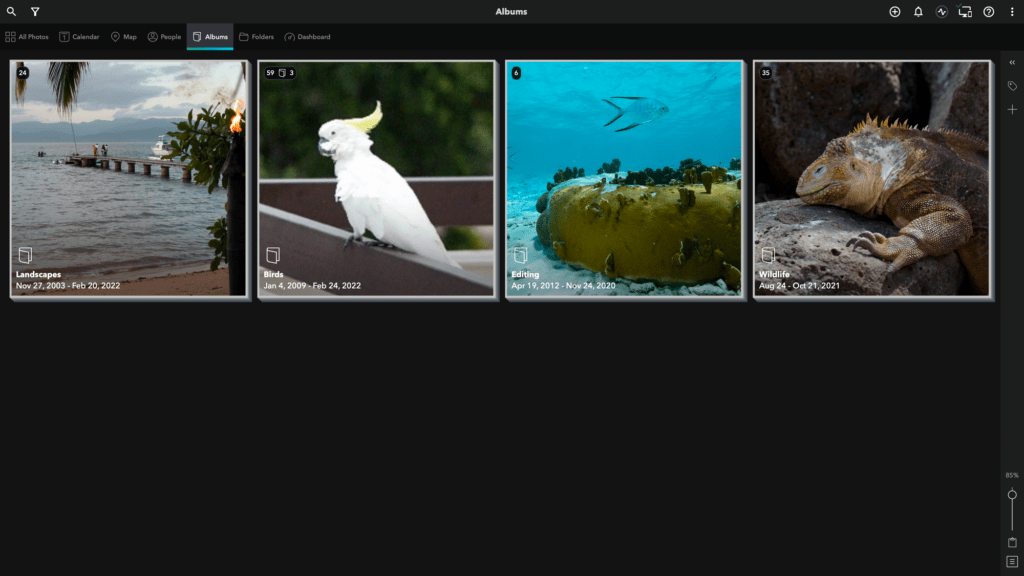
Album View 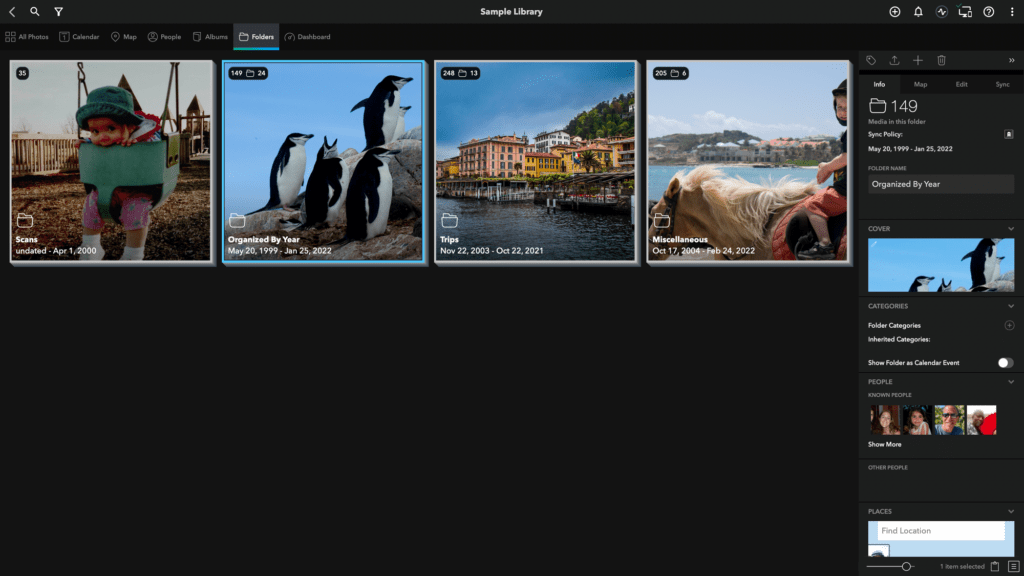
Folder View 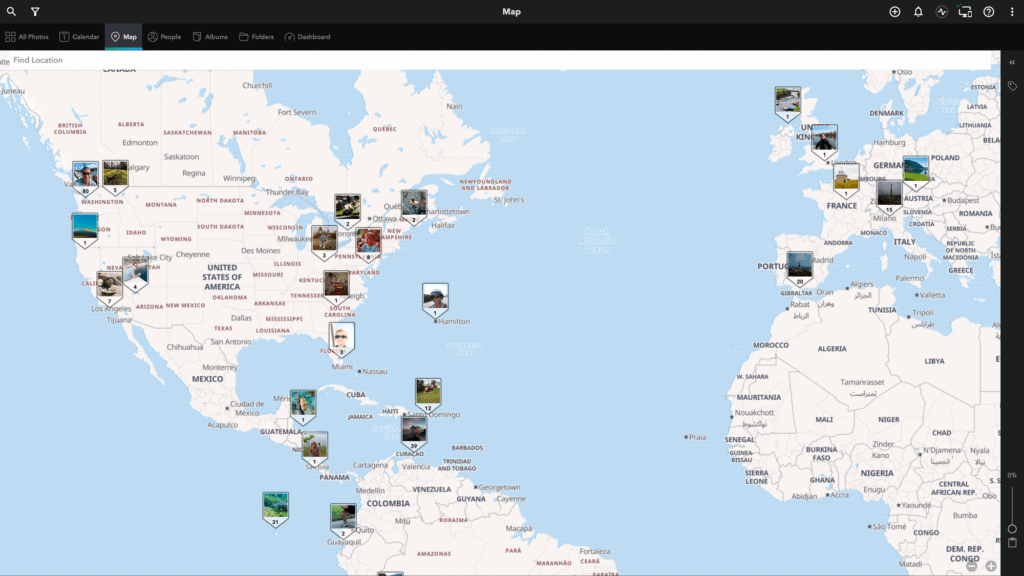
Map View 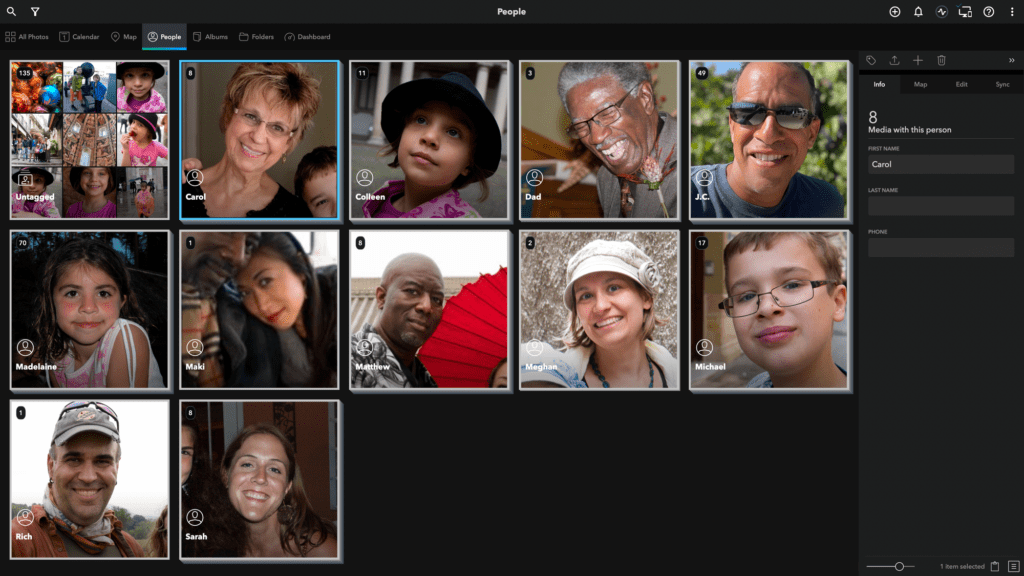
People View
Overview of each of the views above
- All Photos view – This shows you all the photos in your Mylio Library and lets you easily scroll through and view the photos in your library
- Album View – Let’s you group your photos into any grouping you like. There is also a Category option not shown. Albums are for more specific groupings, Categories are for more general. An example would be The category of Travel and then have albums for each individual trip.
- Folder View – This shows the folder structure of your Mylio Library. This is the same folder structure you see in your OS if you viewed it via your operating system.
- Map View – For any Geotagged images you have in your library, you can view them on a Map of the world to see where you have taken your photos. For images that are currently not geotagged, it is very easy in the program to add that information
- People View – View images that have been tagged with the faces of people. Mylio does an excellent job of finding people in your images and letting you identify them. If you have identified a person in around 4-5 images, that is enough for Mylio to search the rest of your images and find that person in more of your images. You will then be able to confirm that they are the right person.
- Not Shown, the Search panel. Mylio has a search bar where you can search for images in a variety of ways.
More details on each of these views in a future posting.
Photo details
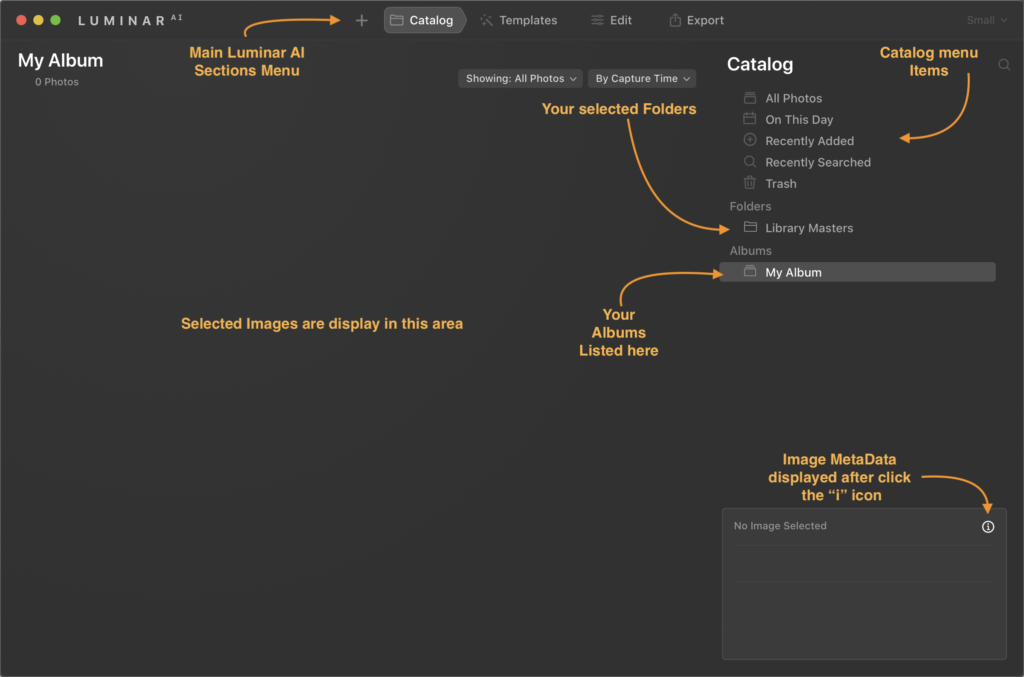
Of course, we all like to see some details of each photo. Mylio shows this when you select an image and click on the info panel for that image. You can see the technical details about the image such as the camera and lens used, the filename, the date created, and more metadata. Some of which you can add your own information or modify what exists.
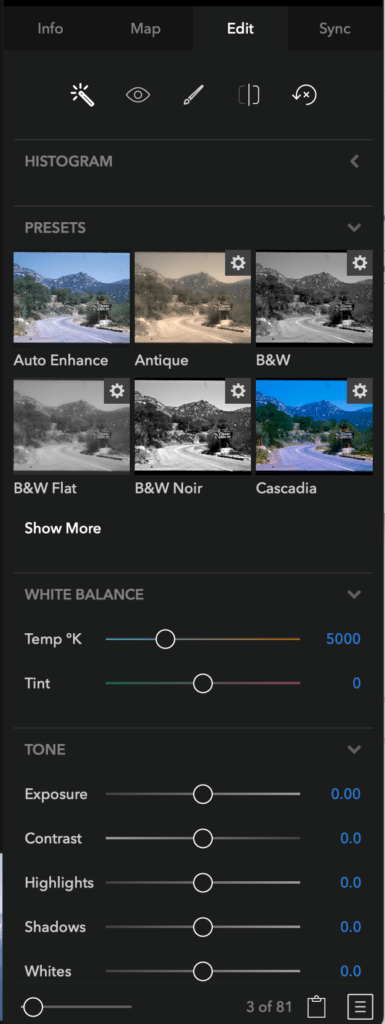
Editing
Mylio has basic editing features as part of the application and here is a sample of the options. I will go into detail on editing in a future post.
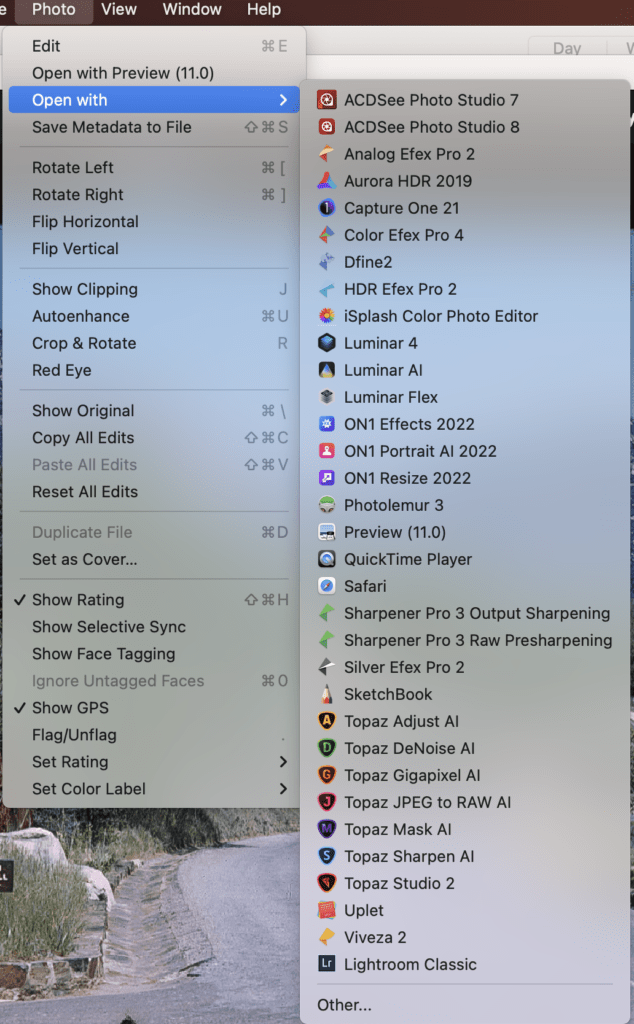
The Open with Option
This is one feature I’m going to use a lot as I prefer to use photo editors that do a bit more than what Mylio currently can do. Here is an example of some of the applications you can open from within Mylio, and it will send the image that you had selected when you choose the Open with to that application.
Now, what Mylio is not good for in my opinion
Printing
Mylio is not the program I would use for printing as the printing options are limited. For starters, it appears that the max print size is 8 x 10. and it is basic printing options. More advanced printing options such as color profile etc are not included.
For the average home user, this might be enough, but I print much larger prints for my Art Shows, so this is a no go for me and I’ll continue to use my other programs for printing my artwork.
For editing it’s ok, but I’ll still be using other programs as mentioned above.
The program has the basic editing tools that most folks would want to use including presets (you can create your own), an auto adjustment, white balance, Tones, red-eye removal, a basic brush tool, and a details tool. You can also compare your before and after images and see the histogram. It does edit RAW files for those supported cameras and if you take RAW and jpg and have both images, you can select which one you edit. But for more advanced editing you will need an external program.
How to get Mylio and a special discount
Mylio is free to download and use on up to 3 devices and 5000 photos. So you can always download it and try it out for free.
After that, there is an unlimited number of devices and an unlimited number of photos subscription that you can purchase for a monthly or yearly fee.
As part of their Mylio Photos 22 release, they are offering those who requested it on their website a 20% discount on their subscription. But since you are one of my readers, I can offer you a 25% discount on your subscription purchase. I’m assuming this extra discount they are letting affiliates provide is for a limited time, but they have not said one way or the other. So if you are considering it, purchase your subscription at the discounted rate. There is a 30-day money-back guarantee.
Click the button below and you will automatically receive your 25% discount.
The offer expires on June 22nd, 2022 (has been extended), but you can take advantage of the offer now and change your mind with the 30-day money-back guarantee if needed. But I don’t think you will as this is a great app
Note: you must use the button above to get access to the special 25% off offer. After creating your login, or logging in to your account after using the above link you should see the following button on your account page.

If you do not because you either refresh the page or when to another link, come back to this page and click the link again to see the 25% button on your account.
When you click the button you will be sent to the account signup page to create your Mylio Account if you do not have one, or you can sign in to your existing account. By creating an account you can download the software and try it in the free mode for up to 5000 images and 3 devices. If you decide to use the free version for a while, you can still come back to my page and click the 25% discount button above, and then log in to your account to get the discount when you decide to upgrade.
Or if you just want to learn more, click the button below but don’t forget to use the above button to create your account and get your discount.
Mylio courses
Mylio has started generating courses for their app. As of this writing, they have an excellent Mylio Photos Fundamentals course that covers everything you need to know to get started with Mylio. Click the button below to go to their course site.
My quick thoughts on this program
I’ll admit, I’m a fan of this program and look forward to using it to organize my mixed-up photography storage and get it all organized and easily accessible from all my devices. I like it so much that I’m breaking my usual rule of not purchasing subscription software. I fully believe the price to be worth it to be well organized, easily searchable, viewable, and modifiable on all my devices. I think you will like it too.
Disclaimer: I may affiliate with a product mentioned on this page. As a result, I may receive some compensation from the vendor. This affiliation does not influence any of my commentary on any product that I may write about, nor does clicking on the affiliate links cost you anything, in fact, you may save some money.
Look for more specific feature articles and videos to come from me.