You have been asking for it so Photolemur has added support to Windows 8. So with that it now supports Windows 8, Windows 10, and Mac OS X
If you own Photolemur, you can get the download within the application. It will notify you of a new update available and let you being the download to install after lauching.
If you do not yet have Photolemur you can get a free trial of the application.
Start your trial or purchase your subscription today at the Photolemur Website
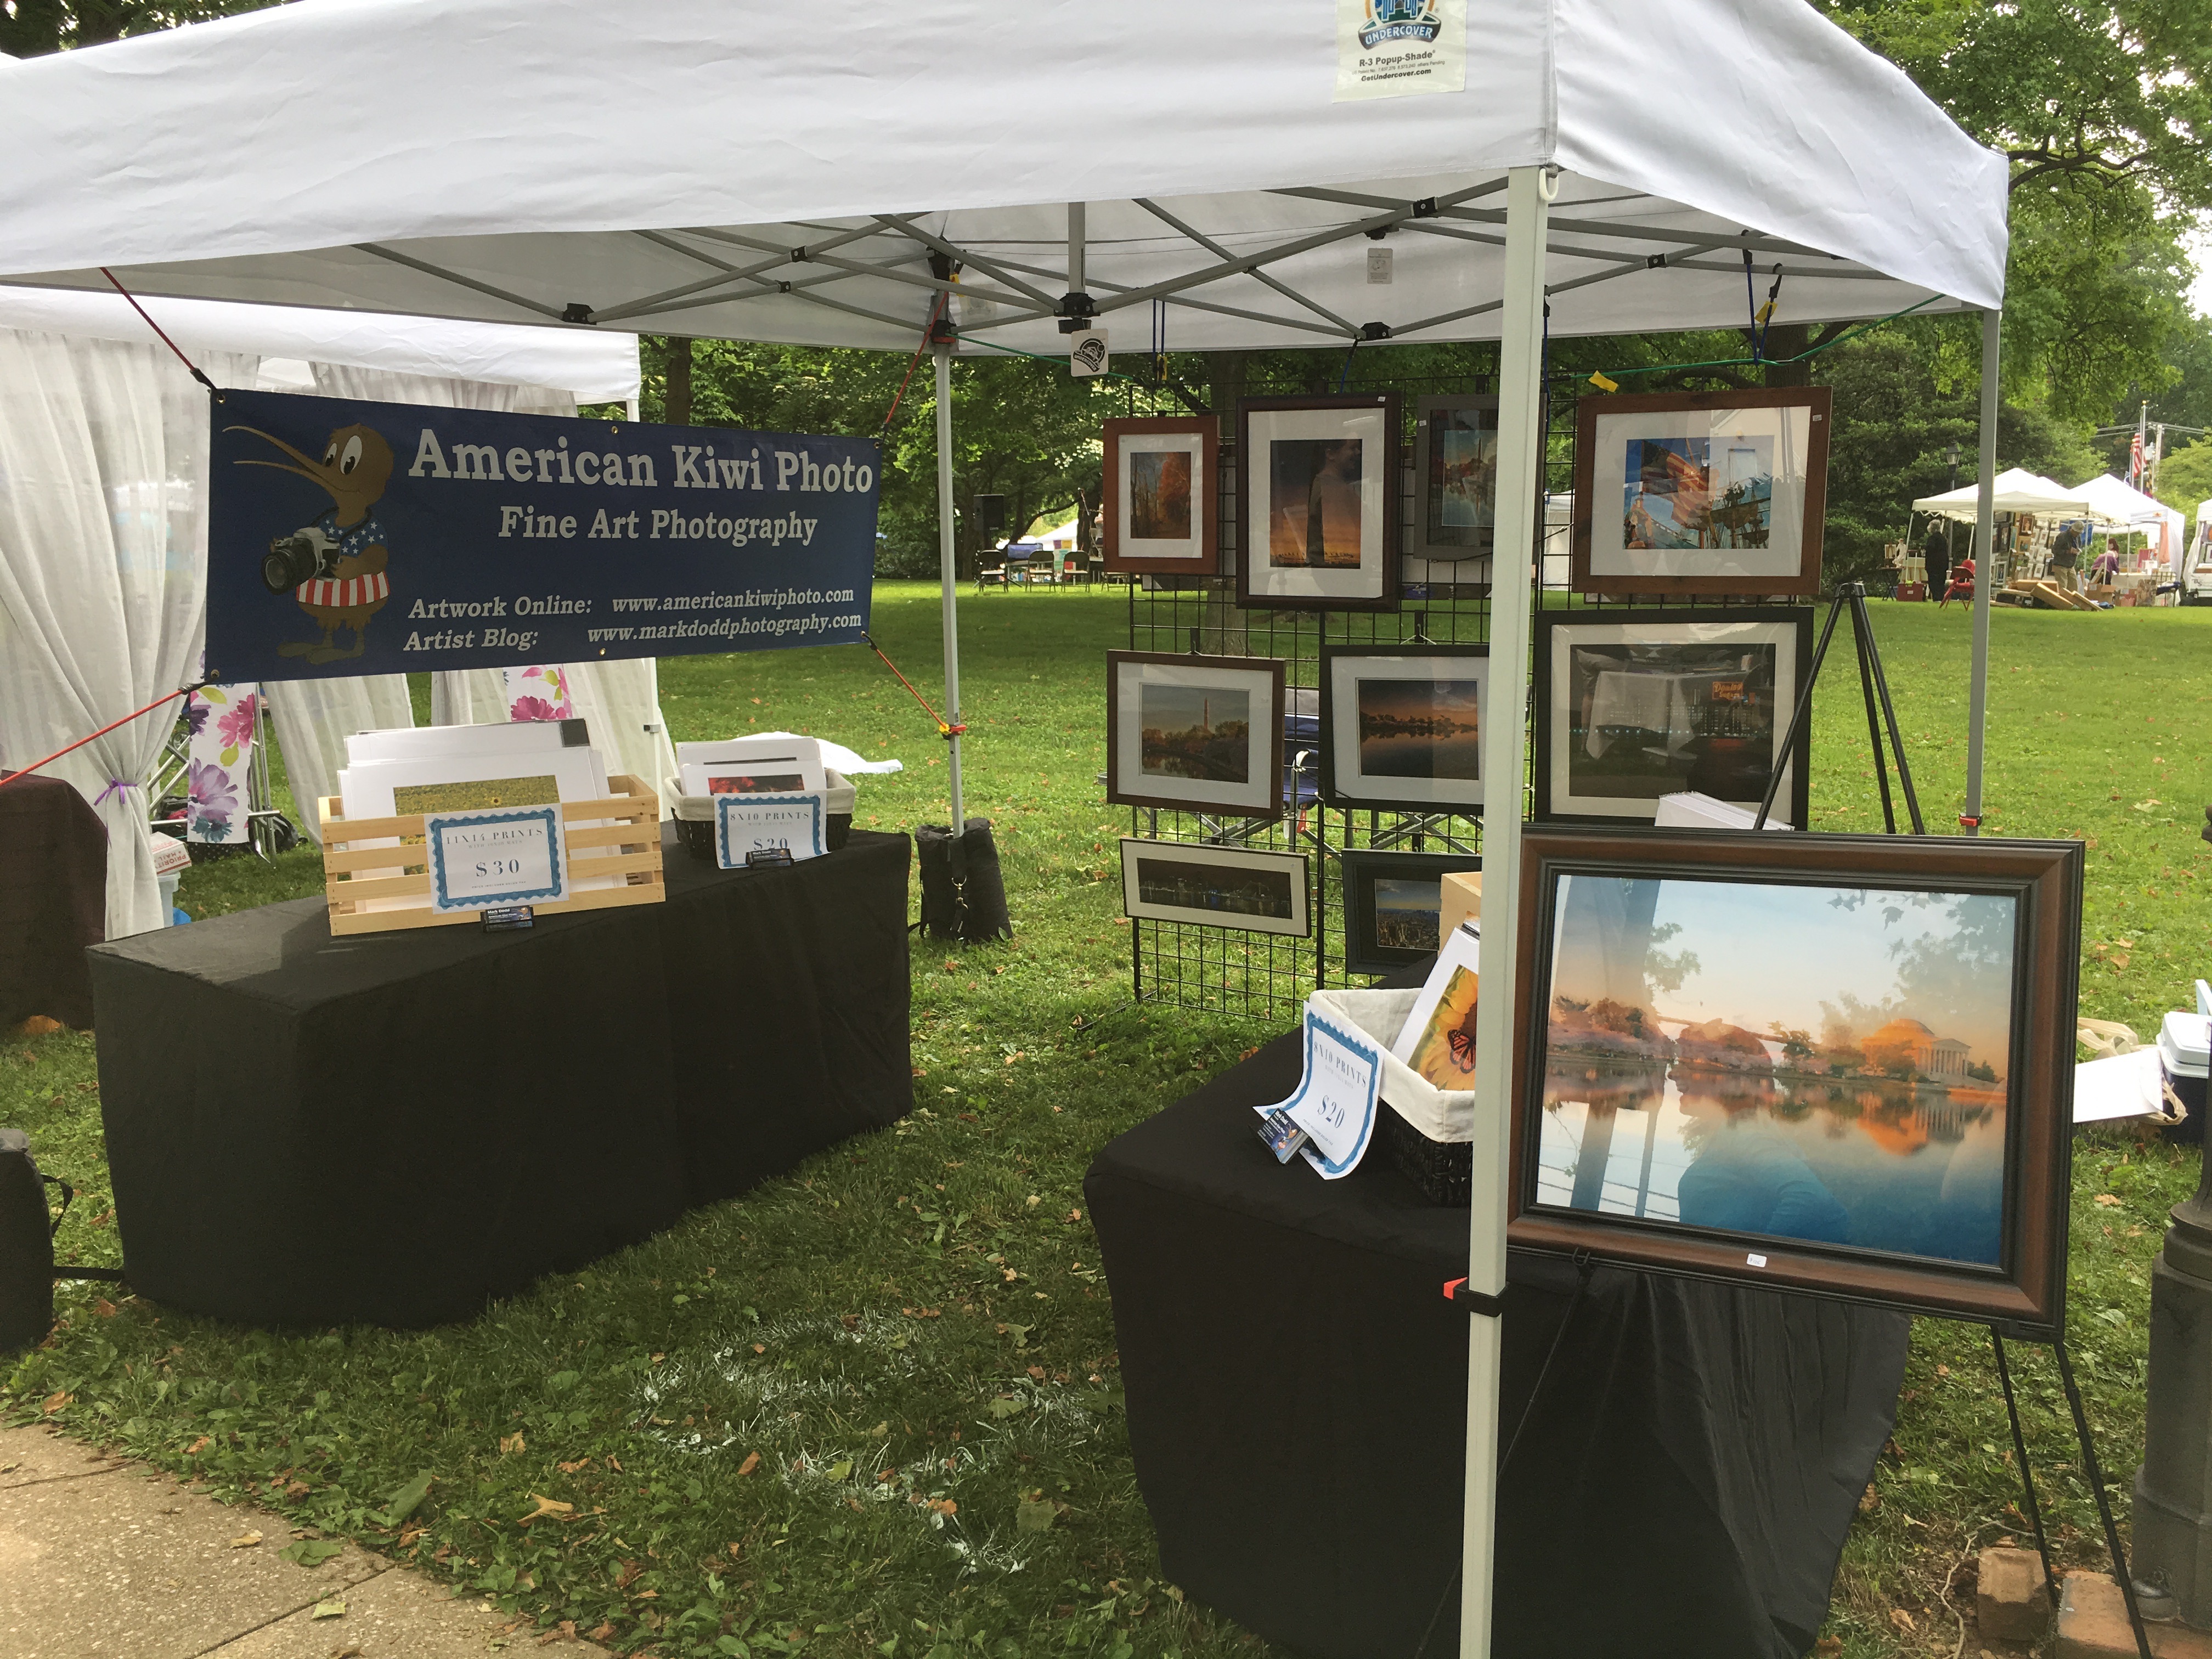
Art Show season has begun and I’m venturing out into the wide world of Local Art and Festival shows.
Just came back from my first show of the season that was a bit of a wash out due to rain, but I wanted to thank all that did come out and stop by my booth at the Hampstead Day Event in Arcadia, Md.
I never take anything for granted, so it was much appreciated for those who did make it and for those who purchased my work.
If you missed me today, you can catch me at my next show.
Art in the Park
Saturday, June 3rd from 10am-4pm
121 Longwell Ave, Westminster, MD 21157-2101, United States
Booth #82/83
Hope to see you there.
I’m working on other events, so be sure to check here or my facebook page(s) of AmericanKiwiPhoto and/or MarkDoddPhotography
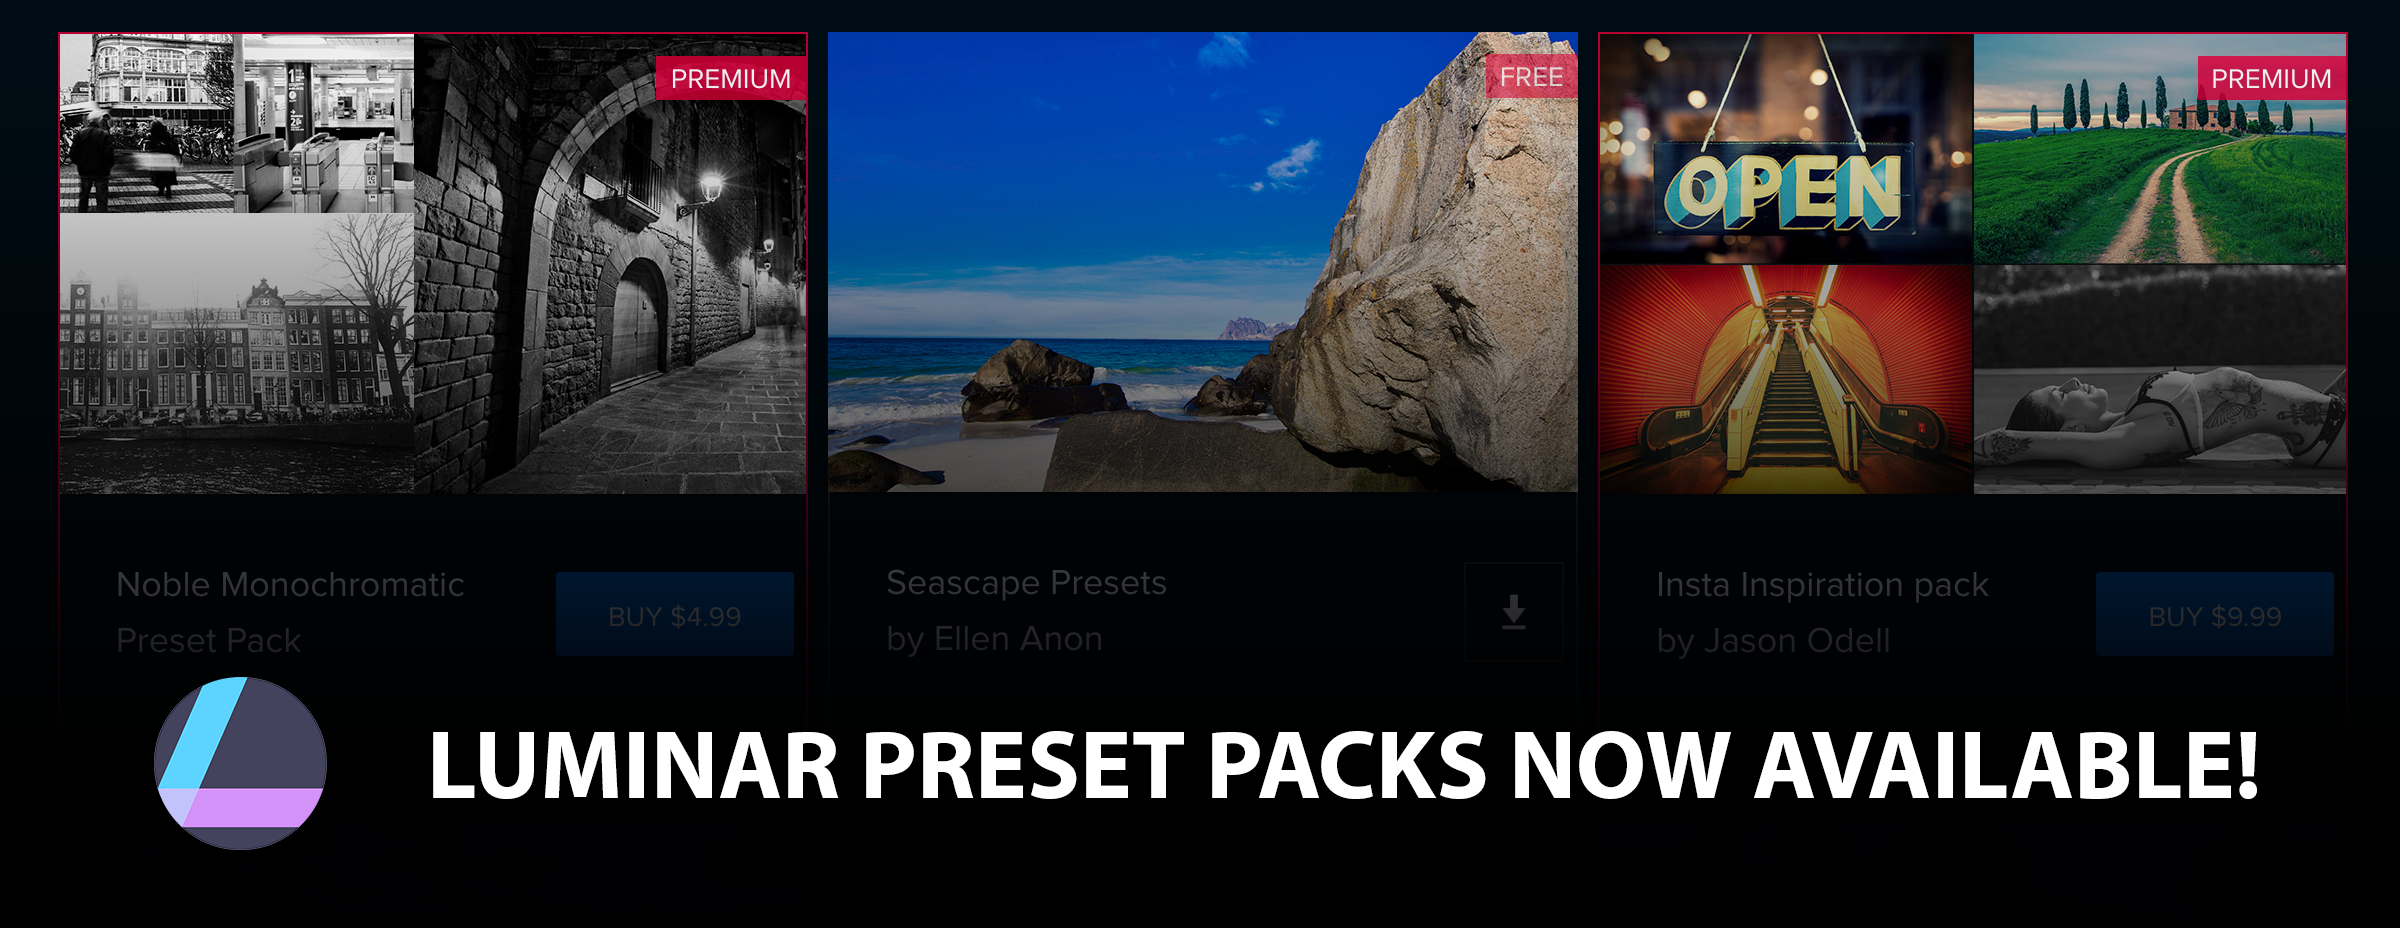
Macphun has released free Luminar presets and a free texture pack that is available to download.
So you have Luminar or are considering getting it, but you are not sure about what settings will bring out the best in your photography. Well, Macphun is here to help.
To help get you started with making fantastic photos, Macphun has worked with various photographers to create a great set of presets and textures that you can use to enhance your photos with just one click. You can either just use the preset as is, or you can use it as a starting point for your own adjustments. Best of all, they are free to download and use.
Once you have tried out the free set, consider a premium preset or the premium texture to get added instant effects for your photography.
The free presets include
Seascape Presets by Ellen Anon
Winter Hues by Discovery Photo Tours
Studio Portraits by Tony Corbell
Magic Hour by Jim Nix
Variations of Monochrome by Dan Hughes
The Box by Scott Wyden Kivowitz
Autin Drama by Jim Nix
View from Brooklyn by Hector Martinez.
And you can get the free Desert Dreams Texture Pack as well.
Once you have tried out the free presets you can purchase additional Premium presets like
Noble Monochromatic Preset Pack
Insta Inspiration pack by Jason Odell
Photo Essentials Pack
And the Premium Asphalt & Leaf Texture Pack.
New with Luminar 2018 a Free Luts Pack and Free Winter Presets Pack
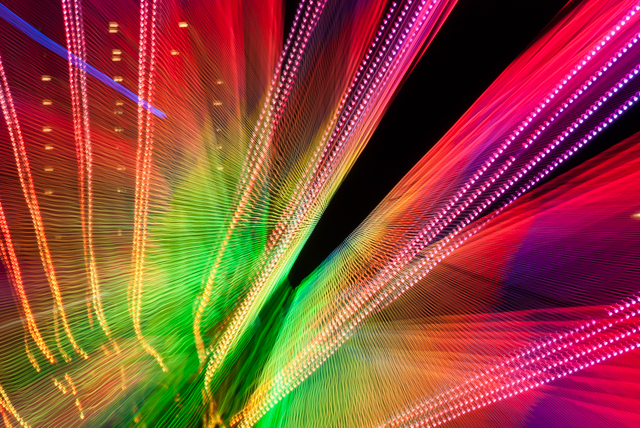
Although Light City Baltimore has been running for a few days now, I have not had a chance yet to go down and check out all the wonderful light art that is on display. From the pictures I’ve seen and posts I’ve read, it is much larger and even better this year.
Here’s hoping I can get some great shots like these from last year’s Light City Baltimore
On a recent Sunday, I planned on getting up early to get Sunrise pictures. This is not something that I do easily as I am not a morning person. I normally do not get up until well after the sun has risen as I work the later shift at work.
Well on this Sunday I did my best the night before to check what the forecast would be. Based on what I saw I thought it was worth getting up early and driving down to the Baltimore Inner Harbor to get the sunrise as it had the potential to be a spectacular sunrise.
I arrived early enough to find a nice cloud deck above, the water was still, and there was a small sliver of an opening on the horizon. Well, the appointed time for the sun to come up came and went and it never made an appearance on the horizon as the clouds were just too thick. So my chance of an epic sunrise was a bust.
So I made the best of disappointment and decided let’s see what else I can get photos of. I ended up driving to four different locations this day as it was one of those rare warm days in February. Here are some of the pictures I got on my 102-mile round trip.
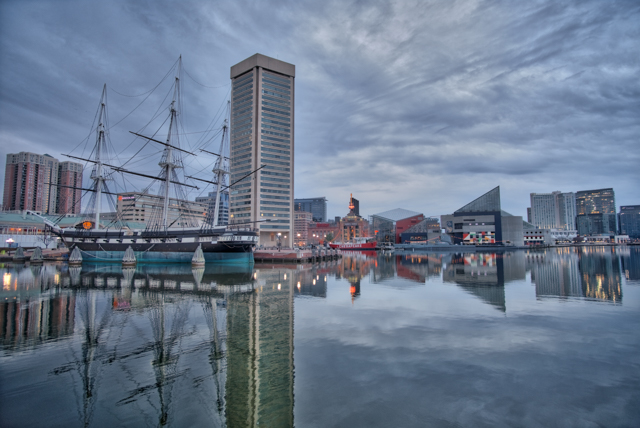
Since the water was still in the Inner Harbor tried my best to get a few reflection shots. Here is one of them.
West side of the Inner Harbour on a still Sunday morning
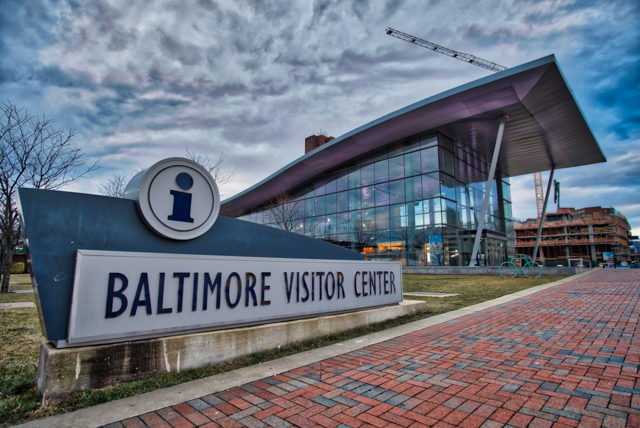
It was so early I was able to get a shot of the visitors center without all the folks walking around. Sometime I’ll actually be down at the Inner Harbor when the visitors center is open so I can go in. It is supposed to be a very nice visitors center.
Baltimore Visitors Center
Next Stop, the Under Armour Corporate Headquarters and the pier nearby.
Seagulls on the Pier
I don’t have too many usable pictures from this location as I was testing out some manual lens that I had acquired. Seems I need to learn a few things about them still as things didn’t turn out as I had hoped for some images.
Off to North Point Park to meet up with a photography buddy, but along the way, I took a picture of some street art that I have been meaning to get for some time.
Unknown artist’s work only Key Highway
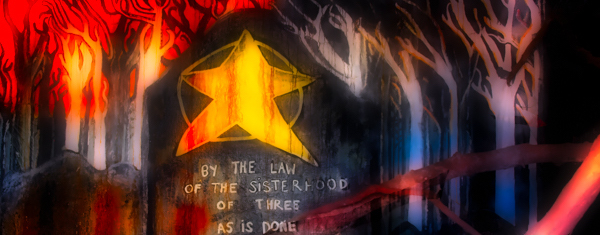
Last spot of the day, Fort Howard Park
Still working on editing some of the other images, but found this one dark room in one of the bunkers that had some artwork painted on the back and had some fun going a little overboard on the editing as I though it just lending itself to the wild side. So here are 2 different versions.
The first is a standard HDR shot.
BY THE LAW OF THE SISTERHOOD OF THREE AS IS DONE TO THE INNOCENTS THRICE SHALL IT BE
I didn’t like the fact that the words were covered so I’m trying my hand at some photoshop techniques. Still learning and this is my first attempt at combining 2 shots together to get the words. Not quite happy with this version yet, but still figuring things out.
Let me know what you think of this or any of the images in this post
Get your Luminar free presets and check out these other learning resources to make the best use of Luminar
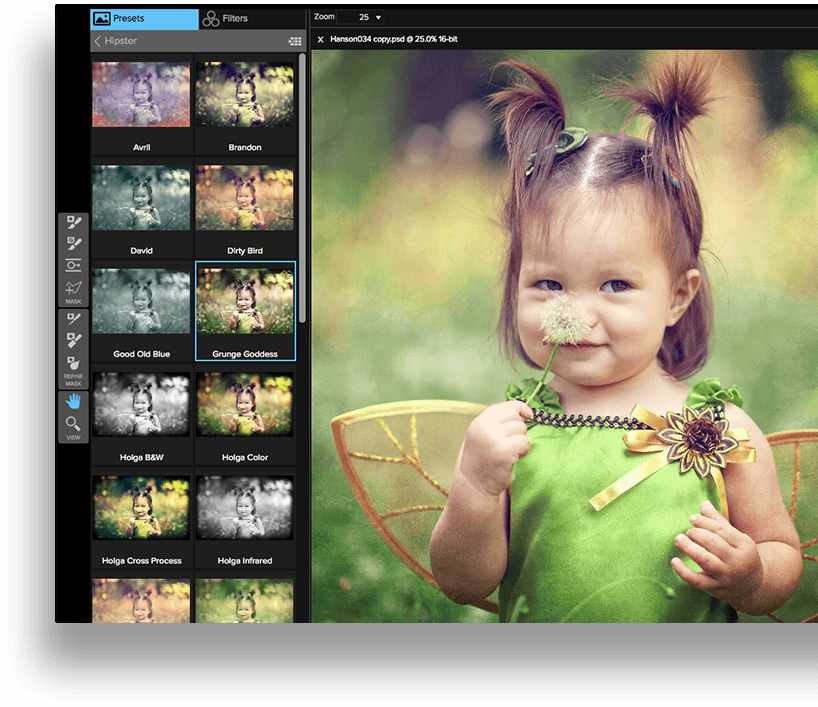
As of this writing, there are 4 Luminar Free Preset packs available. Macphun I’m sure will add more over time. These presets are made but some of the best photographers out there. You can use the presets to do the final changes, or use them as a starting point for making your own adjustments in Luminar.
As with ever new app everyone needs some help to learn about how to use all the features. Luminar is no exception to this, so Macphun has an extensive video tutorial library that walks you through how to do most things in Luminar.
Macphun also has a blog section where you can get tips, tutorial, and trends on Luminar and other Macphun products from the Macphun team and friends. Recent additions include How to Restore Old Photos, How to Colorize a Black and White Photo, and How to Make a Picture Black and White all using Luminar.
You know that you can use Luminar as a standalone program, but don’t forget you can use it as a plug-in to popular photo editors such as Adobe Lightroom, Adobe Photoshop, Aperture, and Photoshop Elements.
Make sure your copy of Luminar is up to date by choosing the “Check for Updates” under the Luminar menu. The current version is 1.1.0 Luminar/Pluto.
Took a little photo trip recently out to Cunningham Falls in Thurmont Md with a friend of mine.
I don’t get out as much as I should, but my partner in crime for the Photography Nation Magazine, Sean Simmons, came out my way so I had no excuse not to go. I’m still working on the photos, but here is a quick preview with an iPhone panorama of the top of Cunningham Falls, near Thurmont Md.
Cunningham Falls, Md. Click on the image to view full size
I’m still editing the rest of the images that I took that day and will post some more here along with on my Facebook page at https://www.facebook.com/markdoddphotography/ If you visit my page, don’t forget to like and share the page and the post. I’d appreciate it.
The Magazine
As I mentioned Sean Simmons of Clear Elite Photography and I have teamed up to create a new magazine. We had our first issue released this month. Check it out.
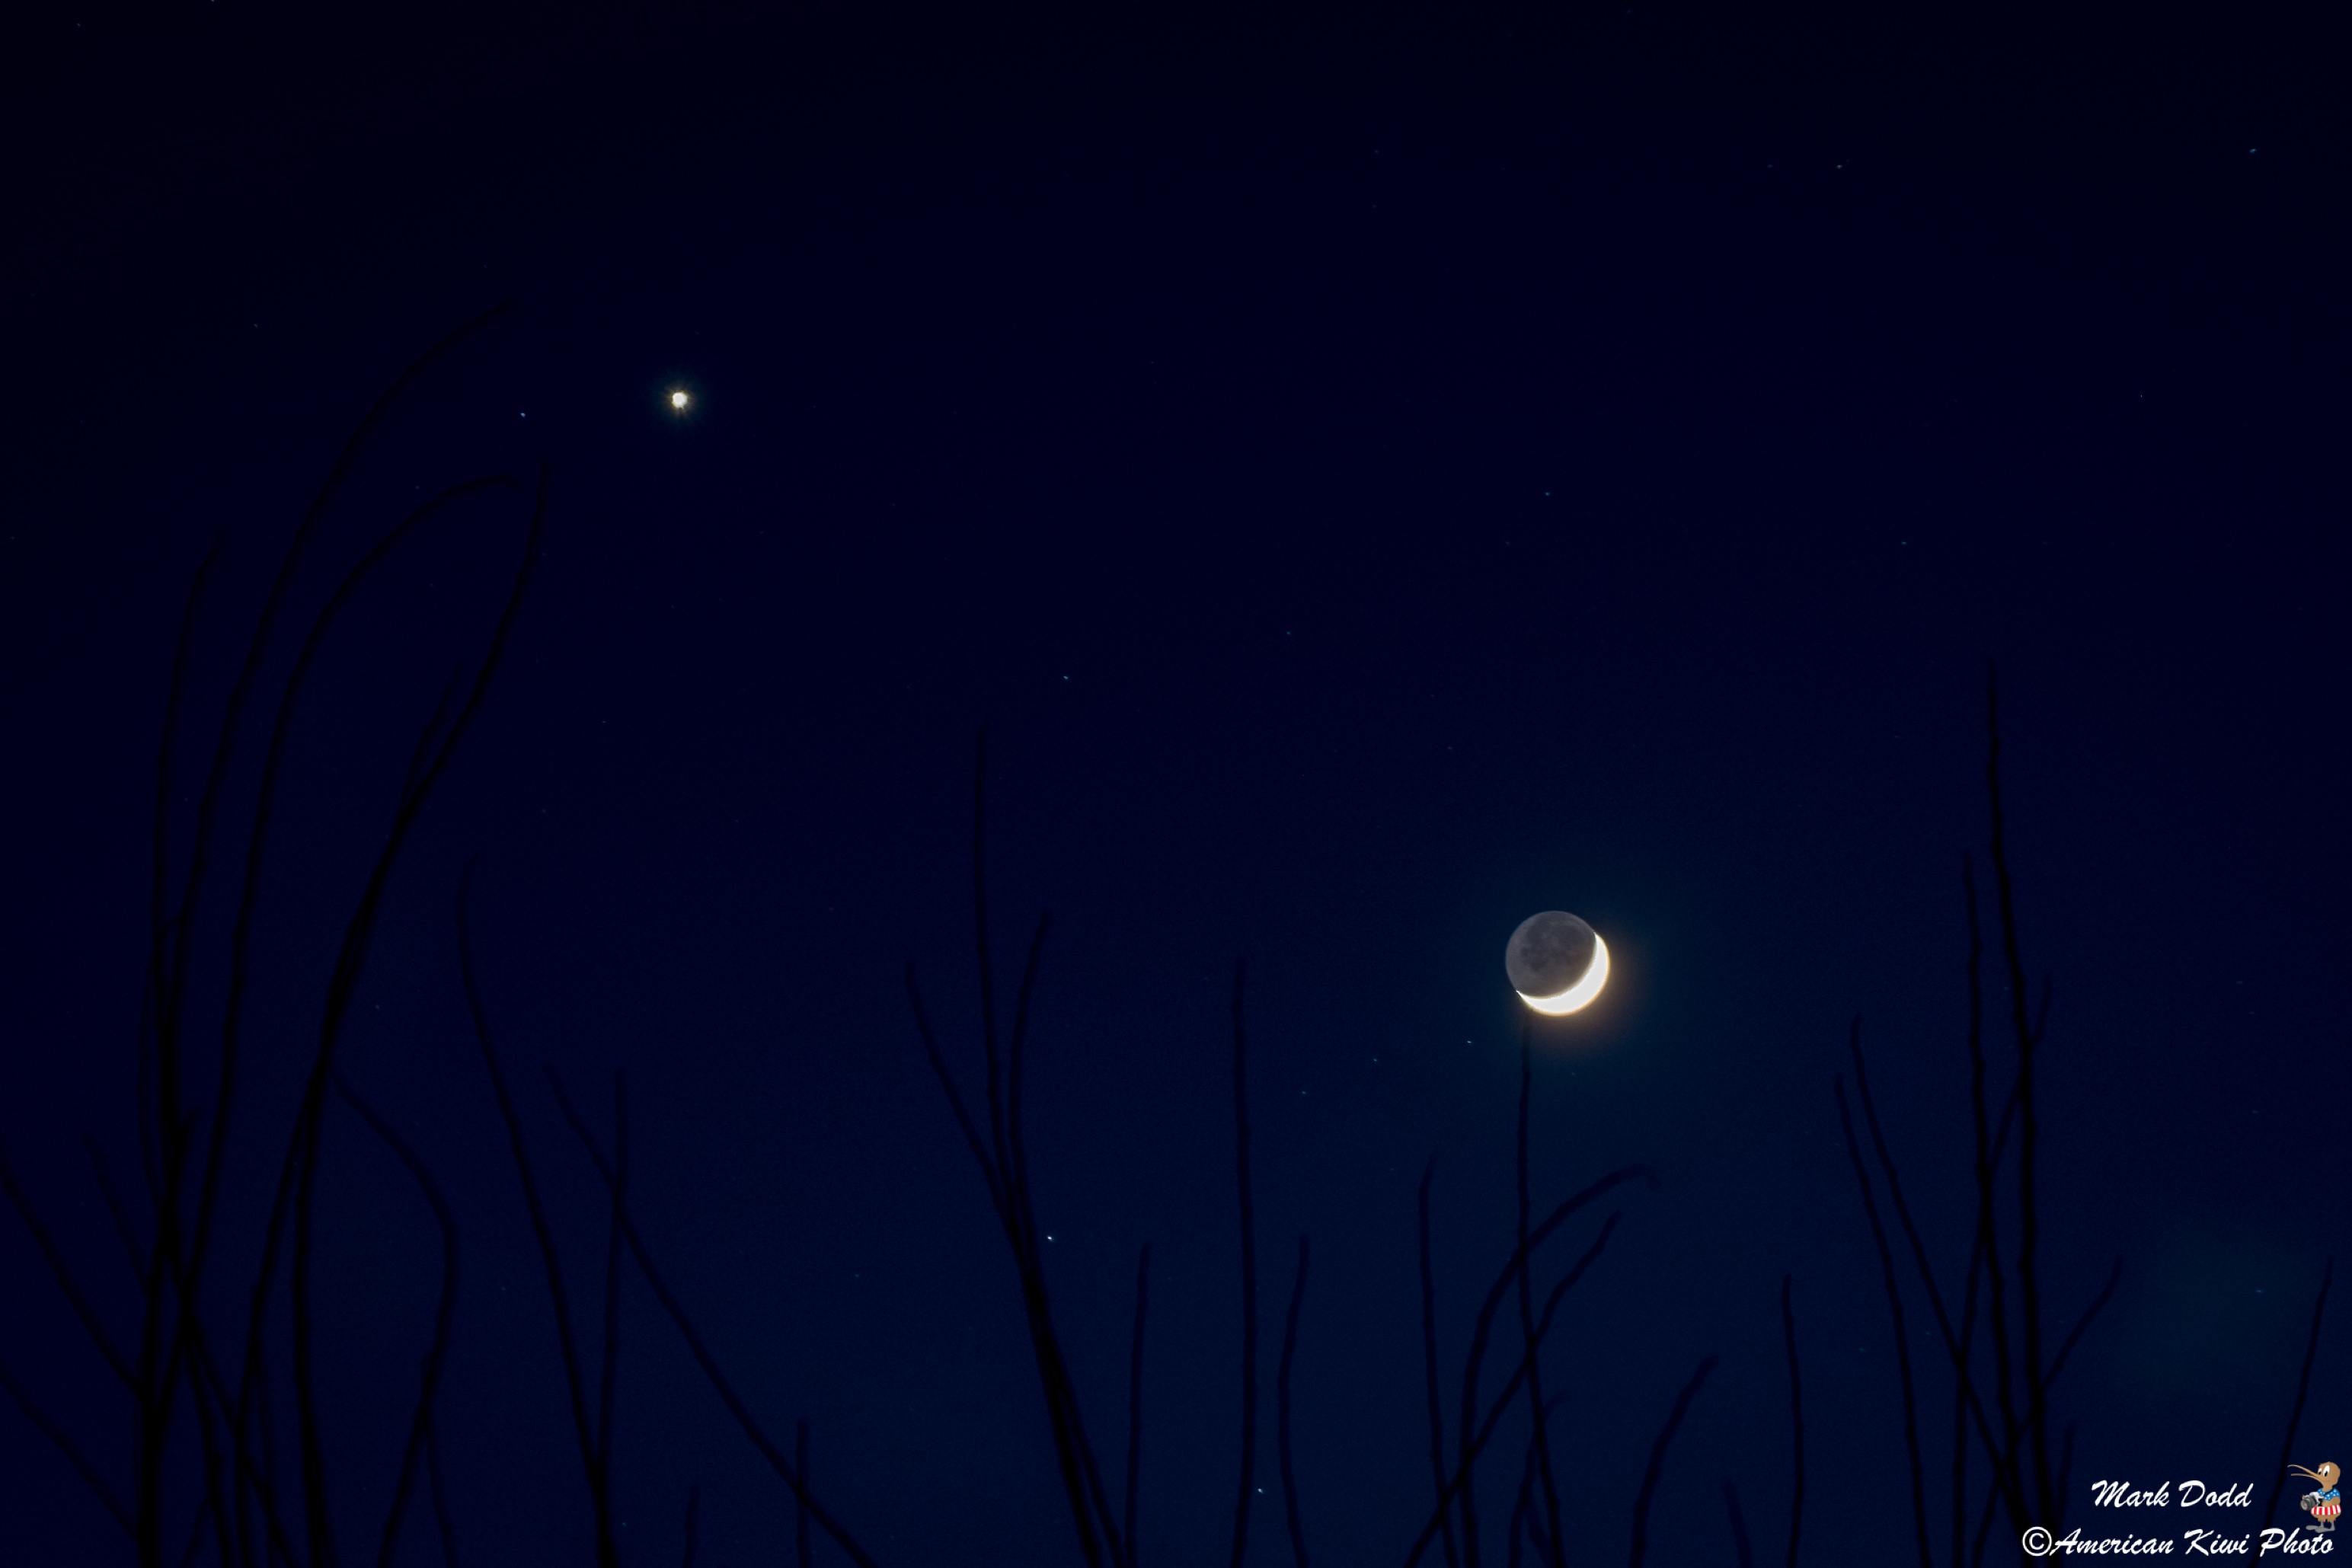
I’m still learning how to use my new camera and one night recently I while I was out walking the dogs I saw that the moon was setting and Venus was nearby. So after taking the dogs back inside, I thought I would see how well the new camera did in low light for astrophotography. I think this is the first time I’ve actually been able to capture the dark side of the moon clearly. Although a larger lens would be nicer next time to get a closer shot. This is the result of my trial. I used Macphun’s Luminar to edit the photo, but it didn’t need many adjustments as it was almost perfect right out of the camera.