Some Photography Slang

Photography slang that you may already know or should know.


I’m not much on acronyms or slang but I found the following article interesting and even a little amusing so I though I would share. Hope is either informative or gives you a smile at what some of them mean.


Click here to see the 10 slang words every photographer should know


Recently I’ve found myself having writers block or not able to think of a good subject to write about during the week. So I’ve decided that I will share some things that I’ve found that I think you might enjoy or benefit from. I’m far from an expert on everything related to photography, so if I find a site or article that I either benefited from or I think you could benefit from I’ll create a post and include a link to it.


Download FREE Trials of Photography Software

FREE trials

Download FREE trials of various photography editing software. I know many like to try out a product before spending your hard-earned money on it, so here ya go with a free way to tryout these great apps.


Don’t forget to check out my Discounts and Coupon Codes post as I may have a discount for the software after you try it out. Click the Discounts and Coupon Codes menu above to see.


Recommended software Free Trail links.


As I come across more free trial downloads of software I feel comfortable recommending I’ll be adding more here.


#free #freetrial #software #photography #photoeditors #tryout


Happy 4th of July

Happy 4th of July to Everyone.

I hope you have a good day and get out there and get some great shots of the fireworks in your area.

And just a reminder, the

Macphuns' Shooting Fireworks Bundle

is still available to help you out with improving those fireworks shots that you will get or  just got.


Creating Facebook 360 photos on your iOS Device

Creating Facebook 360 photos on your iOS devices like your iPhone with either the iPhone Camera app or Google’s Street View app for iOS.

First I will say you can do this on other devices as well such as Android devices via Google Camera, but since I only have access to and iPhone this is all I can show you. I”m sure the steps are similar but the steps in the apps you use will be different.

Both the Google Street View App and the iOS Camera app were tested on an iPhone 6s running iOS 9.3.2. and using Facebook app version 58.

There is an option to embed 360 video as well, but you need a 360 camera to do this and at the moment I do not. So see the Facebook FAQ for more information on video 360.


Creating Facebook 360 Photos on iOS with the iOS Camera App.

Open the Camera app and switch to pano mode. Create your pano making sure it is not too narrow. There is no way to really know, but if you make it to narrow it will not upload in the Facebook 360 format. The wider the panorama is the more movement you will have left and right after you have uploaded it to Facebook. Once you have your panorama created you can now upload it to Facebook.


Uploading your iPhone pano to Facebook.

You can upload your pano photo to Facebook either directly from your iOS device such as and iPhone or you can upload it from your computer.


Uploading from your iOS device such as an iPhone.

Open the Facebook app, create a new post by selecting “Photo”, then select the pano from your camera roll, click done. Add text, description, and tag your friends etc if you wish, then click post. Your photo is uploaded and you are sent to the Facebook 360 post on your feed. Although the text and such is not required it is nice to have a description of what the photo is about.

Continue reading “Creating Facebook 360 photos on your iOS Device”

Getting a website created and online in no time with Bluehost

So you are thinking of creating a website and not sure where to go and how long it will take, I have a quick and easy solution for you with Bluehost, my hosting provider.

These days I think everyone is in the website hosting business and there are many providers you can choose from, but I know Bluehost can can get your website up and online in no time.

Wither you are a techie and like to do everything yourself or someone who just wants to get online and not worry about the details, Bluehost has solutions for you.

So how do you get started…

Before you even go to Bluehost, I would recommend that you do a little pre planning.

Things to think about:

  1. Your domain name. Come up with a list of domain names that you might want to use. I would come up with at least 3 and order them in preferred order. There is always a chance that the name you want is already taken so you want to have your 2nd and 3rd choices ready to go.
  2. Think about the type of site you want to have. This is anything from a blog to a just a e-commerce store. Bluehost has options for any type of site that you want and I believe WordPress can accommodate most types, but if you need a specialized type of site, they have various options for those as well.
  3. Know you budget. Like every hosting site there are a ton of options from the low-end shared hosting to dedicated servers just for you site. You can always start at the shared hosting option and move up the options list to the dedicated server as needed. Also, you can get more for your money using the introductory pricing if you get multiple years of service up front. This is what I did and it has saved me a lot over my initial sign-up period
  4. Think about your content. This mainly comes in for the Basic and Plus shared hosting options as there is a limit on server space. If you site is going to be heavy on images or videos that are stored on your site you may have to go with the Pro shared site option to start as it has unmetered storage space

Knowing these things will help you deciding which of the multitude of services that Bluehost can offer that you will need to start with.

Now that you have done your pre-planned. Lets go through the steps of getting you online and up in running.

Continue reading “Getting a website created and online in no time with Bluehost”

Review of Macphun Intensify CK and a Special Deal.

Review of Intensify CK from Macphun

I’ll get the basic information out of the way first before getting into my comments and review. First, this is a Mac OS only application. Sorry my Windows followers, but if you are looking for something that does run on Windows, I would check out On1’s Photo 10.5

The Intensify CK System and Software requirements

  • Mac OS 10.9 and above
  • iMac/MacBook Pro/ MacBook Air/Mac Pro/Mac Mini late 2009 or later
  • 4GB RAM and more
  • 512 MB Graphic RAM and more
  • Creative Kit is integrated as plugin with Lightroom 4,5,6 and CC; Photoshop Elements 10-14 (App Store version is not supported due to Apple Sandboxing); Apple Aperture 3.2 or later; Adobe Photoshop CS5, CS6 or CC 2014, СС 2015, СС.
  • Photos extensions support – for 10.11 only


Intensify CK Pricing

List price is $59.99 for the standalone application. (Look for a special limited time discount at the end of this review) You can also get it as part of the Creative Kit. There is a version of Intensify in the Mac App store, but it is a scaled down version and does not include the Plug-in support as mentioned above. To get the full features of Intensify CK you need to purchase it direct from Macphun.

Intensify CK feature set.

  • Real-Time Image Processing Engine!
  • Standalone software & Plug-in Support
  • Native 16-bit RAW Processing
  • Social integration: Facebook, Flickr, etc.
  • 68 Professional Presets
  • Advanced Structure and Micro Structure controls
  • Layers & Masking
  • Proprietary Technology for Revealing Details
  • Vignette with Custom Center
  • Proprietary Technology for Pro Contrast
  • Powerful Macro Sharpness
  • Built-in Macphun Print Lab


Now on to the review and my comments on Intensify CK

Continue reading “Review of Macphun Intensify CK and a Special Deal.”

Get Adobe Lightroom and Photoshop CC

Adobe has a special Creative Cloud set just for photographers for just $9.99/month

So to get Adobe Lightroom and Photoshop CC click on the image below.


Adobe_PSLR_Affiliate_Bnnr_728x90_r1


They do offer Educational pricing on the full Creative Cloud set of applications, but for Photography Creative Cloud the pricing is the same for everyone. If you are interested in the full Creative Cloud set of applications, click the image above, then click on the Student and Teachers tab to see how to get All the Apps at Educational pricing.

The Creative Cloud subscriptions include all application updates as long as your subscription is active.

#lightroom #photoshop #PhotographyCC #Adobe #CreativeCloud


Review of Becoming An Artist Season 1

Becoming An Artist Season 1 with Trey Ratcliff of StuckinCustoms.com

Preface

First I must say I do my best to be unbiased in all my reviews, but in this case I must disclose that I’ve been following Trey Ratcliff for years and as such I”m am a big fan so this review might be a little unintentionally biased. I’ve followed him for so long that I seen changes in his website, changes in his photography equipment, and the ever evolving changes and improvements in his photography. I’ve seen him go from a one person show to a multi artist show, to a worldwide show, and now to Facebook live. I’ve seen his business constantly expanding with new and exciting products and adventures. I also had the pleasure of meeting him in person on a photo walk he and the Stuck in Customs crew did last year in Philadelphia and Washington DC. If you want to see what that was like visit tour.treyratcliff.com

That said, let’s get to the review.

Becoming an Artist Series 1 is comprised of 15 episodes. Each episode is about 30 mins long and divided into two sections. In the first section of each episode you hear Trey tell personal stories such as a bit of his life history, how he became a photographer in his 30’s, and some of the things that inspire him in his photography and art. I believe he does this to give you a sense of where he’s coming from, how he sees the world, and what affects this has on his photography. There is some dialog just about art in general and how other art can help influence or inspire your photography. He will discuss the picture(s) he is taking at that time, why he choose to take that picture, and some tips about the picture including composition, color, light, and inspiration.

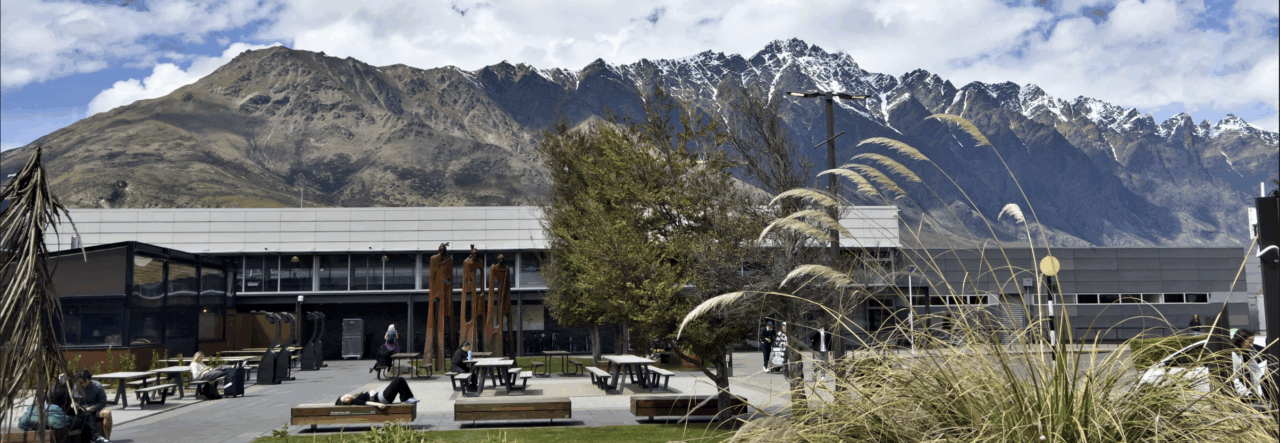
In the second section of each episode you get transported to Trey’s Studio in Queenstown New Zealand, where he will show you his editing techniques on some of the photos he took during the previous section using various tools from PhotoMatix, Lightroom,  Photoshop, and other tools like Autopano Giga for his panorama’s. He shows you basic techniques up to some very advanced techniques.

Episodes have interesting titles like

  • Episode 1 – The Accidental Creation of Me
  • Episode 6 – Writing a Failed Novel
  • Episode 10 – A Reccy to Chernobyl
  • Episode 14 – A Street Fight in Morocco

So you can see this is not your typical tutorial series.

This series was created before Aurora HDR came out, so for this season he doesn’t use his new tool, Aurora HDR Pro, which he co-developed with Macphun software.

In addition to the video series Trey has created a Facebook group “Becoming and Artist – Trey Ratcliff’s Funky Lounge” where you can post your own work and interact with fellow artists.

Continue reading “Review of Becoming An Artist Season 1”

For my Aurora HDR fans, New Presets for Aurora HDR Pro from Trey

For my Aurora HDR fans, the co-creator of Aurora HDR, Trey Ratcliff, has just release a new addition to the program.

Trey’s Expansion Preset Pack for Aurora HDR 2017

The expansion pack includes 25 Presets, 2 Tutorial Videos, and 20 Sample Images that you can use to practice with Aurora HDR 2017 and his new presets.

You can get this expansion pack from

The Expansion Pack at the Stuck in Customs Store

Dont’ forget you can get 10% off of most products at the Stuck in Customs store using the Coupon Code: MDP10. Since this product was just released I’m not sure if the code works yet for this product, but it is good for many of the other items in the Stuck in Customs store. Best advise is to pick what you would like, add it to your cart, and enter the Coupon Code: MDP10 and the site will let you know.


Here is his quick tutorial/intro to the Expansion pack.


If the video doesn’t load for some reason, click The Expansion Pack at the Stuck in Customs Store and the video is in the Product Description.

The expansion pack is only available from Stuck in Customs.

#AuroraHDR2017 #AuroraHDR2017ExpansionPack #Aurora2017ExpansionPack #StuckinCustoms #Addons #Presets


Maryland Preakness Hot Air Balloon Festival

A recent purchase of a 30.000″ x 13.750″ print of Balloon Glow by a buyer from Baltimore, MD reminded me that the Maryland Preakness Hot Air Balloon Festival is just around the corner.

First, I want to thank them for their purchase and I’m always grateful to anyone for purchasing my work.

The above picture is the one they selected. A wide shot of the Balloon Glow that they hold on 2 nights of the festival.

If you have never been to the Preakness Hot Air Balloon Festival I would recommend going. It is a fun event and is family-friendly. You can get Balloon rides and walk inside one of the balloons.  If you can only go one day, I would go on one of the days that they do the Balloon Glow, pictured above. It is rather amazing to see all the Balloons lit up. Be aware that when they are all firing their flames to illuminate their balloon it is rather loud

Here is a small selection of photographs I’ve taken at this festival in earlier years.

For details about the event, Visit The Preakness® Celebration Hot Air Balloon Festival Page

#preakness #Balloon #festival #hotairballoon